
The Action Shot is of the Kapsules, hammer Beeks, and Damper Lifters in the 1835 Graf Fortepiano in Ann Arbor, Michigan
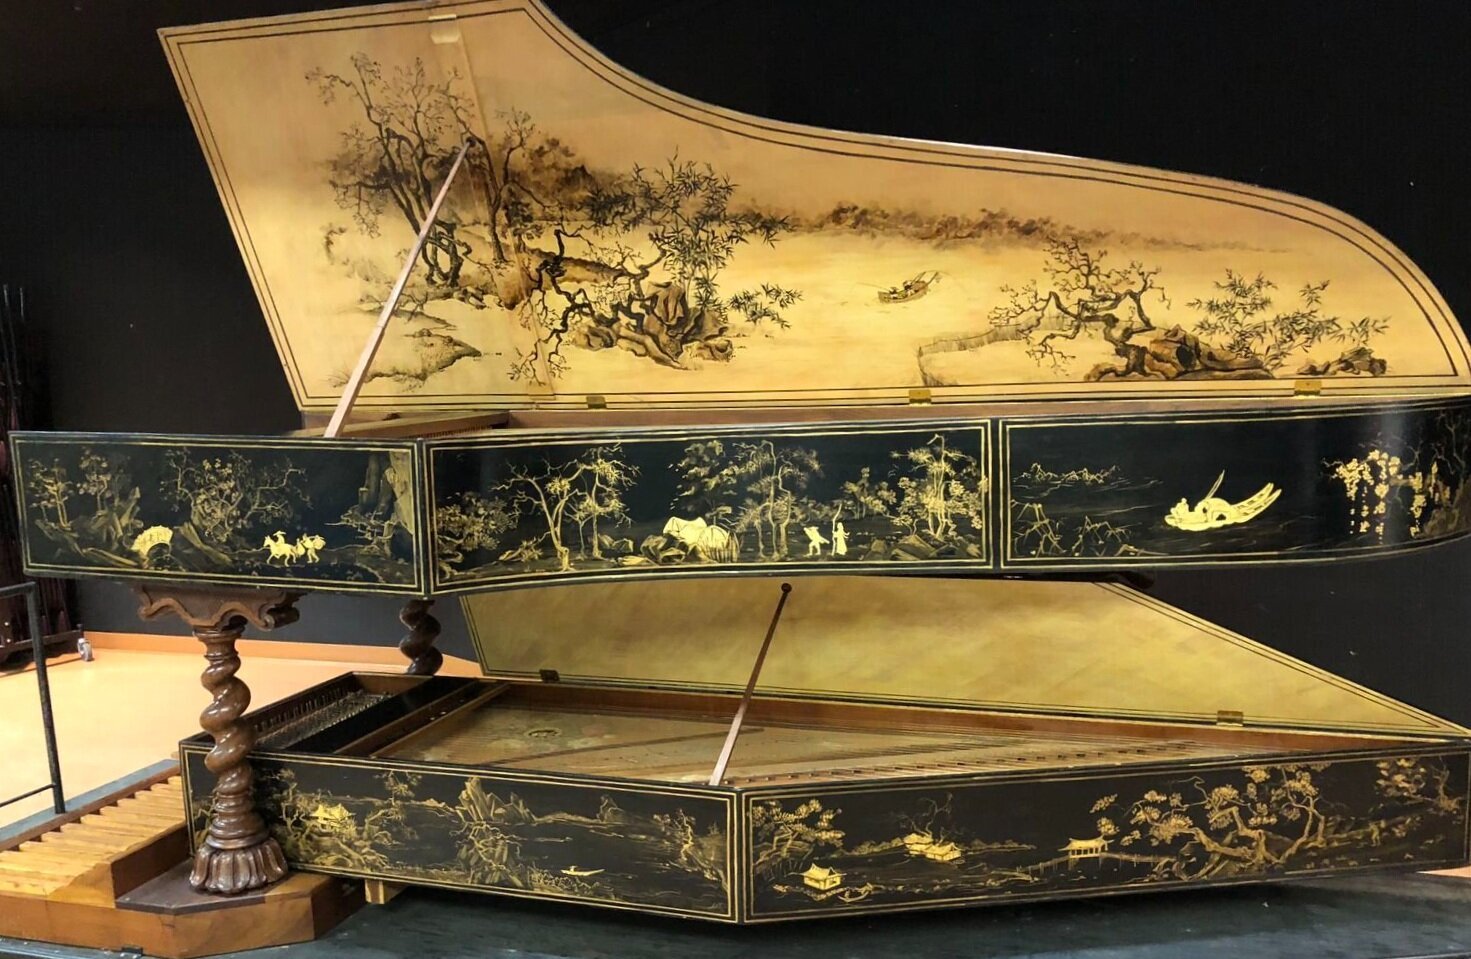
Harpsichord after Johannes Petrus Bull in Antwerp 1789 made by Keith Hill Opus 57 in 1978 revised in 1988.

My treatise on The True Art of Making Musical Instruments—A Practical Guide to the Hidden Craft of Enhancing Sound is now published and available on Amazon.com. Here is the link for that page.
https://www.amazon.com/dp/1791889611
There has never been a book written that covers the craft of enhancing sound until now. Indeed, most books written about sound are based on the physics of sound. In the 47 years I have been making musical instruments, I have never found it either necessary or useful to know anything about the physics of sound. My reason for this total disregard for such knowledge is that ALL the greatest musical instrument makers from 1400 to 1840 including Stradivari, Guarneri del Jesu, Amati, Ruckers, de Zentis, Blanchet, Taskin, Cristofori, Stein, Hubert, Walther, Graf, Schnitger knew nothing about the physics of sound. That is because all such knowledge wasn’t discovered yet. What these makers knew was vastly more important and valuable, that is, the science and craft of enhancing sound, all knowledge of which, unfortunately, was secreted away only in their instruments.
Now, some people quibble with what I have just written, so in response I would like to have proof where researchers in the area of the physics of sound have figured out how to increase the clarity of the sound of an instrument, increase the immediacy of the sound of a violin, increase the depth of sound, increase the intensity of sound, increase the carrying power of the sound of an instrument, increase the vocal property of a sound, increase the evenness of sound from bass to treble of an instrument, increase the ease of recording quality of an instrument, increase the responsiveness of color flexibility while playing the instrument, increase the ability of the sound to bloom in an instrument, increase the perceptibility of pitch in an instrument, increase the ability of the instrument to reflect the intentions of the player, and last but not least, increase the ability of the sound to capture the listener’s attention. Each of these qualities are what the ancient instrument makers knew how to build into their instruments and it is precisely these qualities that remain beyond the ken of scientists and makers who fancy themselves as acoustical scientists. It is these qualities the knowledge of how to build them into a sound that is secreted away in their instruments. The only scientist I know of who made some progress in tackling these qualities was Jack Fry, but he succeeded by the same approach I myself used for the last 45 years.
My attitude when I began making musical instruments in 1972 was to restrict myself to only that knowledge available to those great musical instrument makers. That body of knowledge, which was acquired over a period of 350 years, had as its foundations the teachings of Pythagoras. Based on his ideas of the musical ratios, makers of all kinds instruments developed the craft of enhancing the sounds of their materials to make their instruments sound as beautiful and as resonant as possible. Then, towards the end of the 18th century, with the development of modern scientific methods and attitudes, all that lovingly acquired ancient Pythagorean based knowledge was put aside and immediately forgotten. Even Conrad Graf in the beginning of the 19th century had to relearn that body of knowledge to produce the sounds of his pianos. But little of what Graf had learned was acquired by apprentices in his workshop. Recovering all that lost knowledge was my goal.
This treatise is meant to preserve this knowledge of how the greatest instrument makers in history thought about sound and how to enhance it.
LIST OF CONTENTS
THE TRUE ART OF MUSICAL INSTRUMENT MAKING
AREA TUNING THE VIOLIN
HINTS FOR AREA TUNING THE VIOLINS
RECIPE FOR MAKING "HILL" VIOLIN VARNISH
RECIPE FOR MAKING "HILL" VIOLIN VARNISH (IN RUSSIAN)
VIOLIN VARNISH DRYING CAROUSEL
ON VOICING AND REGULATING REAL QUILL
ON VOICING AND REGULATING THE HARPSICHORD
THE 1658 DE ZENTIS HARPSICHORD: A RESTORATION
ACOUSTICAL TECHNOLOGY TRAINING
ITS ABOUT PEDAL HARPSICHORDS
It is a sad fact that all previous pedal harpsichord designs mimic the pedal piano designs from the early 19th century. A litany of problems that plague that antique design are listed below. I invented my design in 1980 expressly to solve those age old problems:
A: the problem of tuning the pedal harpsichord (previous designs lay flat on the floor and are as wide as the pedalboard—meaning you have to have help to tune the pedal harpsichord as it can’t be tuned by the person sitting at the manual harpsichord). My design allows the player to sit at the manual harpsichord and easily reach down to tune the pedal instrument.
B: the problem of excessive energy dissipation that results in an unfocused sound in every preceding design. The previous designs being as wide as the pedalboard meant that the soundboard had to be equally wide…too wide to have any significant focus to the sound coming from the pedal instrument.
C: Again, the width of the instrument in the previous designs from the 19th century and on is too wide to fit into a normal van, which makes it a problem to transport the instrument,
D: Because the instrument is within easy reach from the bench, means that the problem of regulating and voicing the instrument is easier.
E: Then there is the problem of supporting the manual instrument above (not a problem for the 19th models intended to fit under a 6 ½ oct. fortepianos but a definite problem for harpsichords which are narrower than those pedal board width pedal harpsichords).
In fact, it is a perfect design and I expected other harpsichord makers to copy the design, naturally, without asking me or giving me credit for the design when they did. But back in 1992 the folks at Hubbard Harpsichords Inc. even had the gall to claim that they had invented the design.

KEITH HILL OPUS 146 - - 16’ HARPSICHORD AND PEDAL HARPSICHORD ENSEMBLE . DECORATION BY KEITH HILL
AREA TUNING THE VIOLIN
by Keith Hill©2015

Originally published as Guild of American Luthiers Data Sheet #283, 1984
Announcements of “discoveries'' of the “secrets'' of Stradivarius usually are not worth the ink used to print them. When they appear, everyone reads them with the customary curiosity. Then away they are filed along with the hundreds of other such claims. They get dredged up again when someone writes yet another book on the violin. Mindful of this possible fate, I would like to offer an explanation of a discovery that I have made. It is not of the “secrets'' of Stradivarius; rather it is, I believe, the acoustical system used by the ancient Italian violin makers to construct the sound of their instruments.
The system is simplicity itself. It is possible for anyone who understands it and has normal hearing to use it. Moreover, it requires no measuring equipment save the ears and possibly a monochord. Furthermore, the thicknesses and their inexplicable variants, which so annoy our modern sense of decency when we observe them in the finest violins by Stradivari and Guarneri, occur naturally as a result of this system. Because it is so simple, it is, of course, the last place one would think to look for the answer. I expect that once you are equipped with the following information, you will go to your nearest antique Italian fiddle and look to see if what I am saying is actually there.
The heart of the acoustical system is this: Each discrete area of vibrating surface on the plates is tuned to an overtone in the harmonic series. In Figs. 1a and 1b you can see how I have observed the areas to be. Not every maker would have used exactly the same distribution. Camilli, for instance, creates many more than the normal areas which I have shown. But for the greater number of makers, what is indicated is what you can notice.
What does this mean?
Take as your fundamental, or first partial, the basis pitch which you have preselected and tune the largest area to it. On the top of the violin, this would be the lower bout on the treble side. On the back of the violin, it would be the lower two-thirds of the lower bout area. All other areas on the plates are tuned to these pitches respectively. The idea the ancients must have understood is: the larger the surface area on the plate you give to an overtone the more prominent that overtone will be to the ear when the violin is finally sounding. The overall pitch of the plate is indicative more of the inherent properties of the wood and is not really relevant. Figs. 2a and 2b and 3a and 3b show typical tuning schemes.
In the violin diagrams below I have abbreviated the names of the pitches in the various areas. So you don't have to puzzle over what those abbreviations mean I have provided a table below.
Fundamental is the beginning or lowest pitch
3 rd is a Third or Tierze above the fundamental
5th is a Fifth or Quintabove the fundamental
8va is an Octaveabove the fundamental
7th is a Seventh above the fundamental
AUG 4th is the Augmented Fourth above the fundamental
s. 8va or s. 5th indicates a Super (above) Octave or Super Fifth meaning an octave higher
4th indicates a Fourth above the fundamental
2nd indicates a Second above the fundamental
2nds and 3rds are labeled as either MAJOR or MINOR

a
It is important to remember that each maker would have had his or her own personal scheme or pattern of ratios. Some might have more than one. Stradivari changed his scheme twice (but with a few variants now and again), his first system being the same as that of Nicolo Amati, his teacher, and the second system being that of his Golden period (see figures 6 and 4). Other makers changed the scheme from instrument to instrument, depending on other factors such as wood quality and the modeling. I have seen only a few Guarneri violins and each has a different scheme and pitch. He clearly understood the relationship between specific wood qualities and things like modeling, pitch selection, and tuning scheme.

As for the question of what pitch to select, that appears to be a matter of personal preference. The usable pitches range from C# to F#. When lower than C# the plates get too thin, and when higher than F# the plates become too thick to resonate freely. Some makers made the top plate higher in pitch than the back and others made the back plate higher than the top. There is no obvious rule, therefore it is probably hidden within the woods used. Stradivari, in the instruments which I have personally inspected, used D for the top and E for the back. Guarneri was inconsistent, for I have seen instruments by him which range from C# for the back and D for the top to F# for the back and F for the top.
After having used this area tuning principle for almost twenty instruments, it is clear to me that some schemes work better for particular pitches while others work best with altogether different pitches. Although the subject is too complicated to discuss in detail here, there is a definite relationship between the fundamental pitch used for the tuning scheme, the scheme itself, and the modeling. While the tuning scheme and the pitch on which it is based are important, unless you strive to make the actual tuning as flawless as is humanly possible, they seem irrelevant. Choose one and make it a pure as possible.

The most important aspect of the use of this area tuning principle is achieving an extremely accurate tuning. Accurate tuning ability seems to be the factor which separates the best violin makers of the period from the mediocre ones. Stradivari and Guarneri were the best tuners. Their ability to tune the wood accurately was unexcelled. This was the heart of their craft. If there is a catch to using this principle, this is it.
It took me about twenty-five instruments to refine my own level of control over the tuning process. I hope that it will require far fewer for those of you who are willing to look into this principle and try it out for yourselves. Because you need not look for the principle, I expect that you can be successful in only five or six tries. I hope that I am not wrong about this. I feel confident that those who are persistent in their pursuit of control over this principle will be successful in producing violins equal to the ones made long ago by the Italian masters.

Any success in acquiring control regarding the use of this principle can be heard. When you get the overtones right, the violin will produce a sound of greater strength of tone, more beauty of sound, better carrying power, and more flexibility. No attempt to tune means leaving everything up to chance. When the attempt has been made and is less than accurate, the result is less open, less free, and less brilliant. When no attempt has been made, the result ranges in sound from muffled to raw and harsh.
The violin sound that results from tuning the plates as I have suggested is at first in need of playing-in. At once the sound is radiant, alive, and feels very healthy. What is lacking is the richness and depth that comes from being played-in. It seems that when a tuned fiddle is played-in it becomes more resonant, brilliant, flexible, easier to play than at first, and deeper sounding. What happens to the wood with playing-in is that the tuning gets clearer and more obvious. The principal effect appears to be like the effect which exercise has on the human body. A noticeable difference in the sound can be observed after only three months of playing-in. I have observed radical differences after a year’s worth of playing-in. What is sure is that when the instruments have had the tuning principle applied to them, they start life sounding wonderful and proceed to become better and better with age and playing-in.

Curiously, there are many people in the violin world who reject a new good-sounding fiddle because of the preconceived notion that it will somehow deteriorate in quality. Where this may be true for instruments which have not been tuned according to the area tuning principle, it is quite the contrary for instruments which have been well tuned. After all, Stradivari’s instruments were much sought after when they were new because of their gorgeous tone quality and their flexible playing properties.
I feel that it will be helpful to include some specific tuning schemes which I have observed in some antique Italian instruments. You can notice the similarities and differences between them at once. As I stated previously, there is a relationship between the modeling on a violin and its specific tuning scheme. Because I can not present in this article the information regarding the modeling, I caution you not to take these schemes at face value. Think of them only as specific schemes for given instruments. That is, they are just a point of departure for thinking about the principle (Figs. 4, 5, 6, 7).

Each maker possessed a different understanding of the variables involved in the execution of his craft and created a tuning scheme to compensate for acoustical inadequacies. In this way, each maker was able to make a sound which felt complete for him. The great makers who extended the acoustical range of the violin felt more compelled to use other methods to reach those same goals as did early makers or makers of less importance to us today.
What I like about the area tuning principle is that it allows every maker to construct a sound which most pleases him. (I don’t really believe that today violin makers everywhere will go and do this, but the spirit of the early Italian masters requires that the idea be suggested.) A maker can do this by designating the largest areas to the overtone he or she most prefers to hear in a sound. For me, there is one instrument that I have heard which feels the most complete. That instrument is the 1734 Guarneri “del Jesu”, known and the ‘Gibson’, owned by Ruggerio Ricci. It has been a challenge to understand that particular instrument. I hope that each one of you will find the one fiddle that challenges you. And, in the same way, I hope that you will try to understand it and aspire to make instruments of a quality equal to it. To do this you need to be able to hear the tuning scheme used by the maker.

Testing a Violin to Notice its Tuning Scheme
For the novice, getting someone who owns a great violin to let you handle their prize for ten minutes may be difficult. I appeal to those of you who are players, who own a great fiddle, to encourage your local maker to listen for the tuning on your fiddle. But for the novice, it may prove advisable to do the listening test with a player or the owner. It is actually easier to hear the overtones that are on the violin plates when someone else is doing the work. I have always found players with such instruments to be very obliging when they understand that no harm can come to their instrument from doing the test.
The actual job of testing the fiddle is easy. But care must be exercised when handling something as valuable as a Stradivari or Guarneri violin. Remove rings, watches, and bracelets from your hands and wrists. The purpose of the test is to discover the tuning scheme by rapping very lightly on the plates. To do this effectively, you will need to damp off any extraneous vibrations or resonances which might complicate the act of listening.

* OOT = Out of Tune
I usually begin with the top. I spread a soft cloth over my lap and lay the violin back side down in my lap. This damps off the back while I listen to the top. I grasp the neck of the fiddle to secure it and to damp off the sound that the strings might make. Using the knuckle on my right hand middle finger (this gives me the clearest sound) I rap lightly at points central to the discrete area I am testing.
The most important part of the test is to establish the interval relationships between the overtones on the various areas. From this you can readily determine the pitch on which the scheme is based. I start with the area in the lower treble-side bout. Progressing to the upper bass-side bout, then to the lower bass-side bout I end up on the upper treble-side bout. This way I establish the basic framework to the tuning scheme and move on to the smaller areas once this framework is established. I find it hard to determine anything about the tuning on a plate when I knock the areas in an isolated way. I zero in on the scheme by checking the relationships between the areas. I will knock here twice, then there twice, then over here and so on. By moving around quickly from area to area you avoid listening too carefully. In the best instruments the scheme will become clear with just a few rappings. In the poorest instruments there will be nothing but out-of-tune areas and no clear relationship.
Many of you will experience the same problems hearing the tuning that I had. Trying too hard is a big one. If you assume an almost casual attitude when listening you should be able to hear what is there. Because so much is available to the ear for hearing, it is possible to hear almost anything you want in the rap sound of a great fiddle. So you must want nothing.
Another problem is autosuggestion. This is what occurs when you tell yourself that you are hearing the third or the fifth when what you are actually hearing is the octave. There can be an effective counter to this. Make a suggestion that what is present is a non harmonic pitch. That is, an “overtone'' not in the harmonic series, like a minor third or a fourth. When you find that the sound cannot be interpreted as what you are counter suggesting then you can be more sure that what you are hearing is so. You know that the overtone for that area is the one, when you cannot make it disappear or reorient itself. What I do is to think the pitch first. By anticipating the pitch and comparing the rap sound with it, you can tell quickly what the pitch is. My guess or pitch anticipation is sometimes in agreement, sometimes in disagreement, either way I learn to know what the scheme is. I always double check my findings by thinking a semitone higher or lower than the pitch that I have already observed. Doing this weakens the potency of autosuggestion.
Another vexing problem is not having a knuckle on your hand which is capable of producing a sound of sufficient clarity. If so, do some experimenting to get the clearest sound audible. When others are present ask them to do the honors by lending a hand and lightly rapping on the fiddle for you. When this is not possible, you can use the eraser end of a new pencil. Be careful not to drop the pencil eraser end down on the surface from too great a height. I recommend dropping it from a height above the surface of a quarter inch or so. When you have to do this, practice a few times on a table top before using it on the fiddle in order to avoid marring the varnish.
Once you have thoroughly examined the tuning on the top, turn the violin over and do the test on the back. Take care to completely damp off the extraneous vibration from the top. Because hands are the most effective dampers for this, when others are present ask them to assist in damping off the top. But, take care. The varnish on the great antique violins is sensitive to warm moist touch from the hands, so protect the varnish from direct contact using a handkerchief or clean dish towel. When the top is neatly damped off check out the tuning on the back. When you have repeated this test on five to ten antique Italian violins you should, I trust, be able to confirm my findings.
Because the area tuning principle is so exquisitely simple, it may prove hard for many people in the making and playing professions to accept it. As the determining principle which accounts for the extraordinary tone quality that the typical great Italian fiddle emits, it stands alone. Neither the varnish nor the wood nor the modeling nor the workmanship can by themselves make a violin built today sound like the best of the 17th- and 18th-century violins. This is already something that everyone knows. History has shown us that aging does not improve the quality of the famous 19th-century violin maker’s products. Likewise, it will not improve today’s output unless the varnish covers wood which has been well wrought and finely tuned.
Lest you think that applying the principle expressed in Area Tuning is too difficult or worse, nonsense, read the article by Elatia Harris in the link below in which she interviews me and there you can hear some sound samples of work done by Pierre Liebe, an amateur violinist and violin maker, who actually documented his initial efforts in area tuning. Below you can hear his before recording followed by two separate track of the after recording, which is then followed by two more after recordings documenting the results of my suggestion that he go back, pop the violin apart and perfect the tuning some more.
In the first sample, he plays his violin before it has been opened so you can hear how the instrument sounds prior to being tuned. In the first couple of sound samples following, you can hear the results of his initial effort. When Pierre sent me these sound samples, he asked me for my feedback. I responded that it sounded like he needed to go back and purify the tuning that he started which was moving in the right direction but needed to be rectified completely. The remaining sound samples followed a week later. You can hear the results for yourself.
If the results sound nonsensical to you then don't bother using the principle. If you think the violin is improved by the principle having been applied to it, then you would be wise to use it. Since this was Pierre's first attempt at doing anything like this, it should prove that this behavior was totally within the grasp of every musical instrument maker in the 16th-18th centuries. It doesn't require an act of genius to apply. The genius of Strad and Guarneri was in how extreme they were in their precision and purity of tuning. They were merely the most extreme in how far they took this idea.
I have learned that any finely-tuned scheme carries with it very important playing qualities. These playing qualities are ease and immediacy of tone production, fullness of tone, freedom of tone, a glowing brilliancy, great purity of tone, strength of tone, great carrying power, flexibility of tone, superior tonal balance, evenness between the strings, seemingly unlimited tonal reserve, richness in the bass and fullness in the treble, and more secure in-tune playing. I have also found that each tuning scheme tends to favor one or more of these playing qualities. Depending on the choice of wood, an 18th century maker would alter the scheme to fill out the spectrum of overtones he or she most preferred. Harder woods tend to emphasize highest overtones so a more concordant scheme (one having fewer dissonant overtones) would be used, while softer woods which dampen the higher overtones might have a more dissonant scheme, thus bringing out the overtones which the wood might leave out. The best instruments by Stradivari and Guarneri are those which marry the tuning scheme which is most favorable for enhancing all these playing qualities to the appropriate pitch, which was determined after considering the wood and peculiarities of the modeling used.
A natural question to ask is, "How does the varnish fit into the picture?'' We know that varnish has the effect of changing the pitch. We know also that the harder the varnish, the stiffer and more resistant it is. Conversely, the softer the varnish is, the more pliable and flexible it is. The ideal varnish is hard, tough, flexible, and pliable. There is still no varnish that measures up. (The statement in this last sentence was true when I originally wrote this article. Now, it is no longer true. Read my article on violin varnish. That varnish measures up when properly made.) When a varnish does not measure up, it has the unpleasant effect of determining in a major way how the violin is going to sound. The role of varnish on an instrument made according to the area tuning principles is one of strict neutrality. It must encourage everything yet dampen nothing. It must contain the energy and integrate the vibration of the plates as they respond “partially'' and “fundamentally.''
Once I became aware that I had discovered something of substance with this area tuning principle, I felt that it was important to find from what source in nature the early Italian violin makers might have derived their inspiration. I discovered what I believe to be that source quite by accident in the shower one day. I noticed that the high pressure water as it struck my body produced distinct pitches. Wondering if there was any relationship between the pitches, I let the flow strike against my body at first in the chest, then on my throat, and so on up my face and head. I found that the various areas in my body corresponded to the changes in mass, density, plane (of surface), and materials. Each area had a different pitch. Moreover, each pitch was an overtone of the pitch of my chest.

For me, this was nature’s confirmation of the principle. In imitating the human voice, they imitated nature’s mode of acoustical construction by following the principle which nature employs in creating the sound of the human voice. The timbre of every voice is the result of these overtones, and the prominence of each overtone is governed by the amount of area allowed to it in the body. (Nature being what it is, infinitely variable, voices will yield different results even when the observations suggest that two voices should be similar. So far, evidence has not been gathered to confirm or deny the hypothesis that the more area that an overtone has allotted to it in one’s body, the more prominent that overtone is in the sound of one’s voice. But reason dictates that this is what is happening.)
While there are other acoustical principles at work in the great Italian violins, not just the area tuning principle, they do not stand to make their effect unless the tuning principle is first observed (applied). It was the knowledge of these principles which constituted the science of the art of violin making as Stradivari knew it. It was a “copyist’s'' attitude which caused this science to be overlooked. Worshipping varnish and expert craftsmanship has created the blindness to these principles. Recognizing “golden calves'' for what they are is the best hope for music in the future.
It has not been my intention to give out formulas or state dogmatic rules. The area tuning principle is neither. It is a wholly different way of looking at violin making. It suggests that the violin makers in Italy viewed themselves not as mere fancy box makers but as builders of sound in a violin format, in imitation of God and His nature. It also suggests that when viewed this way, the process of making a violin of excellence is simple, straightforward, and really unmysterious. The truth of this can only be measured by those of you who become skilled in executing the principles and by the players who use the results capably, moving the listeners with stirring performances of music.
December 2008: Since I wrote this article more than 25 years ago, I have been hoping for some independent evidence that other violin makers have "become skilled in executing the principles and by the players who use the results capably" (taken from the sentence above). I am happy to say that this has finally happened. A few weeks ago, I had the pleasure of hearing a really good sounding violin made by a German violin maker by the name of Stefan-Peter Greiner. Curious to understand why the instrument was so appealing, I tapped on it and discovered that it was clearly and precisely "area tuned". Nothing could have made me happier. Seeing another modern maker's work that employed the area tuning principle was a full confirmation of the validity of the contents of the above article.
Now, it could be that Herr Greiner has come to this result by wholly other means than I myself use. If that be so, more power to him. It doesn't change the end result, which is area tuned. How a maker produces a good sound reliably instrument after instrument can only be accomplished by the application of true fixed principles. What a maker does to realize those principles is largely irrelevant. If Herr Greiner uses careful electronic measurements or works completely intuitively or works systematically or searches for his final result by trial and error, that the plates exhibit clearly tuned areas, which is what I found on his violin (similar to figures 6a and 6b above with minor variants), that is all that matters. A wonderful tasting cake made by whatever means, tastes as wonderful.
When I subsequently went to look up Herr Greiner on the web, I was doubly pleased to learn that some extremely important violinists are using his violins, among them is Christian Tezlaff. And what astonished me was that a Greiner violin was selling for around $40,000.00. This information came from a news site and so some of the information, especially about the price, may be inflated, as is the tendency among popular journalists to enjoy exaggerating the importance of their reports by discussing values placed on art objects, as though that was the test of true quality. Nevertheless, I wish to acknowledge Mr. Greiner's achievement in making a beautiful sounding violin. Now, I can only hope that others will be encouraged by his success in using the area tuning principle, and be tempted themselves to master the use of this principle.
October 2013: I had the opportunity to examine a Samuel Sygmuntowicz Violin made in 1991. That violin was very clearly Area Tuned. Whether or not Herr Greiner or Mr. Sygmuntowicz would actually own that they are Area Tuning their violins remains to be seen. So far, they have not. But that in no way discounts the excellent results that they are achieving in their violins.
You can read the email below which was sent to me by someone who tried the area tuning principle on his violins and sent me this report.
6 November 2013
Dear Mr. Hill,
I thought you might find my "Keith Hill tuning" experiences with two old violins of interest. The first was an old German violin that I got on eBay. It had been coated with spar varnish, or something similar, that caused a horrid orange-peel finish all over the instrument. I had not seen that before I had bought it, or I never would have done so. My first task was to scrape all that off, leaving the original varnish as intact as I could manage. While that was no easy task, I have great experience with scrapers on other fine woods, so the task was not daunting, just tedious. It came out okay.
I had to remove the top to repair a crack. This was my first experience with opening a violin, and I found it to be easy. While I had it apart I took the opportunity to apply some of your techniques of tap tuning, which led me to thin the top and back with appropriate scraping, using your tone patterns from your website as best as my old ears could manage. I made a tape recording of the instrument before I began any work on it. Initially it had a weak, slightly woody sound. I found the insides, especially the back, had not been thinned at all near the edges. It was easy for my old ears to hear the note rise drastically as I tapped progressively toward the edges. And the notes were not the same from side to side within the boundaries set by you.
I really couldn't tell what the pitch, or note, of the taps at the various areas were, but I could tell differences. I could just about discern an octave in the tapped note. What I did was to try to make the tones within a given area, all of which were supposed to be the same tapped note -- per the charts on your website of the front and back areas of the violin -- to in fact be that same note. I did this by scraping to lower the tap note. I was surprised at how little wood removal was required to lower the pitch of the tap note significantly.
I did quite a lot of tapping and scraping. When I got the violin back together I found it was now the loudest of my four violins. I recorded it again with the same strings, and it sounded quite good. The tone was still a bit "woody," but loud, pleasant and commanding. I replaced the rosewood tailpiece with one of ebony, and that improved the sound quality. Now, with Dominant strings and new pegs on it, its sound is at least the equal of my Gemünder Excelsior (#802), and to some ears, it is far more pleasant and commanding. For the record, it's my "Schwarze Diamant" because of an ebony inlay in its back.
Next, I tried the same scraping technique on a second violin, a copy of the Amati from Czecho-Slovakia (sic). This one required some work and finish on its neck, and I made and applied a finish using some sap from a 400+ year-old Ponderosa outside my front door. It came out looking quite nice. But the sound...! The result is an even more powerful violin, by which I mean louder, and with very even volume across the four strings. With a Teller bridge it has a pleasant and mellow sound. (The Gemünder Excelsior has a best-quality Milo Stamm bridge, which might make it somewhat thinner or sharper sounding.) At any rate, I can hardly believe what this simple scraping technique does for violins. It seems to turn inexpensive instruments into jewels with amazing sound, for not a whole lot of work.
Thank you for providing the template for this work, which I find fascinating. I plan to do a third violin, another old German Strad copy that sounds nice but has no volume. We'll see if I can do the trick a third time.
Thank you for your time.
Ray Ordorica/Idaho.

by Keith Hill © 2015
I have purposely posted a photo of a harpsichord because the principle of area tuning applied in some form to every type of musical instrument made during the period between 1450 and 1800. That includes: organs, harpsichords, clavichords, pianos, violas da gamba, violins, violas, cellos, double basses, guitars, lutes, woodwind instruments, drums, brass instruments, in other words, every kind of instrument. The acoustical technology based on area tuning was ubiquitous in Europe because the predominant science of the day was Pythagorean...not modern physics. Pythagorean science is the knowledge of musical ratios and how to apply those ratios intelligently to everything...including buildings. In a time when the idea of noise, an idea we have accustomed ourselves to since the advent of electricity, was people talking loudly and carriages rumbling across cobblestone roads, sound was the leading edge of science and musical instrument making was the counterpart for our fascination with computers today. Musical instruments were THE home entertainment centers of every cultivated home and every intelligent cultured person was expected to be able to play a musical instrument or be left out of social activities within the family. Now we each watch on the computer what we prefer and we are becoming isolated and musically ignorant as a result. We let recordings make our music for us.
Originally published in American Lutherie #1, 1985
In my article Area Tuning the Violin I presented my discovery of one of the theoretical principles governing the acoustical quality of the violins made by Stradivarius and his numerous Italian contemporaries. Because I believe that the area-tuning principle is the most important of all the acoustical principles pertinent to violin making, I deemed it best to present it in isolation.
I would be less than open with you if I did not say that the American Acoustical Society and the Catgut Acoustical Society both rejected the worthiness of the area-tuning principle back in 1984. I feel that their reasons were full of vested self-interest and their own theories based on plate flexibility. I tell you here what I told them: Paying attention to flexibility of free plates is a waste of time and attention. I have recently observed the application of the area tuning principle in the violins of two living violin makers, a Peter Stephan Greiner violin from 2005 and a Samuel Zygmuntowicz violin from 1991, though they would likely not admit to it. In my view, how the effect of the principle happens to occur, the result is the same intended or not but I can assuredly say that the Zygmuntowicz violin was executed purposefully, because I was able to examine the tuning system closely. Because of my respect for what they might consider to be proprietary knowledge, I will not publish their area tuning maps. Furthermore, the dismissive attitude regarding the idea of area tuning that so many violin makers affect, who consider themselves masters of the craft, indicates to me that my original observations made back in the early 1980's, which I took the trouble to publish, have arrived at what I call the "third stage of acceptance" that all new right ideas must submit to.
Those stages are:
1. Utter Rejection (All new right ideas are almost universally rejected), 2.Followed by Ridicule (What doesn't want to go away gets ridiculed in hopes that it will go away.), 3. Dismissiveness (What won't go away is sniffed at as the tide begins to turn in the new ideas direction), 4. Silence (As the evidence piles up against the old conventional ideas in favor of the new idea. This stage involves Mark Twains advice to fools: "It is better to look stupid, than to open your mouth and remove all doubt."), and finally, stage 5. " I KNEW THAT!"(Those who can't fight against the new idea then have to submit themselves to something their brains have utterly rejected and are forced to deal with their inability to recover their professional esteem, or become like dinosaurs --extinct.
Consider the following points.
First, thousands of violins have been made using the notion or theory based on plate flexibility for the last two centuries, yet no consistently superior results have been produced.
I used to test my plates for flexibility but quickly abandoned the practice when it occurred to me that there was no objective measure for flexibility. It seems that something which must depend on muscle tone of the person doing the flexing, which can change from day to day, is highly subjective and prone to mistakes. What the flexor has been doing just ten minute before can influence that test. Those who would input electronic testing equipment into the process are to be made fools of by Stradivarius and his colleagues who needed no such equipment.
Second, making so-called objective measurements of plates (ala Chaladni et al) and doing ex-in situ flexing of plates has very little to do with how the top and back behave in a violin that is set up and playable. Microphones, as good as they may ever be, are incompetent replacements for ears and brains unless those who are doing the hearing with them aren’t connected to either, in which case microphones may indeed be superior to either or both. That not withstanding, microphones are too colored in how they pick up and transmit signals. The diaphragms, wiring and housing all contribute significantly to the signals. And how glitter or iron filings on a violin plate or surface behaves when the plates not glued onto a set of ribs with another plate opposing it nor being stopped someplace off-center of the middle, is acoustically uninteresting. Should acoustic researchers discover a way to make such measurements and take photos of glitter on plates of a great violin while it is being played with a bow by a really good player, then what they come up with might prove to be interesting. As it is, these pseudo-scientific (visually dominant) measures of acoustical (aurally dominant) phenomena are irrelevant at best and not even entertaining at worst. They deceive those who want to learn about that type of acoustics into thinking that they can reproduce the sound of the 18th century Cremonese violins, and delay their own more productive investigations by filling their heads with nonsense.
Last, the amount of distortion that you can subject a free plate to never happens on a playing violin. The notion that the old masters had a "mystical intuitive measure or sensibility,'' seeming to know where to remove wood depending on how the plates flexed, is wishful thinking. The removal of wood must have been methodical and direct for such consistency of result to exist. The area-tuning principle leads the way to a methodical, direct, no-nonsense approach.
At this point, I feel it might be purposeful to add to the discussion some thoughts and hints of a more practical nature specifically for luthiers. It is my genuine interest that those of you who desire to use the Area Tuning principle not be hampered in your endeavors. I hope that what I offer here will contribute to that end.
Hint #1. I cannot urge you strongly enough to use a monochord instead of tuning forks, electronic devices, and so on. I have conducted all of my experiments using this tool. I find the monochord to be more versatile, more reliable, easier to use, better sounding, and less sensually insulting than the other devices. It is more convenient to use because the overtones are so easy to find for any given frequency.
Hint #2. To build a monochord, glue together three pieces of pine or basswood, about 4” x 5” x 40”, using one piece as a bottom and the other two pieces as sides for the box. Fill one end with a block 1” thick. At the other end, cut a 1” end block short by 1/2” , or drill several large holes in it, to allow an air space between the bottom and the block. Glue this block in so that its top edge is flush with the top edge of the sides of the box. This air space will act as the soundhole. For the top, glue to your monochord a 1/8th” thick piece of quartersawn pine or spruce. The box is now complete. When the glue is dry, trim off all excess wood and glue and chamfer the edges in order to make the box pleasant to handle. Then, proceed to pin, bridge, and string it. I use headless nails for hitchpins, zither tuning pins, and .010” hard steel wire for strings. For the nut and bridge I use walnut, but maple will do just as well. The cross section for the nut and bridges should look like a house as seen from the end.
Hint #3. I have two strings on my monochord. One of the strings stays at a constant pitch and acts as a point of reference, removing the nuisance of constantly having to refer to a tuning bar or fork to make sure that my monochord is at pitch.
Technically speaking, a monochord is a musical instrument that has one string, which is fixed at one end and adjustable for tuning at the other end. It has a fixed nut while the bridge at the other end is movable. A third bridge is a classical feature which you can introduce should you desire to redo the experiments and calculations of Pythagoras regarding the overtone series. However, these calculations are readily available in books.
Start by determining the length for the strings at A-440; I use 22 1/2”. Next, the scale has to be plotted out. I use an equal-tempered scale for reasons too complicated to discuss in this article. An electronic device is best for this purpose if it is accurate because it is fast and easy. Move the bridge until the desired note is achieved, then accurately mark that position and label it with the pitch name. Calculation of bridge positions, such as fret scales, is not workable because string tension is a dynamic variable. Because of this variability, it is important to remember to always keep your monochord string at pitch during this procedure. Any slight variances can be troublesome to you in the future.
Hint #4. Use junker violins purchased from your local violin repair shop to conduct your initial experiments in using the area-tuning principle. I think that you will find it easier to start learning to tune the wood on violins that are already complete, but clearly worth nothing. You can pop off the back to scrape away on the inside of the top while it is attached to the ribs. The back, because of the harder wood, is easier to work on when it is off the ribs. Leave the fingerboard on. When you have reassembled the instrument you can hear the results of your work almost immediately because the instrument is finished.
I never bothered to even clean off the glue except in those cases where the instrument turned out well enough to sell. When selling these glorified pieces of junk, don’t ask too much over the price that you paid for them. The idea is to get on with the next experiment using an instrument of fractionally better quality each time. You may have to do five or six experiments before you get results worth selling. Once you do start getting results, turnover is crucial. I used Titebond glue only on my first experiments in order to hear the results as soon after the tuning as possible. I found that I could disassemble the instrument, tune the wood, and glue the violin back together all in the space of four hours. Within five hours I was hearing the results and judging the success of the experiment.
Hint #5. To determine the success of your experiments you must have worthy criteria. I used the functional performance criteria exhibited by the greatest antique violins, as judged by the greatest violinists. These criteria may at first seem vague, but once heard and recognized, they are obvious: 1) Ease and immediacy of tone production. 2) Fullness of tone or resonance. 3) Depth of tone. 4) Freedom of tone. 5) Glowing brilliancy, not to be confused with brightness. 6) Great purity of tone. 7) Transparency of tone or clarity. 8) Solidness of tone. 9) Strength of tone. 10) Great carrying power. 11) Flexibility of tone, the ability of the sound to be altered by the player to create different vowels. 12) Superior tonal balance, that the sound feels complete in every way regarding the proportional relationship of the overtones to the fundamental. 13) Evenness of response between the strings, that the strings speak equally well throughout, letting nothing stand out or be less than it could be. 14) Seemingly unlimited tonal reserve. 15) Richness in the bass and fullness in the treble. 16) That the instrument should give the player the sense that it is easier to play in tune. 17) Finally, what I call the ``distortion resistance effect.''
“The Hill Effect”
Hint #6. What I call the ``distortion resistance effect'' is a phenomenon which I, and others, have observed, and for which I believe I have discovered the reason. The phenomenon is that the strings exhibit unusual resistance to being pressed to the fingerboard. Also, even though the instrument will speak with ease and immediacy, the strings will want to speak the overtone rather than the fundamental. The strings appear to the player to offer a certain physical resistance to the bow pressure. So when players speak of great instruments as being "hard to play'' they mean that they are hard to control. What makes them hard to control is the distortion resistance effect. It requires skill to overcome the distortion resistance effect when playing. Stradivari violins are often observed as being not altogether easy to play even by accomplished players. It is due to the distortion resistance effect, which I also call the Hill Effect as I believe I am the first to correctly link the phenomenon to its cause.
The cause of this effect is related directly to the area-tuning principle. When the wood has been tuned according to the overtone series, the distortion resistance effect will result. Instruments which do not exhibit this effect, yet are tuned, are usually tuned to pitches other than the overtone series. Stainer’s violins, for instance, do not exhibit the distortion resistance effect as intensely as Stradivari or Guarneri violins. His instruments are tuned using pitches like fourths, minor thirds and seconds, and minor sixths, as well as an octave.
The more perfect the tuning of the wood the more resistant the strings will feel. I had a conversation with a violinist from Milwaukee who had the pleasure of playing on Paganini’s del Gesu "Cannon'' in Genoa. He reported to me that the strings were so stiff feeling that he cut his small finger while playing on the instrument for an hour. I would expect that an instrument like the del Jesu “Cannon'' violin would be extremely well in tune. It would help account for why Mr. Paganini wrote as much as he did exploiting the harmonics for his compositions. You can test for this effect yourself by pressing lightly down on to the strings of several violins, including a good old Italian instrument. Because the string lengths are basically the same, the feeling of stiffness should be the same. But it is not. Although Dominant "stark'' strings on a mediocre violin may seem stiff, they are flabby feeling when compared to gut strings on a well-tuned instrument.
Hint #7. When experimenting on finished instruments, you will need to support the plates to avoid breaking them. One solution is to use a thin sheet of foam rubber. It gives firm support broad enough to prevent breakage. Another is to secure the plates for tuning to a workboard which has been cut out in the center. When the plates are placed upside-down in this board, the edges are supported all the way around, leaving the rest of the plate surface to vibrate freely.
Hint #8. You can’t check your tuning accuracy often enough. I check my tuning over and over again at different times just to make sure that it is right. My method is to do the initial tuning as a finishing of the carving-out process. I then glue on the bassbar and tune the plate again. After gluing the top to the ribs, I cut out the f-holes and tune the top yet again. Once the back is glued on, I tune both plates once more on the outside with fine sandpaper. This is the last tuning before the varnishing is started. Once I begin varnishing, there is little to be done to radically alter the tuning. Always allow some time to pass before taking up the plates to check the tuning so that you start with ``fresh'' ears.
When the plates are perfectly in tune according to the scheme that you have worked out beforehand, you can be absolutely sure that the violin will turn out first rate. The principle does all the work for you; all you have to do is be present and exert some effort to that end. I am sure that this is how the 17th- and 18th- century Italians could work so confidently and prolifically.
Hint #9. When the outsides of my violin plates are finished, I place them on a lightbox to carve. My lightbox is topped with a piece of plywood with its center cut out like the workboard. With the light shining from beneath, I can be sure that the wood never gets too thin. The final tuning process is also very speedy. The light allows me to relate wood thickness to color; thicker wood is brown and thinner wood is orange. Wood thickness is also related to pitch; so brown colored wood is higher in pitch and orange colored wood is lower in pitch. The old masters could have used cutouts in the shutters of their workshop windows which would have given similar, if less convenient, results.
Hint #10. Learning is more a process of extracting the ``clearly wrong'' than doing what is right the first time through. Learning, the natural way, occurs when the greatest freedom for making the most mistakes exists; all infants learn language this way. By using our sense of what is right, we can systematically remove those things which are wrong; we need only look. Our attitudes will be the only things preventing us. Learning what to listen for when you knock on the plate of a violin is not easy, but it can be done by everyone who has normal hearing. You must isolate and recognize what all the possible sounds are and ignore everything but that which you wish to hear.
You will hear many things when you use your knuckle to tap on a plate ready for tuning. Use a scraper to tap the plate as well. The sound produced by the scraper will augment that of the knuckle and vice versa. A catalog of the sounds heard will include: the pitch and resonance of the knuckle bone, or the click of the scraper; the pitch of the whole plate; the resonance of the whole plate, i.e., the dying away of the vibrational energy; the pitch of the spot of wood directly under the knuckle or scraper; the pitches of the edges of the plate when held and knocked freely; the pitch of the exact center of the plate, usually a semitone different from that of the whole plate; the pitches of all of the other tunable areas not directly under the knuckle; the pitch of the area being tested (this is what you are most interested in hearing); and the effect of each of these sounds being reflected by the room. If you use a lightbox, you will also hear everything sounding from it. It is not very audible, but you can hear it when you focus on it. What you will need to pay the most attention to will be the pitch of the wood directly under the knuckle. It might be useful to look at how the ear hears in order to focus the attention successfully.
The ear is a wondrous device. It hears everything audible to it. Yet, you rarely ever become confused about what you are listening to. I point out that it hears while you listen. This capacity is both a blessing and a curse. When you desire to, you can focus your attention on the subtlest sensation initiated by the lowest intensity sound in a highly complex stimulus. This is a blessing, especially if you know what you should be listening for. The curse occurs during those times that you are exposed to sound which you have no desire to hear but you are incapable of tuning out.
When you actively tune in to certain stimuli, you equally actively tune out most other things that the ear is, in fact, hearing. The act of tuning-in or tuning-out depends very much on what your preferences are. To refine the sense of hearing demands that you examine your preferences. By preferences, I mean timbres which you like over others, or habits that die hard, or ideas that you might have been working on for so long that they demand that you not put them down even temporarily, or attitudes that you refuse to give up.
Attitudes are curious things. They are the only things which we have absolute control over, yet we rarely exercise that control. As you judge your preferences to determine those of lesser or greater worth and those of lesser or greater significance, your ability to listen clearly will naturally readjust itself according to the priorities that you have established. In effect, you express your judgement and listen accordingly.
If what I have been describing were an easy thing to do, most people would do it. It’s not. It requires months, even years, of intensive and patient scrutiny regarding preferences to achieve clarity of ear, hence clarity of mind. The easy path, though somewhat liable to error, is to replace one preference for another. To use the area-tuning principle, period, you need only prefer to hear it. To use the area-tuning principle masterfully, you will probably have to overhaul your preference system.
Hint #11. The very best way to keep track of how you are doing when tuning the areas is to always be checking the relationships that exist. By this I mean that you will need to watch how the pitch changes relative to the pitches that already exist in the other areas. Tap one of the areas as many as three or four times and then move to another area and tap as many times, always sensing the interval that exists between them.
Hint #12. Most people to whom I say this are very amused. Using the same method of tapping or knocking, tap on your body to discover the overtones that exist on you. All your bone are tuned to overtones of a basic pitch in your body. That pitch resounds when you thump or tap on your breast bone. You clavicle or front shoulder bone usually sounds a 5th above that pitch. This is where the area-tuning principle comes from. Why not hear it first where the hearing is the easiest, that is, on your own body? Each person will have something different in how his or her bones are tuned. The beauty of it is just that. Everyone is different, yet everyone is of equal quality. True, there are some voices that we love to hear; maybe you should knock on those bodies to determine their tuning scheme and use that on your violins. I’m serious!
It is well known amongst singers and voice specialists that these areas resonate but until now no one to my knowledge has defined their specific property of being tuned according to the overtone series. It is hard for me to believe that I am the first person to make this observation, but there it is!
Hint #13. When you tune the wood in any given area on your violin plates, tune each annular ring. To do this, you will require a scraper of small size. Do the tapping with the edge of the scraper. Listen only to the click of the scraper as it hits the wood surface. The frequency of this click is a fifth above the fundamental pitch of that area, an octave up. The scraping sound is also the same pitch as the click, but a bit more difficult to focus on. Tune each ring along its entire length within a given area.
The reason for tuning each ring is that no two rings are alike. Differences in ring density will necessitate differences in wood thickness for the rings. You can circumvent this by selecting wood for homogeneity between the winter rings. Good Luck! I have only found one or two pieces of wood that were homogeneous between the winter rings which I thought would yield a resilient sound; most were too punky. I like resilience more than I like homogeneity of growth. If you do too, then leave the harder rings thin and the softer rings thick.
The ``Art'' of anything is to enhance decent materials by being willing to adapt to any set of conditions to produce the best effect possible. What I have been discussing here are the ``details'' of acoustical craftsmanship. If we are to master our craft, we need to master it at this level.
Hint #14. It’s important to remember that the violin plates are complex because they vibrate freely in some areas and are partly constricted in others, such as the edges and the areas nearest the bassbar. You will need to make the parts near points of constriction thinner because constriction creates stiffness and stiffness equals higher pitch. By making the constricted areas thinner, you make them more flexible and bring them into tune at the same time. Given two surfaces of unequal size, you need to thin the smaller of the two surfaces to make them sound the same pitch. Area size is directly proportional to pitch, given an equal thickness and material. Stiffness is the key factor involved.
To test this phenomenon, tap on a drum head. Tapping from the center to the edge, you will notice that the pitch rises. Were the membrane thinned towards the edge you would get less rise. Doing this thinning causes the membrane to act in unison with itself. This is precisely the effect that you must create on your violin plates. According to my observations of antique fiddles, the mediocre Italian instruments made during the ``Golden Age'' were tuned only in the centers of the areas while at the edges they were left untuned.
Hint #15. Begin tuning by tuning the largest area to the fundamental. Proceed from the largest to the smallest. Should you tune the smallest areas first, you would have to retune everything if you made a mistake on the largest areas; all the pitches of the smaller areas would be out-of-series (nonharmonic).
Hint #16. Once I have determined exactly what frequency I want to end up with, I tune the largest area down to the frequency one semitone higher. I then tune all the areas to that area so that I end up with a completely tuned plate exactly one semitone sharp of my final destination. After this I can confidently go right to the exact and final pitch. This method is very safe.
Hint #17. Accuracy, accuracy, accuracy: This is your goal. Even the pitch you select for an area is not as important as accuracy of tuning. The beauty of the area-tuning principle is that you can make an error pertaining to the pitch, when tuning, without ruining the plate. Simply tune down to the next semitone lower if you’ve gone too far. Although you may not get the exact sound that you were after, you will always get a sound which is resonant, brilliant, open, and free. Who knows, you may even surprise yourself and come up with a tuning scheme that you like better than what you had planned.
Hint #18. Wherever there is a strong curvature in the modeling or a change of direction of curvature on the modeling, you will need to thin the wood at those places. Curvature makes the wood stiffer.
Hint #19. When you are scraping on wood which is perfectly quartersawn, you will need to make that wood a bit thinner than wood which is not, even though the wood is on the same area. Grain at 90 degrees or perpendicular is stiffer, hence, higher in pitch than grain which is 88 or 92 degrees.
Hint #20. Take pains to make the exterior surface of the violin plates as highly polished as possible. The reason for this is that a rough surface dampens the highest frequencies while a polished surface reflects them.
Hint #21. This hint is troublesome to discuss, and I hesitate to discuss it in this article. The reason is that it is esoteric and therefore too easily misunderstood. However, I include it because I feel that without it your ability to understand what I have presented thus far might be impaired. Maybe, maybe not.
To be complete, any art must incorporate three elements. These elements are philosophy, theory, and practice. These correspond directly to the three elements that form our own nature: spirit, mind, and body. Philosophy guides the spirit, while theory guides the mind, and practice guides the body. Usually the mind and body follow in close order after the direction set by the spirit. So the foremost of the three elements is philosophy. For without right attitudes, theory and practice would be subject to much wrongheadedness in the same way that practical techniques become meaningless manipulations when they are unsupported by true theoretical principles. The last 150 years of violin making attest to this truth. So, if the function of philosophy is to guide, ultimately, our actions, then we need to think seriously about the aesthetic act of sensing.
I use the word sensation to mean something specific, but quite different than the conventional usage suggests. I mean sensation of the purist kind, so pure that you can’t prove what you sense much less talk about it. This level of sensation is many times deeper than the mundane variety. It depends very much on how the mind or consciousness is directed. When you direct your attention to what is happening within the sensing mechanism or organ while it is sensing, you can perceive what I mean.
It is sensing with the mind how the experience of sensation feels when sensing is taking place. It is noticing the effect sensation has on the subtler aspects of the sensing organ and seeing how the mind is affected by it. This level is the level I call true knowledge. This is the level at which you know absolutely. You need not interpret, question, or believe with your mind; there is only complete awareness. You can react emotionally to what you sense but you do not need to, necessarily. You have no control over the sensation of sensation. You can only control your awareness of it.
I believe that this level of sensation is absolutely objective. Nothing about it is relative. It is, or it is not. How you feel about it is irrelevant. This level is subject to only one thing, the presence of stimulation. The fact that you can not prove what you ``know'' in no way invalidates the awareness you achieved. It just means that you need not even try to prove what you ``know.'' This level of human experience is wholly free from deception. All other levels are subject to possible deception either from the self or from a source other than the self. Because this level is free of possible deception you can trust it completely.
An exercise for becoming aware of this level of sensation is to enter a totally dark room and, looking into the direction of the light source, turn on the light. At the moment that the light shines, you will sense many things. Be aware of two separate responses in the eye. The stronger of the two is the sensation of the muscle controlling the iris changing the size of the pupil. The second and significantly weaker sensation is the sensation of the effect experienced as the retina is exposed to light. The important idea here is embodied in the words sensation of the effect. This is the root of aesthetic awareness and appreciation. Upon this, all art is constructed. This exercise merely demonstrates in one sensory mode, sight, the level of sensation that I have been discussing.
The question is, so what? What’s so important about this level of pure sensation? The answer is nothing, really. In and of itself, nothing is important. What is important is the effect on the mind that paying attention at this level has over a long period of time.
A mind which is accustomed to being aware at this level of sensation naturally thinks profound thoughts. This is because the step between awareness at this level down to the level of the mind being aware of itself thinking intuitive thoughts is small. This, the final level of awareness, is crucial to our development, both mental and spiritual.
At this level of sensation, we are all reduced to the same experiential status. This is the level which is ``universal.'' Art that is successful, in the ultimate sense, is designed to stimulate in us this level of awareness. We say of that art that it embodies a universal expression. And art which is not fashioned to stimulate us at this level, though popular during its time, will eventually be judged for what it really is.
An Essay: In Praise of Principles. Principles are marvelous. When present, they do their work unobserved. Yet, their effect is very much felt. No good effect is ever achieved without some principle having been applied. What we call talent and genius is really the behavior, which we sense, of some principle being executed. Our senses are designed to respond to effects created by nature and all these effects are the result of some underlying principle. This is why we as natural organisms tend to gravitate to art, which also, in imitation of nature, has effects created by some underlying principle. When a person utilizes a principle we call that person an artist. When we see an artist using principles intelligently, we call the artist a genius. When a child exhibits artist-like tendencies, we say that the child is talented. What sets these individuals apart from others who are involved in similar activities is the acuity of judgment stemming from their awareness of pure sensation and their tenacity regarding the application (either conscious or unconscious) of some principle or principles.
When principles are misapplied, violated, or unused, the effect of the result on our senses is of very non-intense stimulation. The effect seems like so much "nonsense.'' If we are accustomed to "nonsense,'' the effect of the "sensible'' can be almost overpowering. This strength of intensity usually caused the work of the greatest artists in history to be rejected during their own time. Such seems to have been the case with Guarneri del Gesu and Bach.
For many years now, there has been a general trend away from the application of true principles. It was as though they were something to be feared or avoided. They were equated with dogmatisms and rules. They are, of course, neither. However, it was thought (and still is) that principles might inhibit "personal expression.'' Isn’t it ironic that the efforts of those who would deny the use of principles have been largely wasted because the effect of their efforts is that they are unimaginative, lifeless, weak, inhibited, and lacking in interest, quality, or expression, the exact opposite of the effect these individuals desired. Because they failed to employ true principles, and true principles create effects which communicate directly with the senses, their work fails to communicate with the senses.
When we embrace true principles, we find that they do most of our real work for us. All we need to do is be present and expend a little energy to get the job done. Most importantly, our work is done for others, not for ourselves. Because the principles are objective in the effects that they produce, we can be certain that others will experience our work exactly as we intend it.
I believe that artists such as Rembrandt and Guarneri del Gesu were neither talented nor geniuses, as we might think. They were just men who were sensibly aware, who thought deeply about the principles underlying their art, who applied those principles strictly and intelligently, who were unafraid to experiment, and who enjoyed the doing of what they did. Anyone who does likewise would be as great. How could it be otherwise?
with a Condensed Step by Step Description following this Recipe
by Keith Hill
Instructions for Making an Acoustically Proven Varnish
Using only Five Ingredients: Linseed Oil, Rosin, Water, Wood Ashes (Yes, Wood Ashes), and Turpentine
This is a revised reprint of an article I wrote that was published in the American Lutherie, the quarterly journal of the Guild of American Luthiers, Number 37/ Spring 1994. For those of you who may not have access to this journal, I have provided it here for your convenience.
Like many of my fellow Luthiers, I have made numerous experiments in concocting varnishes for use on my violins. I owe a debt of gratitude to earlier experimenters whose work and publications contributed substantially to the outcome. Those whose work contributed materially to the production of my varnish are Ole Bull, members of the 19th Century London Hill Family, George Fry, Jacques Maroger, and Joseph Michelman.
Ole Bull, in his tiny book on the violin, confirmed my instinct that the quality of the great Italian fiddles stemmed from the way all the parts were proportioned and not from the varnish even though the varnish contributes something valuable. He put no stock at all in the magical mysterious marvelous aspects of varnish which many during that time (how little things have changed) were given to worshipping. The books by the Hill family on the makers Stradivarii and Guarnerii provided a meager supply of extremely useful descriptive adjectives for the sounding and playing properties of the instruments by those makers.
George Fry's book describes many varnishes of little real value because his varnishes work neither acoustically nor mechanically. He also discusses the varnishes of other experimenters. One is William Fulton's Oil of turpentine varnish. I use this "Oil of Turpentine" varnish as the basis of my colorants. Should you decide to do so as well, take to heart what he says as his accurate descriptions of what happens when such varnishes are put together show that they can be very dangerous.
Maroger, in his book Secret Formulas and Techniques of the Masters, provides a wealth of information concerning the behaviors of the components of varnishes known to exist in painting during the 17th and 18th centuries.
Joseph Michelman contributed the most because of his belief, which he expressed to me over the phone during my only conversation with him, that the components of ash were the components of the Italian fiddle varnishes. Everything he said made sense to me. Unfortunately, his varnishes don't work very well either mechanically, visually, or acoustically.
Others whose work contributed positively in a negative way presented points of view that accord with the "holy varnish" mentality so common among varnish enthusiasts. They positively presented their beliefs about what the magical ingredient had to be; this helped me reject their avenues of approach. Since this closed many possible paths, they helped speed me on my way.
What I have found will, I hope, be of some use to you in your search for the best possible varnish.
The foundation for my varnish recipe is one simple principle. The violin must be a great sounding violin before it is varnished. If it is not, the varnish will not make it so. The varnish is there to assist in preserving whatever sound the fiddle has, protecting the wood of the fiddle, and enhancing the sound of the fiddle by the effects of its mechanical properties. In other words, the quality of the overall result from the effect of a finished violin is roughly 90% due to the box and how all of its parts are proportioned and the remaining 10% is due to the varnish. When both are right, whatever quality remains wanting comes with playing-in of the fiddle. How good the fiddle sounds depends on these factors. When all factors are at optimum, the result is what we can hear in a Strad or del Jesu fiddle or their equivalent.
Standards for a Useful Varnish
My standards for varnish are, in part, a compendium of traits, characteristics, and properties that have been noted by the above authors. Some are my own. Anyone who is well read in the literature will recognize the sources of the various standards. Here are those standards:
A. It should be easy to make. Easy here is a relative term. I mean that one should not have to be a chemist to make it. That is, almost anyone should be able to throw it together with reasonable success.
B. The ingredients must have been and still be easily obtainable by anyone without significant effort. No unusual ingredients must be present. All the ingredients should yield, upon spectrographic analysis, a reading similar to the findings published by Michelman in his latest articles on Ash Varnishes.
C. The varnish has to exhibit the following optical properties: 1.) dichroism-changing color depending on the angle of sight, 2.) absolute transparency-no apparent loss of light when it enters the varnish and when it leaves the varnish, 3.) uniform refraction-no matter at what angle you view the fiddle the light must not be diminished, 4.) magnification of wood substructure-an effect from light being uniformly distributed within the varnish such that every detail of the wood becomes obvious to the eye, 5.) naturally deep color-one that comes from the depth of color of the various ingredients, 6.) radiant color-the effect of certain components in the varnish that make the color extremely vivid, 7.) extreme effect of depth, h.) significant darkening with age yet never becoming fully dark brown to black but always appearing golden in whatever hue it finally becomes.
D. The varnish has to have the following physical and mechanical properties: 1.) the film should be extremely thin, 2.) the film should be extremely even and without runs or sags, 3.) the film should adhere fast to the previous coat yet maintain the integrity of each individual coat-it may not "melt" or dissolve the previous coat to ensure solid adhesion, 4.) the varnish should be made of ingredients that yield the lightest possible film-the varnish should not weigh down the plates which need to vibrate freely, 5.) the film must be curable only in the sun, 6.) the film must allow itself to be worked into a very high polish easily without being ruined easily. 7.) the film must be a self healing, that is, film nicks and scratches should eventually disappear without any human assistance unless they are too large, 8.) the varnish film must be capable of shrinking in all directions equally as it dries and cures, 9.) the film must be able to "sink" significantly into the surface as it ages, 10.) the varnish should never crack or check, 11.) the film, when dry, should be soluble in alcohol but not in turpentine, 12.) the liquid varnish should improve with age-getting clearer and more luminescent the longer you keep it, 13.) it should never "spoil" on the shelf--it should have an indefinite life so long as the container has not been left open. It should never thicken further, nor should it film over in the container, nor should it cure in the container.
My violin varnish fulfills every criterion stated above. If you share these standards, this recipe will interest you.
Here are the materials you will need:
--A few pounds of the dirtiest, crudest, darkest, ordinary rosin available. This can be easily obtained from your local sporting goods store in "batter's bags". (Baseball batters use the dust from this rosin to give themselves a better grip on the bat. The advantage of this rosin is that it is unrefined) High quality pure rosin can also be obtained for a better price from The Rosin Box, a store catering to the needs of ballet dancers in Philadelphia, PA. The purpose behind all the dirt and crudity of this rosin is twofold. One, the rosin is likely to be free of the acids used in the process of chemically cleaning rosin used to make commercially manufactured varnishes and paints. They remove all the "impurities" from the rosin so that it will never darken--this is a government imposed standard. By removing all the impurities, most of the minerals that give the rosin its color are also removed. Two, ironically, it is those minerals that give the great varnish much of its allure and charm. In fact, using ash to make the varnish is the method employed to "fix" even more of these impurities into the varnish than what the rosin or the linseed oil themselves can supply. No matter how dirty or crude rosin gets, it always maintains perfect transparency, i.e., it never is cloudy or milky. Of the material you get, use only the largest pieces in order to avoid using too much oxidized rosin in your varnish. You want your rosin to oxidize on your violin so that it cures properly in the presence of the other constituents.
--A few quarts of extra virgin cold pressed linseed oil. You can get this as salad oil in your local health food store. If you buy something that you can eat, you can be pretty certain no one has put chemical additives in it to make it dry better. You do not want hot pressed oil because, although it may have more "goodies" in it from the impurities standpoint, you can't be certain that the oil was really hot pressed and only hot pressed. Usually, the process for getting the most oil out of the linseeds involves adding chemicals to leach every last drop that can be had. These chemicals are harsh and will cause the varnish to deteriorate. It is for this reason that I do not even trust Artist quality linseed oil that can be purchased from the art supply shops. I suspect it to be chemically cleaned to make it clear. The salad oil linseed product is the finest. You can also buy a slightly less refined product in bulk from Kremer Pigment in New York or in Germany.
--A gallon or two of true Pure Gum Spirits of Turpentine. Nothing else will do. Not Spirits of Turpentine. Not Turps. Not Turpentine. And, even if it says on the can that it is pure gum spirits of turpentine, don't believe it. Smell the stuff. If it doesn't smell exactly like pine sap, don't use it--it probably has some petroleum additives to increase its bulk. And even if the store keeper says that nothing is added, trust only your nose. If it don't smell like pine sap, it probably isn't You can use the high quality PGST from the artist's supply shops but that can be very expensive. If all else fails, use that.
--One old large cooking pot that you will discard after use.
--One quart of reduced and processed Oil of Turpentine. This stuff takes about 6 months to a year to make.
Making the Colorant
I will recount for you my realization of Fry's directions for William Fulton's Oil of Turpentine varnish. That is so you don't have to go out and hunt for their books to make your own colorant. Then I will proceed with the directions for my varnish recipe.
Collect one gallon of pure spirits of turpentine, some ready to rust iron filings ( you can also use a bunch of steel pot scrubbers or very coarse steel wool), and an air pump with a length of plastic tubing used for fish tanks. Put the turpentine and the steel wool in a large gallon bottle (you can scrounge one of these up from a local restaurant--they buy their pickle slices in such jars). Set up the air pump to aerate the turpentine. Let it run for 6 to 12 months in a window, if you don't mind the smell, or on a porch, if you do. And make sure that you keep it covered to prevent it from acquiring dirt or water from rain. I put mine out in the garage.
When it is a little thinner than the flowing consistency of honey, it is ready for processing. Fry warns you in his book that this stuff when it is being heated is really dangerous unless you take adequate precautions. Here is why. This Oil of Turpentine no longer has the properties of turpentine. It isn't even soluble in turpentine anymore at this point. When you heat this material up, as soon as it gets to a certain temperature, it begins to cook itself. This is the dangerous part. Even if you removed it from the heat, it would continue to increase in temperature and cook as the volatile gases escape from the center of the mass. When this happens, it more that quintuples in volume as it bubbles up. Unless you take the precaution of having a pot that is more than six or seven times the size of the amount you are cooking, this material will spill over onto your heat source and explode covering everything, including you, in 400-500 degree impossible to remove scalding pitch which when it cools turns almost glass hard. This stuff is not fun.
The way to handle it is to watch the pot intensively while it is cooking. As soon as you notice the bubbling up behavior beginning, quickly put the pot on the ground and stand back. If it overflows, nothing will be the worse, and you can easily clean it off the ground. As soon as the bubbling up behavior subsides, it will never happen again. You can continue to cook this material for as long as you like. The longer you cook it the darker it become. I cook it until it is almost black. Its actual color when spread out thinly on a white tile or some other nonflammable white surface will give an idea of how dark you will want it. Remember, this is just a coloring additive and will be extremely diluted when in use. This is why I cook it to almost black. Thinned out, it turns a deep rich reddish brown. Mixed with varnish, it gives a blush of red brown that darkens significantly with age because of the iron dissolved in it.
Your oil of turpentine no longer exists at this point. What you have is a molten resin that can only be thinned in alcohol, lacquer thinner, and a bunch of other thinners you would never think of using in a high quality varnish, but not in turpentine. The only way I could discover to put this material, which is basically just a colorant (and a very transparent one at that) into an oil, rosin, and turpentine based varnish is to use Oil of lavender or Spike Oil of Lavender as a thinner. Oil of lavender has the unusual characteristic of being able to dissolve resins that are normally only soluble by either turpentine or alcohol. By dissolving this resin in alcohol, you would never get it to incorporate into your varnish. But with oil of lavender, it will incorporate effortlessly and it will smell glorious besides. I love the smell of my varnish for this reason.
At this point you are faced with a significant problem. How do you get this Oil of lavender, which is at room temperature, into your 400 degree molten resin and avoid an explosion? The difficulty you face is that the cooler the resin becomes, the thicker and more insoluble it becomes: at room temperature, it is like glass. You could pour it out on a slab of stone or a plate of steel, chip it off and crush it up into a powder and then reheat it with the oil of lavender until it dissolves. Or you do what I selected to do, that is, heat up the oil of lavender until it is hot enough to scorch a boar bristle brush hair causing it to curl and retreat. Meanwhile, your hot resin is cooling down slowly as your Oil of Lavender is heating up. The idea is to get both substances cool enough to avoid an explosion and hot enough to still mix relatively easily. Do this by testing the hot resin with hairs from a large natural bristle paint brush and doing the same test on the hot oil of lavender. When the behaviors are somewhat similar, you can try adding just a tiny amount of the hot oil of lavender to the molten resin. If a drop of the hot oil "steams" off in a rush of sudden evaporation, let your molten resin get much cooler. To add more will cause an explosion. When the two substances are within about 50 degrees of each other in temperature, they should be safely mixable. Slowly continue adding more oil of lavender (letting it cool) until you are using it at room temperature. At this point, the resin should be thinned enough to allow further thinning once it has cooled down to room temperature. Once at room temperature your thinned resin will be about the same in volume as before you began. But at this point most of that volume will be oil of lavender. In other words, one gallon of spirits of turpentine will yield about on quart of Oil of turpentine. And that quart of turpentine oil will yield about one cup of turpentine resin. When thinned back up to brushable consistency with oil of lavender, you have a bit less than a quart of sweet smelling very dark colorant for your varnish.
Directions for making Violin Varnish
Collect a pile of wood shavings, chips and scraps made up of pine and maple from off the workshop floor. Burn this until you have a heap of ashes. While the ashes are still hot, dump them in water. Old recipes for making soap tell you what the density of the resulting lye solution should be. It doesn't matter all that much what your proportions are except if there is too much water, you will spend a lot of time watching your excess water boil off. If you have too little, you will have a tough time getting your initial "soap" to be clean or free of ash.
Hot ash in water turns the metallic oxides in the ash into metal hydroxides (lye). A little lye goes a very long way so start with no more than a liter of lye water. Since these metallic oxides combine readily with water, they also use moisture in the air to do the job. Hence cold ash is less effective. Fresh hot ash will make the best lye for your purposes.
Once you have your hot ash lye, you are ready to make varnish. The more dense your lye solution, the more linseed oil and rosin you will need to use it up. It is best to plan to work with about a liquid gallon of varnish. This will require about a gallon or two of water and a shovel full of hot ashes. Bring your hot ashes to a boil and put the equivalent of three quarts of crushed rosin chunks into the hot lye. Continue heating this until all the rosin is melted and dissolved in the hot lye. This slurry will turn milky or cloudy as the lye emulsifies the rosin.
When you can no longer find any unmelted rosin and the mess in your pot looks uniformly milky, start to add your linseed oil until you have used up two quarts. This will give you a 2:3 proportion of linseed oil to rosin. If the slurry is still milky, continue adding first rosin, then linseed oil in a 3 parts rosin to 2 parts oil ratio until it begins to clarify. When it starts to clarify, that is, the milkiness begins to disappear, you have a neutral solution. If you want soap, you should leave it slightly cloudy. If you want varnish, you want it to be non cloudy. Do this by adding a bit more each of rosin and linseed oil taking care to maintain the 2:3 ratio of oil to rosin. Be aware that "cloudy" in the sense I am using it is relative--the slurry looks like gray muddy slop. Never fear, you can easily notice the milky or cloudy cast and you will notice when that cloudy or milky cast disappears.
What happens if your proportions are not correct? Nothing hideous. If you get too much rosin in the batch, the sound will be a bit brighter at the beginning but will also have a tendency to crackle and crumble. If you get too much linseed oil in the varnish, it will sound more dull at the beginning and become brighter as the oil dries and hardens with age. But the varnish will hold fast to the surface and will be tough and almost impossible to chip. It will also take much longer to dry, be harder to "dust up" when sanding, be more resistant to solvents, and look less beautiful. Such a tall oil varnish is ideal for furniture but not for a violin. In my judgment, it is better to err just on the side of having too much oil than having too little. The best, of course, is to hit the right proportion and keep to it. Bear in mind, too, that the oil of turpentine resin you use as the colorant constitutes part of the rosin portion of the varnish.
Once you have gotten your slurry to a slightly acid side of neutral solution with your linseed oil(linolic acid) and rosin(abetic acid), take it off the heat and let it stand over night. If you wish, you can let it stand for a week or two. The longer you let it stand, the more clear it will become as the ash settles out from the solution. I am much too impatient. After 24 hours, I like to get on with the job.
I should mention here, before going on, what you should do in case you reach a neutral solution too early. This will happen only when you have too little ash lye to begin with. It is a good idea to cook this part of the varnish on a wood burning stove so that you can scoop out some fresh hot ash and dump it into your varnish in the event you reach a neutral solution before having used up your ingredients in their respective proportions.
Next, take your settled-out solution and extract the water. The only way to do this is to boil it off. This may take a few hours depending on how much solution you have. Though water boils at 212 degrees, varnish does not, and once your water has boiled off, varnish is what you have. The trick at this point is to get your varnish to the correct temperature and hold it there until the oil and rosin have perfectly combined. The old method for telling the correct temperature was "hot enough to scorch a feather". Use this method for determining how hot to get it. Maintain the varnish at that temperature until it passes the "ball" test. Since it is possible to burn the varnish on the bottom of the pot, stir the varnish slowly and constantly using a glass rod or ceramic spoon (wood will burn at this temperature and metals conduct too much heat).
The Ball Test.
The ball test is used in making fudge. Fudge is ready when you put a drop of it into a glass of water and it forms a ball. When you handle this little ball, it should not be sticky. But that is for fudge. In making varnish, the ball test is passed when the little drop forms into a ball which, when you place it between your thumb tip and index finger tip and press can be made to adhere to both finger ends. And, and here is the clincher, when you pull your fingers apart you can produce a "gossamer thread". Before the varnish is perfect it will form a ball, it will stick to your fingers, but it will not produce that gossamer thread. As soon as the varnish has reached the balling stage, you need to be constant and alert for that moment at which the varnish comes to perfection--to that gossamer thread moment. When that happens the spider-silk like thread that is produced is a product of great beauty as it maintains its integrity no matter how far apart you draw your fingers. It is golden and silvery in appearance. It is extremely fine and flexible. It is exquisite.
As soon as this moment has been reached, remove the varnish from the heat. This is extremely important. If you continue to heat this substance it will magically change from varnish into linoleum .
--Thinning the hot varnish.
I immediately begin to heat up my pure spirits of gum turpentine until it begins to look like it will boil. At the same time, I put the varnish in its pot into a tub of cold water. Herein lies a problem. The varnish, which is easily stirred when it is over 300 degrees gets gradually more and more viscous as it cools. At room temperature, this material (unthinned) would set up just like soft fudge. What you need to do is to get enough hot turpentine incorporated into the varnish before it cools down so much that you can no longer thin it because the viscosity prevents mixing. This is a tricky affair. You can not reheat the varnish without destroying it so you have only one opportunity to get the turpentine incorporated. So as soon as you think you can safely incorporate the two do so. Here a candy thermometer is useful. When the two substances are within 50 -75 degrees of each other in temperature, they can be mixed reasonably safely. The danger is in having the hot turpentine explode into flame when it is ignited by the super hot molten varnish. You must plan to have at least half a gallon of hot turpentine ready for the initial thinning and another gallon and a half of cold turpentine on hand to complete it. Your varnish is safely thinned when the container is cool enough that you can tolerate touching it for a moment with you bare hand and still thin enough to be brushable. When cooled, this varnish, which has the viscosity of honey, will still need considerable thinning to be easily brushable. I prefer to get the varnish to an easily brushable state while it is still hot. As soon as I have thinned it to that point, I stop and let it cool.
Once it has cooled, you will need to thin it until it has the brushing viscosity that most pleases you. Too thin and you will have to apply many coats to build up any substance to the film. Too thick and it will be hard to move around on the surface. Here are a few characteristics of this varnish that you should know about for you to ascertain how thin you wish to make it. No matter how thin this varnish gets, the handling property of the varnish is that of soft butter. It stays where you put it without running, dripping, or sagging. This effect comes from the presence of Calcium, in the varnish, that is a principal component of ash. The calcium also imparts uniform light refraction into the film. Bearing this in mind, I prefer to keep my varnish about the same viscosity as oil paint fresh out of the can. At this viscosity, it is very easily brushed and it requires only three coats to finish a fiddle. The first to soak into the surface to seal the surface. The second to create a uniform coat. The third and sometimes the fourth to add resilience to the surface by stiffening it.
The body which this varnish has comes from all of the metals that have been incorporated into the varnish. Yet for all the incredible body of the fluid state of the varnish, once dry it forms an extremely thin film because it shrinks on to the surface as it dries. This shrinking behavior is extremely important for the preservation of the acoustics of the fiddle. Varnish which does not shrink on to the surface but simply lays there as most varnishes do actually dampen the acoustics of the fiddle. By shrinking, the varnish envelopes the violin in tight embrace becoming one with the fiddle. In this way, it responds as the wood responds to the energy from the strings yet controls any wild vibrations that might occur in the plates.
This shrinking behavior that is peculiar to this varnish accounts for much of the quality that varnish should add to the sound. The more the varnish shrinks, the stiffer the outside of the surface of the instrument becomes. As the varnish shrinks and hardens it creates a "case hardening" effect on the instrument. When the instrument is set out in the sun to cure this varnish, the sun desiccates the wood, thus shrinking the wood, and makes the varnish, which has already been shrinking, even tighter in its clutch around the instrument. As the wood expands again as it takes in moisture from the air at room temperature, the tightening increases even more. The term, case hardening, is a term coined when the process used to make modern steel music wire was invented. By making wire that was extremely hard, that is, having the molecules more densely packed, on the outer surface while being softer and more ductile in the center, wire makers were able to fabricate wire that was both brilliant sounding and fundamental. And the wire was very hard to break because the inner softer core allowed the material to flex easily. This same process was used in ancient Japanese sword making to create swords that would hold an edge and yet be ductile enough to not break during use. The ductility prevents the brittleness that comes from hardness. Likewise, the varnish creates a compact outer surface that extremely tightly surrounds a softer wood inner core. This effect contains the sound energy in the instrument causing the sound to ring. And, very importantly, it does this without adding significant weight to the whole or without sacrificing flexibility. These two factors would otherwise dampen the vibration of the instrument.
The metal salts that are dissolved in the water that is absorbed by the trees that eventually become part of the solid material of the wood that turns into violins as well as wood scraps that get burned in the stove that turn into ash that becomes the basis for this varnish all have a significant role in imparting to the varnish highly desirable properties. Calcium also helps this varnish to adhere fast to the surface and to darken significantly. (Calcium from quicklime was also the basis for waterproof cheese based glue used in furniture and instrument making in earlier times. The German word for glue is still lyme.) Aluminum gives this varnish its extreme adhesiveness and toughness so that when it shrinks on to the surface, it does so uniformly. (Aluminum, when combined with proteins (amino acids), causes coagulation. I suspect that in the varnish it causes bonding of the several coats and acts like a linking mechanism to connect the oil and rosin (acids also) molecules together giving it a chained behavior.) Zinc gives the varnish its flexibility and self healing properties. (Zinc is the mineral we take as a supplement because it is responsible for tissue integrity) Manganese lets the varnish turn hard. Iron makes the varnish oxidize evenly and contributes to the gradual darkening as the varnish ages. These minerals all do these jobs to exactly the right degree when they are proportioned as they are in wood ash.
Also because of the body, this varnish covers the instrument and seals completely in just three coats of the viscosity I recommend. In this regard it is like shellac. Its drawbacks relative to shellac are mostly the time required and the conditions required to dry and cure it. It takes a week--minimum-- to dry each coat properly. And it must spend at least three days in the sun to properly cure the varnish.
Once you have thinned your varnish to a brush ability you like, try brushing it on a clean prepared surface. If the varnish has a tendency to froth like a soap, you definitely need to incorporate some of your oil of turpentine-oil of lavender colorant. This will help speed drying, it will make the varnish slightly darker per coat, and it will make the varnish acid enough to prevent frothing. If your varnish does not froth, so much the better. This brings me to the question about color.
I showed one of my fiddles to a well known major concert violinist about 12 years ago. He played it and complemented it highly for its tone. When he finally stopped playing, he asked me why I did not distress the finish of my fiddles as most other makers do and why my varnish was so blond? My answer to him was a question. That was, Had he ever in his life seen any paintings made in the 17th or 18th centuries that showed a violin or cello that was either distressed or brown? No, he had not. Neither have I. If the varnish is right, which is my point of view, it should look like the varnish as seen in the iconographic record. To tamper with the varnish by distressing it and using coloring additives, all designed to give violinists of today the delusion of playing on an antique, will result in a product that ten year hence looks stupid and fake. His answer to that was that I would not be able to sell my instruments because no violinists would buy them. In this he was and is absolutely right.
My intuition about the aging properties of this varnish have proven themselves by now. Instruments that I made 13 years ago, which were blond colored at the outset, are now a rich deep rosy golden blond-brown, absolutely transparent, and still possess a trace of fragrance from the oil of lavender. Now, they look like well preserved antique fiddles though still not as deeply brown. That deeply brown color has still to come from the oxidation of the wood from within the violin. As the oxidation process reaches from inside the violin gradually to the outside of the fiddle, the color will begin to change again and its color will be complete. This may take 100 years, but I know it will happen.
Perhaps the greatest beauty of this varnish is its paradoxical origins. A coating of such beauty fashioned out of that dirty, muddy, ashened slurry assumes a more wonderful awe in me than if it were to come from the purest most refined products. Add to this the fact that this varnish never skins over in the jar, and that it fulfills every standard by which antique instrument varnishes are to be judged save the color (when new), it is no wonder that instrument makers have been puzzling over how this varnish came to be in the first place and that they attributed all of the acoustical qualities of the old violins to what appeared to their eyes to be self evident--how could their eyes be lying when what they heard was glorious?
The Condensed Version for Making Hill Violin Varnish
Step 1. cook your rosin until it is completely black in color. (you then need no colorants)
Step 2. Make a fire and allow it to burn as completely as possible all the wood. Then collect the ashes in a metal bucket and while the ashes are still extremely hot, add water until the amount of water plus ash makes a mixture the consistency of liquid yogurt. Then allow all the ash to settle out and collect the water.Step 3. Use 100 ml of the water and put it in a cooking pot large enough to hold 1 liter of fluid.
Step 4. Heat to boiling that 100 ml of the water from step 3, Just as the boiling begins, add linseed oil in small amounts. The combination of linseed oil and the water will turn the linseed oil cloudy appearing. Keep adding linseed oil in small amounts until the cloudy or milky appearance begins to again become clear appearing. Keep adding linseed oil in small amounts until the milky/cloudy appearance turns completely clear.
Step 5. Keep the clarified mixture of water and linseed oil boiling until all the water is gone and all that remains is the linseed oil. Then add your cooked rosin to the hot linseed oil. Use at least as much rosin as you used linseed oil. the proportions of rosin to linseed oil is based on what you decide to have. Also you can add a small quantity of either raw umber or burnt umber from a tube of artist oil paint.
Step 6. Keep cooking the linseed oil and rosin mixture until a drop of this mixture in a cup of cold water forms a ball. The higher the temperature you use to cook the mixture the sooner that "ball" stage is reached. Test the ball by removing from the water and hold it between your thumb and first finger. You should be looking for a fine thread like structure to form when you pull your fingers apart. The longer you cook the mixture, the longer that thread like structure will be. As soon as you can create a 20-30 cm long thread from a ball of the mixture, you know that you have created not a mixture but a varnish because the linseed oil and rosin have become one with each other.
Step 7. As soon as you are able to create that 20-30 cm long thread, remove the varnish from the heat and place the pot of varnish in a pan of water to stop the cooking immediately.
Step 8. When the varnish cools it will become very thick and hard to stir. Carefully add pure spirits of gum turpentine in small quantities until the varnish has the thickness and consistency of honey when the temperature is cool enough for you to touch without burning yourself.
Cook this outside in the open air. It stinks like shit and burning rubber while it is cooking but as soon as it becomes a varnish that smell becomes less awful and begins to smell faintly floral.
The time involved to do this depends on how hot the heat source can get. Use only an electric hot plate to do the cooking or the mixture could catch fire if you use a gas stove.
RECIPE FOR MAKING "HILL" VIOLIN VARNISH translated into Russian
Рецепт для создания вашего собственного скрипичного лака.
Кейт Хилл. Перевод Марата Аксянова.
Инструкция для изготовления акустически проверенного лака с помощью всего лишь пяти ингредиентов: льняного масла, канифоли, воды, древесной золы и скипидара.
Это переработанный вариант написанной мной статьи, которая была опубликована в ежеквартальном журнале Гильдии американских скрипичных мастеров в 1994 году. Для тех из вас, у кого нет возможности ознакомиться с той статьёй и написано нижеследующее.
Как и многие мои друзья из мира скрипичных мастеров, я провёл множество экспериментов, связанных с лаком, применяющемся на моих инструментах. Я очень благодарен более ранним экспериментаторам, чьи работы и публикации внесли существенный вклад в полученный мною результат. Среди них - Оле Булл, семья Хиллов, Джордж Фрай, Жак Марогер и Джозеф Мишельман.
Оле Булл в своей небольшой книге о скрипке подтверждает мою гипотезу о том, что качество скрипок великих итальянских мастеров проистекает из пропорциональности всех частей, а вовсе не от лака, хотя и он вносит некоторую ценность. Он не стал полагаться на рассказы о волшебных свойствах лака, которому в те времена (как мало всё изменилось) поклонялись очень многие. Книги семьи Хилл о Страдивари и Гварнери содержат некий запас прилагательных, описывающих звучание и свойства инструментов этих мастеров.
Книга Джорджа Фрая описывает множество лаков, представляющих для нас низкую ценность, так как они не имеют нужных нам механических свойств и не подходят с акустической точки зрения. При этом он описывает лаки других экспериментаторов. Один из них - это так называемое скипидарное масло Уильяма Фултона. Я использую этот лак в качестве основы для моих красителей. Если решите применять этот лак, то вы должны точно следовать рецептуре и описанию процесса изготовления, так как это может быть очень опасно.
Марогер в своей книге Секретные формулы и приёмы мастеров предоставляет обширную информацию о свойствах компонентов лаков использовавшихся в живописи семнадцатого и восемнадцатого веков.
Джозеф Мишельман внёс самый большой вклад благодаря его убеждённости, высказанной им в личной беседе по телефону, в том, что в скрипичном лаке великих итальянских мастеров присутствовала зола. Все его мысли на этот счёт ценны для меня, хотя приготовленные им лаки имеют не самые лучшие визуальные, механические и акустические свойства.
Иные исследователи слишком уверовали в "святой лак", содержащий какой-то волшебный ингредиент, чтобы внести позитивный вклад в мои исследования. Поскольку данная вера закрывает множество путей, это добавило скорости моему собственному пути.
Я надеюсь, что мои находки помогут вам в поисках наилучшего лака.
Основой рецепта моего скрипичного лака является простой принцип - скрипка должна отлично звучать до отделки. Если этого нет, то лак не поможет. Лак нужен для защиты древесины, а также для усиления звука вследствие своих свойств. Другими словами, качественный результат достигается на девяносто процентов благодаря качеству древесины и правильным пропорциям и только на десять процентов благодаря лаку. Когда все факторы складываются наилучшим образом, мы можем услышать звучание скрипок Гварнери, Страдивари и их эквивалентов.
Стандарты для лака.
Мои стандарты для лака являются компиляцией характеристик и свойств, которыми обладали лаки вышеназванных авторов, но с моими собственными дополнениями. Вот эти стандарты:
1. Лак должно быть легко изготовить. Простота - понятие относительное. Я имею в виду, что никто не должен быть химиком чтобы сделать его. То есть, практически любой человек должен быть в состоянии получить качественный результат.
2. Ингредиенты должны быть легкодоступными. Никаких необычных ингредиентов. Все ингредиенты при спектральном анализе должны совпадать с результатами, полученными Мишельманом и опубликованными в его последних статьях о лаках содержащих золу.
3. Лак должен обладать следующими оптическими свойствами:
а. Дихроизм - изменение цвета в зависимости от угла зрения.
б. Абсолютная прозрачность - без видимых потерь игры света.
в. Равномерное преломление света - вне зависимости от зрительного угла.
г. Подчёркивание рисунка древесины.
д. Глубина цвета.
е. Яркость цвета.
ж. При потемнении лака с возрастом всегда должен оставаться благородный золотистый оттенок.
4. Лак должен обладать следующими механическими свойствами:
а. Плёнка должна быть очень тонкой.
б. Не должно образовываться потёков или наплывов.
в. Плёнка должна образовываться быстро и предыдущий слой при этом должен сохранять целостность.
г. Лак должен быть изготовлен из ингредиентов, дающих лёгкую плёнку. Лак не должен быть тяжёлым - детали инструмента должны колебаться беспрепятственно.
д. Лак должен быть отверждаемым при помощи ультрафиолетового излучения.
е. Лаковая плёнка должна легко располировываться до высокого глянца и не терять при этом прочность.
ж. Плёнка должна быть самовосстанавливающейся. То есть, мелкие вмятины и царапины со временем должны сами исчезать.
з. Лаковая плёнка должна давать одинаковую усадку во всех направлениях.
и. Лак должен уметь проседать в поверхность.
к. Лак не должен трескаться и давать кракелюры.
л. После высыхания лак должен быть растворим в спирте, но не в скипидаре.
м. Жидкий лак должен улучшаться с возрастом - становиться прозрачнее и люминесцентнее.
н. В закрытом контейнере лак должен храниться бесконечно долго. Он не должен загущаться и полимеризоваться в контейнере.
Мой скрипичный лак соответствует всем требованиям указанным выше. Если вы разделяете данные стандарты, то рецепт вас заинтересует.
Вам понадобятся следующие материалы:
- Несколько фунтов (1 фунт = 450 грамм) самой грязной, грубой, тёмной канифоли. Преимущество этой канифоли в том, что она не рафинированная. Эта канифоль не содержит в себе кислот, применяемых в процессе химической очистки для последующего использования данной канифоли в промышленном производстве лаков и красок. В процессе химической очистки из канифоли удаляют все примеси, так что она никогда не потемнеет. Это требование закреплено правительственным стандартом. При удалении примесей из канифоли удаляются и минералы, дающие ей цвет. По иронии судьбы это именно те минералы, которые нужны для изготовления хорошего лака. Зола применяется для ещё большего усиления этих примесей. Независимо от того, насколько грязна исходная канифоль, она всегда сохраняет идеальную прозрачность, то есть не имеет мутного или молочного оттенка. Использовать нужно самые крупные куски канифоли из доступных вам, чтобы избежать большой доли окисленной на воздухе канифоли. Канифоль должна окисляться уже на инструменте в присутствии других компонентов.
- Несколько кварт (1 кварта = 0,95 литра) нерафинированного льняного масла холодного отжима. Вы можете приобрести его в качестве масла для салатов в магазине здоровой пищи. Если вы покупаете съедобное масло, то можете быть уверены, что никто не добавил туда сиккативы для быстрого высыхания. Вам не нужно масло горячего отжима. Хотя оно и может быть более интересно из-за дополнительных натуральных примесей, вы не можете быть уверены, что технология горячего отжима была соблюдена. Обычно, процесс получения масла из льняных семян включает в себя добавление химических веществ для увеличения выхода масла из жмыха. Эти химические вещества отрицательно скажутся на лаке. По этой же причине не подходит художественное льняное масло.
- Галлон или два (автор американец, стало быть 1 американский галлон = 3,79 литра) 100% натурального скипидара. Никакого древесного, экстракционного или сульфатного скипидара. Только чистейший живичный. Если он не пахнет в точности как сосновая смола, то использовать его нельзя - он вероятнее всего имеет нефтяные добавки для увеличения объёма. В этом деле доверять можно только обонянию. Если не получится найти чистый скипидар, то придётся покупать его в магазинах для художников за высокую цену.
- Одна старая большая ненужная кастрюля, которую потом не жалко будет выбросить.
- Одна кварта специальным образом подготовленного скипидара (краситель). Подготовка занимает от полугода до года.
Изготовление красителя.
Я излагаю здесь мою реализацию рецепта скипидарного масла Уильяма Фултона. Это значит, что вам не надо копаться в разных книгах, чтобы сделать свой собственный краситель. Вот мой рецепт этого лака:
Возьмите галлон скипидара, немного железных опилок (или самую грубую стальную вату), а также компрессор для аквариумов. Поместите скипидар и опилки/вату в большую бутылку (галлон), установите компрессор для аэрации скипидара. Дайте ему поработать в течении 6-12 месяцев за окном, на крыльце или в любом другом месте, где не придётся дышать испарениями. Главное, чтобы в бутылку не попадали осадки или грязь. У меня бутылка стоит в гараже. Когда скипидар становится немного текучее, чем жидкий мёд, он готов. Фрай предупреждает в своей книге, что эта жидкость при нагреве становится очень опасной и надо принимать меры предосторожности при работе с ней. Дело в том, что она больше не имеет свойств скипидара. На данный момент она даже не растворяется в скипидаре. При нагревании этой жидкости выше определённой температуры у неё запускается самонагрев, даже если она снята с огня. Если это произойдёт, то жидкость разогреется до взрыва и всё находящееся в радиусе поражения окажется покрыто смолой с температурой 400-500 градусов.
Способ справиться с этим - неотрывно наблюдать за процессом и использовать ёмкость, превышающую объёмом жидкость в шесть-семь раз. Как только вы заметили пузырение, быстро поставьте кастрюлю на землю и отойдите. Если жидкость начнёт "убегать", то некоторая часть её просто запачкает землю и ничего больше. Как только кипение утихнет, больше оно не повторится. Вы можете продолжать готовить эту жидкость так долго, как вам нравится. Чем дольше вы готовите её, тем темнее она становится. Я её готовлю до почти чёрного цвета. Чтобы в процессе готовки получить представление о её реальном цвете, нужно нанести тонкий слой на белую плитку или другой белый негорючий материал. Это даст вам представление о том, насколько тёмный цвет у вас получается. Помните, что это просто добавка и в лаке она будет в чрезвычайно разбавленном виде. Именно поэтому я её готовлю почти чёрной. Тонкий слой на белой плитке при этом получается насыщенным красновато-коричневым. Смешанная с лаком, эта жидкость даёт красно-коричневый румянец, который со временем значительно темнеет из-за растворённого в скипидаре железа.
В этот момент ваше скипидарное масло уже не существует. Что у вас есть - так это расплавленная смола, которую можно растворить только спиртом и растворителями, но не скипидаром. В качестве растворителя этого колера я применяю масло лаванды, которое имеет необычную особенность - растворять смолы, которые обычно растворяются только в спирте или скипидаре. Вы никогда не сможете включить в свой лак смолу, растворённую в спирте. Но с маслом лаванды вам удастся это сделать и к тому же колер будет обладать приятным запахом. Я люблю запах моего лака.
На данный момент вы столкнулись с серьёзной проблемой. Как вам влить масло лаванды комнатной температуры в расплавленную смолу, нагретую до четырёхсот градусов и избежать взрыва? Трудность, с которой вы сталкиваетесь заключается в том, что чем прохладнее смола, тем менее растворимой она становится. При комнатной температуре она похожа на стекло. Вы можете вылить её на каменную плиту или стальную пластину, после остывания размолоть в порошок и затем разогреть вместе с лавандовым маслом до полного растворения. Я же использую другой способ - нагреваю масло лаванды до тех пор, пока от касания с ним не начнёт обугливаться кисть из натуральной свиной щетины. Смолу же напротив нужно остудить до температуры лавандового масла. Идея состоит в том, чтобы оба вещества были достаточно прохладными во избежание взрыва, но при этом оставались достаточно горячими чтобы можно было их относительно легко смешать. Разница температур обоих веществ не должна превышать пятьдесят градусов Цельсия. Сначала нужно добавить в смолу только одну каплю лавандового масла и посмотреть на реакцию. Если капля масла быстро испарится, то температуру смолы надо понизить. Если при такой температуре влить больше масла, то произойдёт взрыв. Когда температура позволяет смешать оба вещества, нужно очень медленно вливать масло лаванды в смолу. Масло лаванды тем временем медленно остывает и к концу вливания может приблизиться к комнатной температуре. В этот момент смола должна быть разбавлена достаточно, чтобы в дальнейшем её можно было разбавлять маслом лаванды при комнатной температуре. В итоге вы получите приблизительно тот же объём, что и до начала процесса, но большую часть этого объёма будет занимать лавандовое масло. Другими словами, из одного галлона скипидара получится примерно кварта скипидарного масла, а из этой кварты выйдет чашка скипидарной смолы. Когда вы разбавите эту смолу до прозрачной консистенции лавандовым маслом, то получите чуть меньше кварты очень тёмного красителя с приятным запахом для вашего лака.
Руководство по изготовлению скрипичного лака.
Соберите стружку, опилки и обрезки сосны и клёна из вашей мастерской. Сожгите всё это до образования золы и, пока эта зола ещё горячая, бросьте её в воду. Если ознакомитесь со старыми рецептами изготовления мыла, то сможете определить концентрацию получившегося щелочного раствора. Получившаяся пропорция неважна за исключением тех случаев, когда воды слишком много - вы будете тратить время на выкипание лишней воды. Если же воды слишком мало, то вам будет трудно получить нужное вещество. После помещения горячей золы в воду запускается процесс превращения оксидов металлов, содержащихся в золе, в гидроксиды (щёлочь). Ёмкость должна быть открытой, чтобы использовалась и влага из воздуха. Холодная зола будет менее эффективной.
Как только у вас будет щелочная вода, вы можете приступать к изготовлению лака. Чем плотнее ваш щёлок, тем больше льняного масла и канифоли вам нужно будет использовать. Лучше всего планировать работу с галлоном лака. Это потребует галлон или два воды и полную лопату горячей золы. Доведите щелочную воду до кипения и поместите в неё измельчённую канифоль, объём которой будет эквивалентен трём квартам до полного её расплавления и растворения в щёлоке. Жидкость станет мутной или молочной из-за того, что щёлочь эмульгирует канифоль. Когда вы больше не видите ни одного куска канифоли и жидкость выглядит равномерно молочно, начните вливать льняное масло до тех пор, пока не выльете две кварты. Если жидкость всё ещё остаётся молочной, продолжайте понемногу добавлять канифоль и льняное масло с тем же соотношением до тех пор, пока жидкость не начнёт проясняться. Теперь вам надо избавиться от "облачности". Продолжайте добавлять канифоль и масло в той же пропорции. В процессе добавления канифоли и масла вы легко заметите исчезновение молочного оттенка и "облачности". Если ваш раствор приготовится до того как вы успеете внести ингредиенты в соответствующей пропорции, значит у вас было слишком мало золы. Я рекомендую оставить некоторый запас золы, чтобы бросить её в раствор если такое вдруг случится.
Если в лаке будет слишком много канифоли, звук будет немного ярче в начале эксплуатации инструмента, но лак будет склонен к растрескиванию и разрушению. Если будет слишком много масла, то в начале эксплуатации звук будет более тусклым, но со временем станет ярче после полной полимеризации масла. Лаковая плёнка при этом будет очень стойкой, но потребуется намного больше времени для высыхания, усложнится шлифовка и покрытие будет менее красивым. Такой лак подходит для мебели, но не для скрипки. По моему мнению, если уж и ошибиться в количестве масла, то лучше немного перелить, чем недолить. Старайтесь всё же сохранить нужную пропорцию. Имейте в виду, что доля красителя приходится на канифольную часть в лаке.
Как только вы получите нужный раствор, снимите его с огня и дайте постоять ночь. Если у вас есть такая возможность, то можете дать отстояться неделю или две. Чем дольше он отстаивается, тем яснее становится - пепел постепенно оседает на дно. Я беру его в работу через двадцать четыре часа.
Возьмите полученный раствор и извлеките воду. Единственный способ сделать это - прокипятить. Лак не кипит при температуре кипения воды, так что, как только вся вода испарится, у нас останется чистый лак. В этот момент следует довести лак до правильной температуры и поддерживать её, чтобы масло и канифоль идеально смешались. Старый способ определить нужную температуру звучит как: "Достаточно горячий, чтобы опалить перо". Держите лак при этой температуре до тех пор пока он не пройдёт тест шариком. Чтобы не сжечь лак на дне ёмкости, нужно его постоянно медленно перемешивать стеклянной или керамической ложкой. Древесина при этой температуре будет гореть, а металлы слишком сильно нагреваться.
Тест шариком.
При изготовлении лака, тест шариком имеет место быть, когда капля лака образует шарик. Помещённый между кончиками большого и указательного пальца, он липнет к ним обоим, а когда вы размыкаете пальцы, образуется тонкая нить-паутинка. Прежде, чем лак будет идеальным, он будет создавать шарик, но не нить-паутинку. В этот момент вы должны быть очень бдительны и постоянно контролировать процесс до тех пор, пока не получите нить, сохраняющую свою целостность вне зависимости от удаления пальцев друг от друга. Как только это произошло, немедленно снимите лак с плитки.
Разбавление горячего лака.
Я сразу же начинаю нагревать чистый скипидар до тех пор, пока он не начинает выглядеть кипящим. В то же время я положил ёмкость с лаком в холодную воду. В этом и кроется проблема. Лак, который легко размешивается при температуре более трёхсот градусов, становится всё более вязким по мере охлаждения. При комнатной температуре он будет похож по консистенции на мягкие ириски. Нужно влить достаточно горячий скипидар в лак до того, как он станет слишком вязким для смешивания. Это непростое дело. Вы не можете заново разогреть лак, не разрушая его, поэтому у вас есть только одна возможность. Здесь вам помогут термометры. Когда разница температур двух веществ не превышает пятидесяти градусов, они могут быть смешаны достаточно безопасно. Опасность состоит в том, что горячий скипидар может взорваться при вливании в слишком горячий лак. Вы должны иметь не меньше половины галлона горячего скипидара для первичного разбавления и ещё полтора галлона скипидара комнатной температуры для окончательного разбавления. Лак безопасно разбавляется второй порцией скипидара, когда ёмкость достаточно остыла для того, чтобы можно было кратковременно прикоснуться к ней голой рукой. До вливания второй порции скипидара этот лак будет иметь вязкость жидкого мёда. После окончательного разбавления я даю ему остыть.
После остывания следует разбавить лак до нужной вам консистенции. Слишком жидкий лак придётся наносить большим количеством слоёв, слишком густой будет тяжело наносить. Вот несколько характеристик лака для понимания того, как его следует разбавлять. Этот лак по сути - мягкое масло и он остаётся там, где вы его положили без потёков. Этот эффект происходит из-за большого содержания кальция, являющегося основным компонентом золы. Кальций же обеспечивает равномерное преломление света в лаковой плёнке. Принимая это во внимание, я предпочитаю лак консистенции свежего масла. При такой вязкости его очень легко наносить и он требует только три слоя чтобы закончить скрипку. Первый слой используется как грунт, второй создаёт равномерный слой, а третий и иногда четвёртый придают поверхности эластичность.
Лак образует на поверхности очень тонкую плёнку, так как он усаживается при высыхании. Это свойство является чрезвычайно важным для акустики скрипки. Лак, который не усаживается на поверхность, а просто лежит на ней, как большинство лаков, отрицательно влияет на акустику инструмента. После усадки лак прирастает к древесине и реагирует на вибрацию струн вместе с ней.
Под воздействием ультрафиолетовых лучей дерево подсыхает и одновременно с этим процессом сохнущий лак ещё крепче прирастает к поверхности. Когда дерево немного набирает в себя влагу в процессе эксплуатации инструмента, дерево расширяется и лаковая плёнка натягивается. Пластичность предотвращает ломкость, исходящую от твёрдости.
Если лак начинает пениться во время нанесения, то следует добавить к нему ещё немного красителя. Это ускорит сушку и сделает лак чуть темнее. Если лак не пенится - тем лучше. Не следует делать его слишком тёмным - он сам потемнеет со временем и будет выглядеть как инструменты великих мастеров, дошедшие до наших дней. Новый инструмент, имеющий тёмную отделку или искусственно состаренный, выглядит подделкой. Скрипки и виолончели, изображённые на картинах семнадцатого и восемнадцатого веков, имеют светлую отделку. Инструменты, сделанные мной тринадцать лет назад, приобрели более тёмный оттенок, сохранили прозрачность и до сих пор пахнут лавандой. Теперь они выглядят как хорошо сохранившиеся старинные скрипки, но при этом не настолько тёмные. Потемнение происходит из-за окисления древесины внутри скрипки, постепенно проникающей на внешнюю сторону.
Возможно, самая большая красота данного лака заключается в его парадоксальном происхождении. Отделка такой красоты была когда-то грязной жижей. Добавьте к этому тот факт, что лак никогда не полимеризуется в закрытой ёмкости и соответствует всем стандартам, по которым принято оценивать лаки для музыкальных инструментов. Неспроста многие люди приписывали заслуги лаку, говоря об удивительных акустических свойствах старых скрипок. Как их глаза могли лгать, видя такую красоту, когда услышанное ими было столь прекрасным?
Violin Varnish drying Carousel
INVENTED BY MARIANNE PLOGER
Marianne Ploger is perhaps the most important musical scientist in the world today. Go to www.marianneploger.com As you will see when you click on the above link, she is also an ingenious inventor. When I was puzzling about how to dry my violin varnish in a manner that would not require me to regularly turn my violins to prevent them from overheating, drying out and cracking, Marianne instantly suggested this solution. Marianne's invention is ingenious because it allows me to dry up to 6 violins at the same time. It is extremely efficient because it sets up in 1 minute. In fact it takes longer to hang the instruments from this set up than it takes to erect or take down the device.
By Keith Hill © 2015
My method is designed to make the job of quilling as quick, efficient, uniform, and reliable as possible. I structure it in a series of steps. Here is a list of the tools you will need: one voicing knife, one pair of flush-cutting nippers, one small smooth-faced pair of needle-nose pliers, a large jeweler's screwdriver, and a hardwood voicing block.
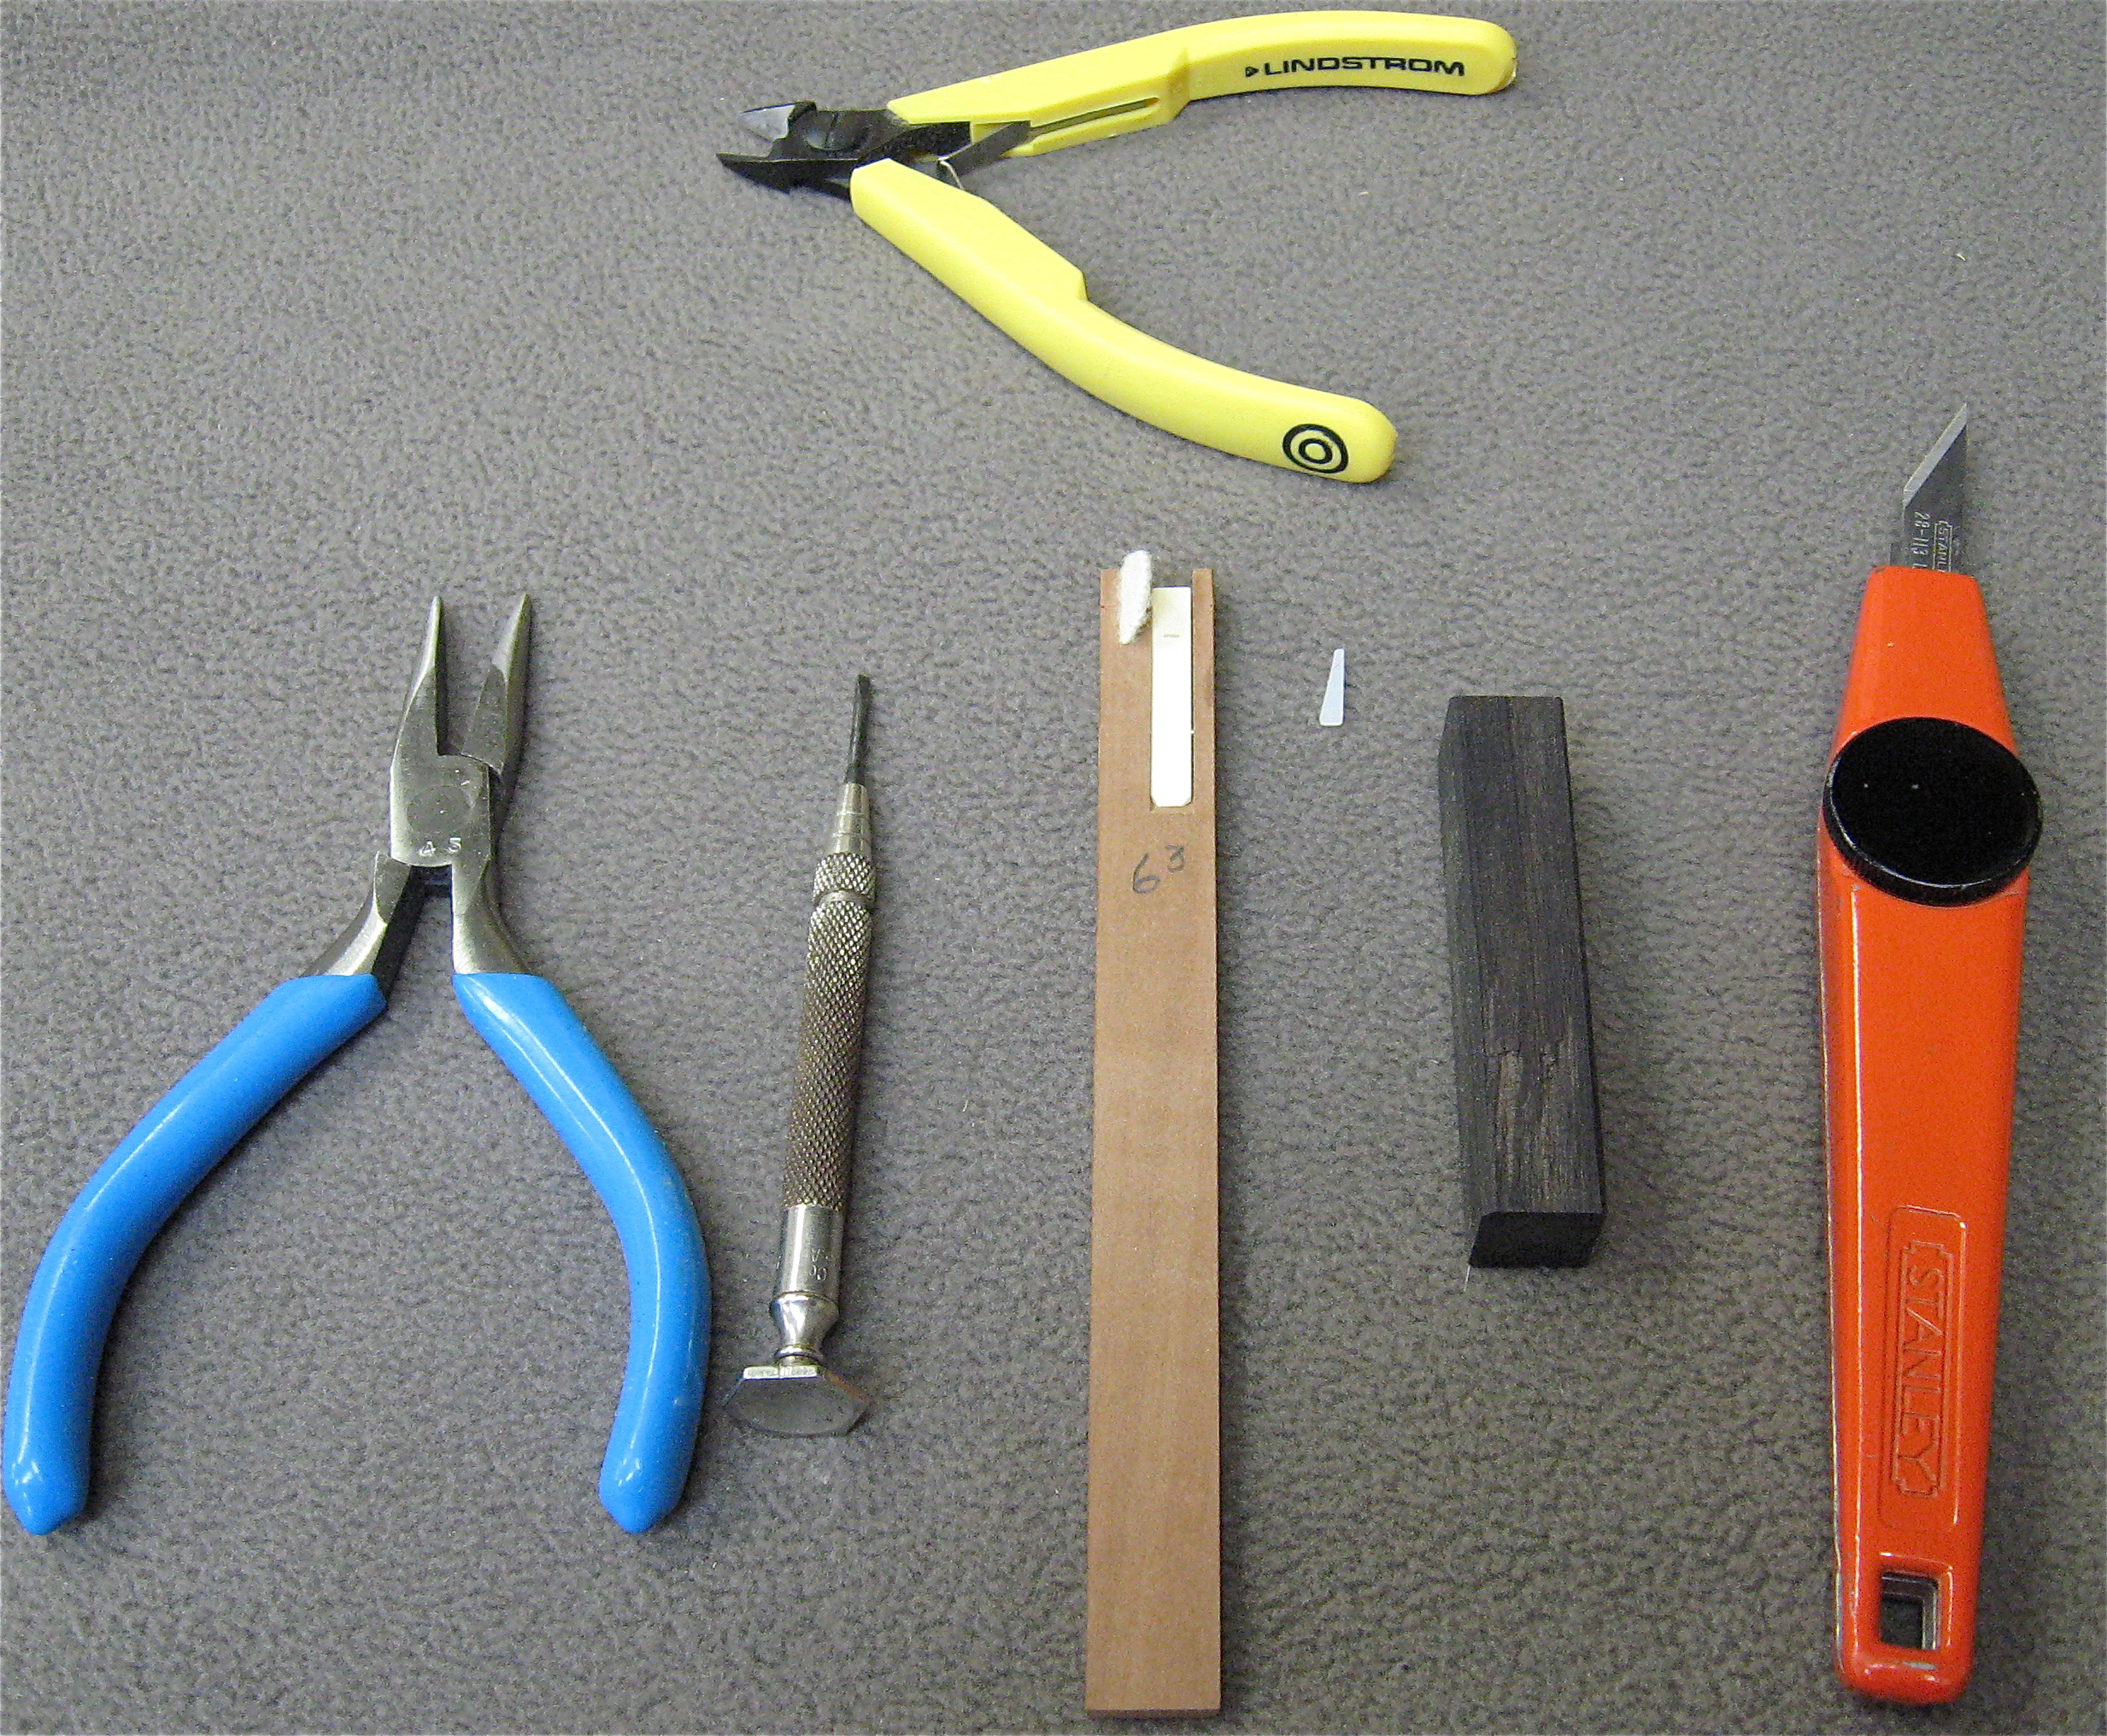
Step 1. Once you have a feather in hand, hold the feather with the top side of the feather facing you; tip up and base down. Beginning at a place where the shaft of the feather is wide enough to use as a plectrum, strip the feather by pulling on the feathery portion of the feather (called barbs) in a direction that is down, out or away from you, and across the back of the shaft of the feather.
The idea behind this step is to produce a feather that is stripped clean of everything except the main center stem or shaft of the feather without damaging the top surface of the shaft. You can tell the top or front from the back of the feather because the front is usually smooth, hard, and convex and the back has a U-shaped groove running down the center of it. You will be using only the top surface of the shaft for your quill plectra.
Step 2. Lay the shaft down on its side on a cutting board and using a sharp voicing knife cut into the side of the shaft, into the pith (a styrofoam-like material that is usually extremely white in color), and slice through the pith along the length of the shaft from the barrel of the quill to the tip. This will allow you to remove from the shaft the furrowed or grooved section which is the back of the quill.
The idea behind this step is twofold. One: you want to end up with the quill stripped of both the barbs (which grow off the side of the shaft) and of the back. Two: you want to pay attention to the quality of the pith as you are cutting it. The softer and punkier it is the less resilient the quill will be in the harpsichord. The firmer and more solid the pith is the more resilient the quill will be. Avoid using feathers with extremely soft punky pith for the eight foot registers--you may regret it. These feathers should be saved for quilling your four foot register.
Step 3. Now that you have removed the barbs and the back from the quill, snip the part of the tip end off just at the point where the quill is wide enough to fit snugly into the quill hole in the tongue.
Caution: if you try to insert a quill that is too narrow for the quill hole, it will probably fall out after a few plucks.
Then snip of the barrel or base portion of the quill just at the point where the barrel or hollow part at the base of the quill end and the pith filled part begins.
Caution: if you try to use any portion of the barrel for plectra you will find them weak and having no durability.
The idea behind this step is to end up with only what you will actually use for quills in your harpsichord. Everything excess is eliminated. What you should be holding at this point is a piece of feather which includes only the top portion of the shaft (the hard, smooth, convex portion) that also has some pith showing on its back side.
It is important to make sure that there is pith on the this strip of quill because the
pith is very useful in helping keep the plectra from slipping out once they are installed.
Step 4. If you are going to quill a whole register of jacks, repeat steps 1, 2 , & 3 on six to eight more feathers before going to step five.
The idea behind this step is that by having six to eight feathers prepared you can proceed to quill all the jacks by using each quill plectrum made following the next few steps, one to a jack for eight jacks, then doing the same thing over and over again. Gradually the quill gets stiffer and stiffer as it gets closer to the base of the quill. Stiffness translates into loudness. You want to have the least stiff quill in the treble and the most stiff quill in the bass. But you want to have the plectra stiff enough for each note, so it is best to try the volume level immediately after installing the quill into the treblemost jacks to determine if it is stiff enough.
Step 5. Remove, by slicing, the pith from the back or underside of the quill just at the tip of the quill. Do this so that the first 2 millimeters of quill have little or no pith underneath, so that the next 2 millimeters of quill have a little pith left underneath, so that the next 2 millimeters of quill have as much of the pith as they have of the top in thickness, so that the next 2 millimeters have yet more pith underneath, and so on up to 10 or 12 millimeters down from the tip.
Step 6. If the quill is just the right width for inserting into the quill hole, insert the quill into the hole in the jack tongue until is appears that you can not push it further with your fingers.
Caution: do not crush or bend the quill as doing so will render that bent portion of the quill useless.
If the quill is too wide, use a sharp knife to carve it down to the right size to get it into the hole to that it stops fast in the hole when the quill is long enough and the pith is thick enough to help hold the quill in place. It may take several attempts at first to learn exactly how to carve the quills to width to get it right the first time every time.
Do not under any circumstances shape real quill to a point.
If you do, you will invite an early failure of such shaped quills. ( Look to the section below called Observations on Quills, paragraph C for the explanation.) Instead, keep the quill as wide as possible.
Step 7. Using a pair of flush-cutting nippers, cut the quill off at the back of the tongue leaving about 2 or 3 millimeters of quill sticking out the back.
Step 8. Using a small pair of needle-nose pliers (that have smooth gripping surfaces--not serrated!), grab the end of the quill about 1 millimeter from the back of the tongue and push the quill in until the quill is securely fixed in the hole.
Caution: Always place a block on the side of the jack opposite the side you are pushing from and hold it firmly in place to prevent any accidents that might break the tongue.
It is easy to slip when pushing the quills either in from the back or out from the front. If you slip, you are likely to break the tongue. I don't think you want to do this.
Step 9. Insert the jack into its hole in the register and determine how much quill length needs to be either removed or added. To remove quill from the front of the plectrum, turn the jack up side down, place the quill on a small block of hardwood, then cut the quill to remove any excess.
To determine what excessive means, cut the quill to length so that the quill does not extend beyond the string more than the width or diameter of the string it needs to pluck. More than this is excessive. Less than this could make it unreliable. Sometimes the individual quill may need to have a bit more under the string than this. You need to observe how each piece of quill behaves and respond to what it needs to get the most out of it.
Step 10. Snip any excess quill off the back of the tongue. Anything over 1 millimeter of quill showing out the back is excessive. Should you need to extend the quill further, use a small screwdriver to push the quill through from the back.
Always reinforce the tongue against possible breakage with the voicing block when doing this.
Having done each step to each jack in the register, you are ready to voice.
by Keith Hill © 2012
There are only a few things to say about this.
1. It is almost impossible to make quill sound ugly. Voicing quill loudly makes the harpsichord sound loud but not more harsh. If you get a harsh sound, it is likely that the harpsichord itself is responsible for that effect. This means that you should voice the harpsichord mainly for the touch. However you think the quill feels to your fingers and hand should be the way to determine how loud the voicing should be. If you detest a tough feel, voice the instrument softly. If you detest a flaccid feel, voice the instrument for strength of sound.
Only you are the best judge of what is right for you.
Also be aware that the inherent quality of tone and the inherent volume of tone in the instrument itself is going to force you to voice for more or less toughness in the touch. The weaker the tone of the harpsichord, the tougher feeling the touch will be even for a soft voicing. The stronger the tone of the harpsichord, the more flexibility it will afford you to make those decisions for your self. The best harpsichords will let you do almost anything you want and it will work. I find that something which is too easy to play is often the most dangerous in a concert situation.
2. Quill voices very easily because of the layered structure of the top of the quill. You can slice away part of a layer at the tip of the quill or a part of a layer from the root of the quill or even a whole layer uniformly because the color of the quill changes with each layer. Also the layers slice or peel away without a struggle.
Remember this: Voicing is easy because of this structure but CUTTING the quill to length with the knife can be downright dangerous because it is so hard to cut. It is easy to slip off the quill while cutting it and run the knife into your fingers. So be careful about this.
3. If you make a mistake and take too much off the underside of the quill, remove the quill from the tongue and save it for putting into the four foot register.
4. I use the largest, most resilient quills from a bird for the rear eight foot register, the intermediate size quills for the upper eight foot register, and the smallest size quills for the four foot register.
5. The most exasperating problem one faces using real quills is the problem of hangers. This is a result of the structure of the quill. It is the soft, hence, rough pithy material on the underside of the quill that causes most of the problems. To remedy this, be sure to slice away all of that pithy material from the underside of the very tip of the quill with a very sharp knife before you proceed with voicing the quill. Once you have voiced the entire register then take out each jack one at a time and using an extremely soft leaded graphite drawing pencil, apply a heavy coat of graphite to just the underside of the tip of the quill. This will solve most of the hanging problems. Usually, the other cause for hangers then will be a tongue spring that is too taut. For this, ease the spring carefully so as not to ruin it.
6. Selecting the correct length for the quills in a register can be a problem for delrin but is almost never a problem for quill. No matter how short a quill may be, the touch is never unpleasant; as it always is for delrin. However, long quills sound weaker than short quills. So if you have strong quills, say from an Eagle, you can make them longer than you otherwise might have them be if they came from a Raven. When I proceed to work with Vulture feathers, I normally like to have the rear 8' register set up with quills that are 4,5 millimeters in length, the forward 8' register set up with quills that are 3,5 millimeters in length, and the 4' register set up for a quill length of 2,5-3,0 millimeters (in some cases they need to be shorter). These quill lengths I amend to be longer or shorter depending on the inherent strength of the quills I am using.
The touch becomes viscous feeling when the quills are too long and strong. When too short and strong, it tends to feel like snapping fresh twigs. The middle way is the best--very crisp yet somewhat springy, like a diving board, to the touch. Quills which are left too loud will wear out much faster than ones which are voiced more softly.
7. The last and most important thing to observe when voicing is the oiling. This is a procedure that should be done as often as is needed. The quills need to be oiled when they have been standing too long without having been played--they should not be allowed to dry out or they will become brittle and break. The quills need to be oiled after some time of playing when they begin to feel tough and begin to sound like they are getting coarse and loud without any apparent reason.
If you do not maintain your quills just as a bird does, that is , on a regular basis, the strings will start to eat into the plucking tip of the quill or they will embrittle and break.
If you look at your quills and they appear dry, they probably are.
You want to oil your quills with a small watercolor brush. Dip the brush into the oil and then attempt to remove all of the oil from the brush on the side of the oil bottle. Even then you want to make sure that the brush is dry enough before oiling the quills. Test the brush out on your finger nail. If it leaves a film, it is properly loaded for oiling your quills. If you can make it leave a tiny droplet on your nail, there is too much oil in your brush, dry it out some more.
It is better to oil your quills with a brush that is too dry than one which is too wet
A droplet on the quill may transfer to the string, damping the sound of the string, or it may leak into the tongue and travel down the tongue and get into the axle hole and gum that up.
Take notice: Oiling your quills is essential to living happily with quill but if you do not do it
with sensitivity to the consequences you shall surely have a non-drying oil all over your
harpsichord action. This may eventually necessitate replacing the entire action so be really
mindful when you are oiling the quills.
Note: the type of oil you need to use should be non-drying and relatively thin. A low acid vegetable oil would do. Your own body oil (from your forehead) is ideal. Goose fat might do although I have never used it. Lanolin might do also. I have never tried these. I use EMU oil.
8. Every action we take is the indirect result of an attitude or way of thinking we harbor. The way we think is directly responsible for our decisions. Our decisions determine our actions. How you think about voicing will determine what you do when you are voicing. The question is: what is the best way to think about voicing? I believe that the best way to answer this question is to look at both extremes of what voicing can be and decide how to best think about the issue.
At the most crude level of voicing you have no voicing at all. Everything's haphazard. Everything is without reason. Everything is unpredictable. Hence, everything is dangerous to play. If you came across an instrument set up like this, no doubt you would consider the results incompetent.
The exact opposite of this is an over-refined level of voicing. With such a voicing everything is completely regular. Everything is made to conform to a pre-conceived ideal. Everything is absolutely predictable. Hence, everything is perfectly boring. If you encountered an instrument voiced this way you would likely not pay much attention to the voicing.
In my opinion, both ways of voicing are flawed. The crude way of voicing is indeed incompetent because it is uncraftsmanly. But the over-refined way of voicing is equally incompetent but in a more deleterious way; because it is unmusical. It is unmusical because it is purposely monotonous. Anything which is even slightly monotonous will quickly put the mind to sleep. Is this a worthwhile goal for the finishing of an instrument of music?
The ideal voicing should enhance the differences in each and every note and should subdue the "sticking-out" effect that often accompanies this way of voicing. (If something sticks out, it really sticks out. It becomes the only thing the mind will notice.) Yet it should allow for the maximum control over flexibility of sound, as the player sees fit. The easiest way to think about this voicing is to imagine a row of twelve soft drink bottles, all having approximately the same size yet each having a different shape and color. This is how an ideal voicing should appear to the ear. [A crude voicing, using the same analogy, would have bottles of radically differing sizes, shapes and colors; each one breaking with a bang at the moment you play it. And an over-refined voicing would have bottles of the exactly the same size, shape, and color.] The crude voicing jolts the senses with each note. The over-refined voicing lulls the senses to inattention and finally to sleep. While the ideal voicing touches the senses in a way that seems natural and easy. In the end, its best justification for being is that it illuminates polyphony--highlighting each note in a line and giving each voice its special attention.
Some Observations about Quill
A. I do not recommend bothering to quill a mediocre harpsichord. It is so hard to tell the difference between delrin and quill in such an instrument that is largely a waste of time. If you can hear the difference in your own instrument and it convinces you then put it in quill, it will feel better if not sound better.
B. I have had no luck quilling plastic jacks with plastic tongues, maybe you will but I doubt it. The quill always falls out after a while. The plastic is too slippery to hold the natural material.
C. For any of you who might be concerned about the killing of birds just for the feathers, there is no need to worry. Birds lose their feathers every year. The process is called molting. The feathers can be harvested each year for as long as the birds are alive. I do this with my flock of geese which I raise specifically for this function. I give their feathers as inexpensive replacements to my patrons to augment their quilling needs.
D. If you are quilling a whole harpsichord, be aware that the process takes about twice as long to do as does the same thing with delrin. But, oddly, to make replacements for quill is much faster than for delrin.
E. I have used the word break to describe what happens when you have to replace a quill. Actually, quill never breaks. This is one of the most redeeming features of quill--it never truly breaks; it fails. Unlike delrin which always leaves a hole in the sound when it fails, failure in a quill means that the quill gets suddenly softer than the other quills. It will continue to play as it always has, it is just somewhat softer. In a really good harpsichord, the only one who might notice this would be the player, not members of the audience, because the note feels lighter and sounds much softer. Yet out in the concert hall, The sound appears almost the same.
F. The reason for why quill never breaks is because of its structure. The structure is made up of layers and layers of a hard fingernail-like substance. Each layer also has rod-like structures that seem to be in a direction along the length of the shaft of the feather. This twofold structure makes quill very strong for its mass. So when quill fails it will do so when a layer fails or when there is a split between the rod-like structures. Such a quill will continue to function, but only at about half steam. So players need never fear the loss of a note in the middle of a concert.
G. It is because quill is so hard when you attempt to cut it to length that you need to always keep the top surface of your voicing block fresh and clean. I do this by rotating the surface with each new cut and by avoiding having a new cut occur where an earlier cut was made. The reason for this is that the quill is flexible enough to follow the knife edge down into the old cut mark in the block. When this happens, the plectrum acquires a slight hook at the tip of the quill. I usually use several blocks to voice one register of quill ; after which I refresh the cutting surfaces with a file or a machine sander.
Others who have some experience with quill suggest the following:
H. Keep quill strips ready in a jar along with a bit of oil. I have tried this for some time and dislike handling the oily quill while installing it.
I. Playing with a brutal touch degrades quill faster than playing with a mindful, sensitive, relaxed touch. Where a harpsichord is exposed to the possibility of being played by players who sport a set of power chops, mercifully keep such an instrument in delrin. Players like that probably won't notice the difference anyway.
J. Quill is not for everyone. Where time and attention are hard to come by, delrin is ideal. When priorities other than harpsichord maintenance require your tender loving care, delrin is ideal. In a situation where no one is prepared to care for a harpsichord, delrin is ideal.
Conclusion
I hope that the thoughts presented here will encourage you to try using quill in your own instruments. It is worth your time and energy to investigate the use of quill. I do not yet have sufficient experience to determine exactly how long quill will last. But by the last report, some harpsichords which I quilled two years ago are still going strong. The owners report that even being used 8 to 10 hours a day 6 days a week, the quills are still playing and sounding beautiful. The reported casualties average one quill every two or three weeks divided between several instruments. Those who report multiple casualties are those who invariably have a casual attitude about oiling their quills or whose strings have rusted to the point of abrading their quills.
I also hope that what I have offered here has helped to dispel some of the mis-notions that exist in the minds of harpsichordists and harpsichord makers about using the original material. In our headlong plunge into authenticity, we clearly have missed something very important in this regard. Harpsichordists who are only acquainted with delrin and are unwilling to learn to live with quill are missing a very beautiful experience. Those whose instruments I have quilled find that they actually love working with the quill once they get to know it. Try it--perhaps you'll like it!
Here is a link to another site that has some good information based on experience as well regarding the oiling of quills. http://www.denzilwraight.com/quilling.htm
By Keith Hill ©2015
Though I have covered many points of quilling, both practical and philosophical, in the previous articles, I did not touch on the subject of voicing and regulation. This article is intended to amplify my above article in order to help harpsichordists and other harpsichord enthusiasts better set up their instruments and render them more playable.Too often, in music school, harpsichordists are expected to push the keys on the harpsichord and taught how they ought to play music but are never taught how to tune, voice and regulate their instruments. I consider this to be reprehensible behavior on the part of every professor and instructor of harpsichord who neglects this aspect of the craft of being a harpsichordist. By their neglect, they demonstrate how little they care that their students are fully qualified to tune, voice, regulate, and maintain their harpsichord when they graduate and become professional harpsichordists themselves. To qualify someone who is professionally crippled is unconscionable. The result is that too many harpsichordists are grossly unprepared to deal with maintaining and tuning their harpsichords, when they finally have to break down and buy one, and are forced to play catch up at a time when their career should be focusing on music making. Oboe players are all expected to learn how to make their own reeds. Often, the quality of their playing and hence their career hangs on how well they can master that aspect of the craft of oboe playing. It was the very first thing I was taught when I studied oboe playing in college. String players are shown how to change strings and tune their instruments, rosin their bows and to see to the correct position of the bridge on their instrument, and those who can't do those simple basic chores have no careers. What are they going to do when a string breaks in concert…call in a violin repair person? Harp players, too, are instructed in the care and maintenance of their instruments. But not harpsichordists, yet harpsichords are notorious for the amount of tuning, voicing, and maintenance they require merely to be moderately serviceable, despite every attempt in the past to make them tuning and maintenance free-attempts which only resulted in abysmal sounding harpsichords.CPE Bach wrote of his father, “The exact tuning of his instrument as well as of the whole orchestra had his greatest attention. No one could tune and quill his instruments to please him. He did everything himself.” (from the Bach Reader, p. 276)Negligence in this area of harpsichord playing instruction needs to be rectified. Quills break in the middle of a concert and it is the hapless harpsichordist who is faced with the matter of correcting the problem then and there. To not be able to do so is to be viewed by everyone looking on as gross incompetence.
Hopefully, this article will help players understand something about how to get a harpsichord both to play reliably and to feel comfortable to the hand so that every concert goes well because the focus is on the music and not on how bad the condition of the harpsichord is.Years ago, I was asked by a harpsichord maker colleague why it was so hard for players to keep harpsichords in perfect working order. My response was that it is never an effort to keep a wonderful sounding musical instrument in good working order. My thinking was that the better the instrument is, the more it inspires the player to keep it functioning in first rate condition.
Human perception tends to balance perceived effort with perceived reward. When effort reaps too little perceived reward, the effort is always viewed as excessive. When effort reaps much perceived reward, the effort is always viewed as manageable. And, when very little effort reaps huge rewards, the effort is always viewed as well worth the doing. During that same conversation, I also offered that the single determining factor for why harpsichords fare so poorly in the hands of those who use them is Fear. Fear of imagined complexity. Fear of imagined difficulty. Fear of imagined personal incompetence in dealing with things mechanical. All of which lead to hopelessness. But most of that fear is unwarranted. And here is why.
Point One: The most important point in learning to set up a harpsichord is to understand that no single action in maintaining a harpsichord is any more difficult than tying shoe laces or buttoning up a shirt. Both these require finger dexterity, good eye hand coordination, and patience…Hmmm!?! the same kinds of requirements as learning to play a keyboard instrument!!!
Point Two: Learning to handle a voicing knife is not much different than learning how to handle an ink pen. In the old days every person who could write was expected to be able to make his or her own pens. Just because that aspect of the writing craft has passed by the wayside, doesn't mean that every human being is incapable of learning how to do it. Who ever could write back then knew how to handle a pen knife, and this means that whoever could write was also able to voice and regulate a harpsichord. We are not dealing with Rocket Science here!!
Point Three: Do not use the excuse: “I am just not mechanically inclined enough to do this” Frankly, I am not mentally inclined to write, but I learned, and that is much harder to learn than how to hold a cutting tool, insert a quill, cut the end of jack, or glue a piece of paper…things which most of us learn in kindergarten. People learn what they have to learn, and unless they failed kindergarten, there is nothing particularly difficult in doing the job of setting up a harpsichord action. If learning is easy it usually means instruction was good or that you have a knack for learning whatever it is that you are learning in spite of good instruction. If learning is hard, it usually means that the instruction was bad or that you have little knack for learning easily what is being badly taught. And talent is merely the ability to learn in spite of what is either not taught or taught badly. Hard or easy, good or bad, learning is something the human brain is designed to do, yet resists doing, curiously, by any means possible. Learning is painful…get used to it. For those who manage to get used to it, to quote Bach, “All things must be possible”. Now that you have it clearly in mind how you need to hold your mind and attention, you can learn how to regulate a harpsichord.
Setting up a harpsichord action
Step One: Set the distance from the underside of the L/M 8' strings to the topside of the L/M 8' quills to exactly 1.5mm or 1/16th inch.
Rule #1: Always analyze the state of the action in front of you before you do anything.
The biggest mistake which people make when working on mechanisms, when they don't understand what they are doing, is to assume that the first thing which they see is the real problem. Usually, it is not the real problem, it is only a symptom. To cure the patient, you need to figure out exactly what is wrong or you may end up doing more harm than good. (But that is not a good enough reason to avoid learning to tune, voice, and regulate your instrument, whether you are a pianist, harpsichordist, organist, or clavichordist. If you insist on avoiding this work, then perhaps you should better stick to playing electronic keyboards, where all you are required to do is plug it in and punch keys.) I can't impress upon you enough the importance of always spending the time to determine exactly what is wrong with the action in front of you before you proceed to do something wrong that will cost a lot of money to fix later. In no way should this prevent you from actually doing the work yourself. Too often, the fear of doing something wrong is assumed as being worthy of a death sentence. Its not.
Remember! A harpsichord is only a piece of fancy furniture that has a mechanism which does something. Your task is to figure out what it is doing and make it do what you want it to do…not what it comes to you as…which is, more likely than not, wrong to begin with, unless the person making the instrument is expert in setting up harpsichord actions for master players. My task here is to help you understand enough to avoid doing anything glaringly wrong. The following are questions that you need to answer before beginning the work. 1. How much airspace is there between the top of the quills on the lower manual jacks to the underside of the strings which they pluck? This question is important because the Lower Manual (L/M) 8' is the foundation of the harpsichord. For those jacks to work properly, the quills have to be set, by whatever means necessary, so they set exactly 1.5mm (1/16th inch) under the string. If the lower manual jacks are set so that their quills or plectra are too close to the strings, they tend not to repeat reliably. If they are too far from the string, the key action needs to be deeper to accommodate both the Upper Manual (U/M) and the L/M 8' plucks otherwise the feeling you will experience will be “spongy”…tough and soggy…at the bottom of the keydip. 2. Are there screws under the keyboards, which are accessible from the bottom of the instrument which can be used to raise and lower the rear of the keyboards? If the instrument has been made to allow for easy regulation to control the distance between the L/M 8' quills and the strings, you should find a screw visible on the bottom of the instrument which, if you turn it, will cause the rear of the L/M keyboard frame to raise and lower. If you see one there, turn it to see if you can notice the L/M 8' jacks going up and down as you turn it in or out. If you don't find one, then do whatever it takes to set the L/M 8' quills so they set exactly 1.5mm (1/16th inch) under the string. Whatever it takes means WHATEVER IT TAKES.
The usual alternative solutions are: (in order of finality from most easily changeable to most final) 1. If the airspace between the Lower Manual 8' quills is larger than 1.5mm (1/16th inch), glue cardboard under the key frame to raise up the L/M keyboard until the airspace is about right or a little too close, which would make the quills be too close to the string, then cut those jacks down that are too tall. 2. Add a strip of cloth under the L/M keys to raise up the keys…this solution will require a total reregulation of the coupling mechanism if you do this, so do it only if there is a great deal of lost motion between the L/M coupler dogs and the underside of the U/M keyends. (I will discuss this later as well). If doing this requires you to cut down the coupler dogs, then remember that this is an extremely final action and you don't want to do it unless there is no other way that you can make the action function properly and bring it into the correct standard. 3. Glue paper, cardboard, or hard leather to the ends of the jacks to raise them up. 4. Cut with a knife or a chisel the ends of the jacks to lower them. Again, this is an extremely final action and you can't undo it except by using solution #3. However, if the distance between the tops of the quills and the underside of the L/M 8' strings is too close, and you have no way to lower the key frame of the L/M, then that is the best possible decision. 5. How even are the distances between the tops of the quills and the undersides of the L/M 8' strings? If what you observe is that the quills are totally uneven, so that the distances from the string to the quill for the jack on the bass-most key up to the jack on the treble-most key are all different, then you need to raise the jacks which sets the lowest and shorten the jacks which sets the highest until all the quills of the L/M 8' jacks set exactly 1/16th inch below the underside of the strings. Once you have set up the action so that the quills of the L/M 8' jacks are all sitting 1.5mm or 1/16th inch below the underside of the strings, you can turn your attention to the voicing of those quills. Until then concentrate on achieving that standard until you have done everything in your power to achieve it. You can eliminate wood from the end of the jacks by cutting with a knife or a chisel, or by filing with a file or a fine rasp, or by sanding or planning off the end of the jack. The method is not as important as the result.
Step Two: Set the distance from the underside of the L/M 4' strings to the topside of the L/M 4' quills to exactly 1.0mm or 3/64ths inch.When you have done whatever is required to get the 8' jacks set up so that the topside of the 8' quills are exactly 1.5mm or 1/16th of an inch from the underside of the 8' strings, and you have done whatever is required to get the 4' jacks set up so that the topside of the 4' quills are exactly 1.0mm or 3/64ths of an inch from the underside of the 4' strings, the next step is: Step Three: Cut the 8' quills to length so that they extend beyond the strings about 0.5mm or 1/32nd of and inch in the treble and about 0.75mm or just over 1/32nd of an inch in the bass.
Rule# 2: In analyzing harpsichord actions, remember that bass strings are under significantly less tension than treble strings and that they have significantly large axis of vibration than treble strings.
If the quills are too long and extend too far under the strings, the touch will feel spongy and thick. If the quills are too short and barely extend beyond the string at all, the touch will feel “chunky” and brittle. If the quills are voiced to be really loud, then they need to extend less under the string or the touch will feel like trudging waist deep in muck. If the quills are voiced extremely softly, then you will want them to extend further beyond the strings or the touch will feel imprecise and feather-triggered. By holding to the above standard, you will have, at very least, a more reliable and easy to play action.
Rule #3: Every instrument is unique and needs to be adjusted on its own terms.
A harpsichord which is not very good sounding also tends to be really difficult to get it to play well and feel good to play. The better sounding an instrument is the easier it is to get it to play and feel good. Your harpsichord, however good or bad it is, wants to feel good for you…how it feels to others to play is irrelevant. However, when you are using someone else's harpsichord for a concert, and you find that their solutions for getting their instrument to work for them are not at all how you would like the instrument to work for you, resist the temptation to work too much on the instrument with out asking the owner for permission to change the set up, assuming you want to do all that work for free, because everyone's idea of what feels good is different. Harpsichordists who fail to consult with the owner of the harpsichord and change the feel of the action without permission risk the possibility of never again being allowed to use that instrument for any future concert because changing the voicing, especially making the volume softer than what the owner likes, risks voicing the “life” out of the sound. It always leaves a bad taste in the mouth of the one who must live with what they may view as an “insipid” or “grating” voicing. If you need the instrument to play more easily than it currently plays, change the register screws in order to back the whole set of jacks away from the strings and then deal with the few that don't fire reliably. That is vastly easier to undo than replacing a whole harpsichord's worth of quills.Whatever you do on someone else's harpsichord, do it with their permission and consent…it is basic courtesy.
About Lost Motion
Piano technicians are the folks from whom I first heard about “lost motion”. This term is an oxymoron. It means exactly the opposite of what it purports to describe. It actually means too much motion resulting in reduced efficiency. When you correct “lost motion” in an action it means you get rid of every bit of motion that doesn't do anything in terms of making the action work. A harpsichord action in which the jacks are suspended from their dampers when the jack is at rest will have “lost efficiency” due to excess movement of the keys, which is any motion of the key that happens until the keys actually push up on the bottom of the jacks. If the jacks are at rest on the keys when the keys are at rest, there is no lost motion between the keys and the jacks…something which should only apply regarding the L/M 8' and sometimes with the 4' jacks.
Most antique harpsichords were set up so that the jacks were at rest on the keys when the keys were not being played. This translates into a feeling of instantaneous response for the player. However, if you make the mistake of having the upper manual 8' jacks standing, at rest, on the ends of the upper manual keys, the sensations will be one of thickness because the fingers can feel the excess movement of the jacks through their contact with the register holes. Upper manual jacks want to hang from their dampers for yet another reason. That is, when the keyboards are coupled so that the upper keys rise the moment the lower manual keys are touched and no sooner, the touch feels more transparent if the upper manual jacks are not sitting on the upper manual keys when those keys are at rest.
When the keyboards are coupled, there should be no motion at all of the upper manual keys while the manuals are being coupled. If you notice the upper manual keys moving however slightly, it is important to regulate the coupler by whatever means necessary to correct that problem. On the other hand, if you touch the lower manual keys, once the keyboards have been coupled, and notice that the upper manual keys are not instantly moving the moment the lower manual keys have been touched, then you will need to do what ever is required to fill up the space between the underside of the upper manual keys and the top of the coupler “dogs” (the projecting pieces on the lower manual keys which contact the rear underside of the upper manual keys). If you fail to set up the coupling mechanism properly, as I have described it, the action will feel sloppy and any regulating work you do will have to be corrected or redone (which can be very expensive because it involves a lot of time). The time to correct the excess motion in the coupling mechanism is any time before you begin work on voicing and regulating the upper manual 8' quills.
The brings me to the question of the ideal key depth. Some players like the least amount of key motion possible. What this means is that the harpsichord must be voiced to have no audible volume, nor any appreciable amount of quill contacting the string. As long as you don't play concerts for listeners, you can do whatever you like with your harpsichord. However, as soon as you take other people's time or money and play music which you expect them the listen to, it is a good idea to make the sound of the instrument loud enough so that they don't leave the concert feeling like it was a waste because they couldn't hear anything coming out of the harpsichord…one of the most common complaints from listeners about attending harpsichord concerts. I am not saying these things at all “tongue in cheek”. This is a serious complaint and one with which I overwhelmingly sympathize. If I can't hear the instrument in a concert, I just get up and leave, instead of politely sitting there and pretending that what is happening is somehow worth watching. Music is meant to be listened to and you can't listen if you can't hear. Some players even force people to listen by making the sound so soft that you have to strain to hear the sound-these players are a musical menace because those who take the trouble to attend a concert ought not be abused by being forced to exert their powers of attention just to hear the sound…the straining to hear becomes the focus of the concert not the music. And the notion that, “Well, the ear quickly becomes accustomed to the lower sound level!” does not justify abusing listeners that way. The fact is that the ear does not quickly become accustomed to the reduced sound level, it merely feels deprived and dismisses what is happening as irrelevant. When that happens, the listener determines to never again waste their time and money going to harpsichord concerts.
So think carefully about the consequences of whatever choice of key depth you establish for the set up of your harpsichord…it can make or break a career. It is the players who choose to play loud harpsichords who, at very minimum, make the listeners feel like they aren't losing their hearing. Before bringing “lost motion” and ideal key depth together conceptually, let me address one more matter relating to motion that doesn't do anything. Once the quill has released the string any amount of motion in the key is clearly not doing anything-so why not remove all that extra motion. Here is where the harpsichord is radically different than other keyboard instruments such as the piano, organ, and clavichord. On the piano, all the key dip, as it is called, is what is required to get the hammer up to the string, to strike the string and to then come to a complete stop the moment that all happens. Ditto for the organ and the clavichord. On a harpsichord, if you make the mistake of having the key stop the moment the quills release the strings, the touch feels like trying to breathe with someone standing on your chest and abdomen. Yes, you can still breathe but it is really hard work and gets tedious very quickly. The truth is that any motion in the key which occurs after the quills release the strings by plucking them translates directly into a feeling of freedom of breath. That is why I call this type of motion “Air Space”. No matter how forcefully or lightly you voice your harpsichord, anything less than 3mm of air space happening after the last quill has plucked its string in the overall descent of the key feels insufficient to allow for the fingers to “breathe”. Generally speaking, the more loudly your voicing is the more air space after the last pluck you need to have to create that effect of the hand or fingers breathing. Too little and the fingers feel like they are gasping for more air. Too much air space and the fingers feel like they are wasting their time or the touch is viewed as “chunky”. If you aim for a minimum/maximum of 3mm of air space after the last pluck, the touch on your harpsichord should make the fingers feel at ease with the business of engaging the plucks in a harpsichord touch. So Air Space is actually doing something extremely important. It is creating the feeling of breathing in the hand and fingers. Lost motion, by comparison, merely feels sloppy and incompetent. Once you have established the correct length of the quills and the correct amount of quill extending beyond the strings for both the L/M 8' and 4' jacks, proceed to voice the harpsichord according to your taste.
Step three: Voicing a harpsichord to your taste means cutting or scraping at the underside of the quills until you establish for yourself the kind of volume, resistance, and playability you require and prefer.
Rule #4: There are wrong ways to hold the knife used in voicing and there are right ways to do it. Learn the right way and you will never cut yourself while voicing and regulating your harpsichord.
The tools you will need for voicing are: one very high quality flush cutting knipper, one jewelers screwdriver, one very fine pointed needle nose pliers, one voicing knife of some kind, and one wood voicing block. I prefer the following tools for voicing: the FLUSH CUTTING knippers are a Lindstrom (Swedish) product with the yellow grips which you can purchase from outfits on line that sell tools for making jewelry and tying flies for fishing. The jewelers screwdriver, that is used to push quills that are trimmed at the back to increase the length at the front, should be about 1.5mm - 2mm wide at the blade. The needle nose pliers are used to insert quills (see photo) as well as grabbing the ends of the boar's bristles to crimp and insert them into the notch made to install and secure them in place.
They are also used to install plectra into the empty quill holes in the tongues, so I prefer these pliers to NOT have any teeth or serrations on the inside surfaces that could create a roughness to the surface of a plectra when it is being firmly gripped in the jaws of the pliers, which you must do when inserting the plectra into the quill hole in the tongue. The voicing knife I prefer is a Stanley Slimknife (0-10-590) and the blades suitable for voicing are 11-113. The voicing block is made of ebony, hard maple, oak, boxwood, granadilla, snakewood, ironwood, or some other extremely dense and hard wood is the best for the voicing block, which should be kept smooth, flat and clean to make cutting on it as easy and rapid as possible.
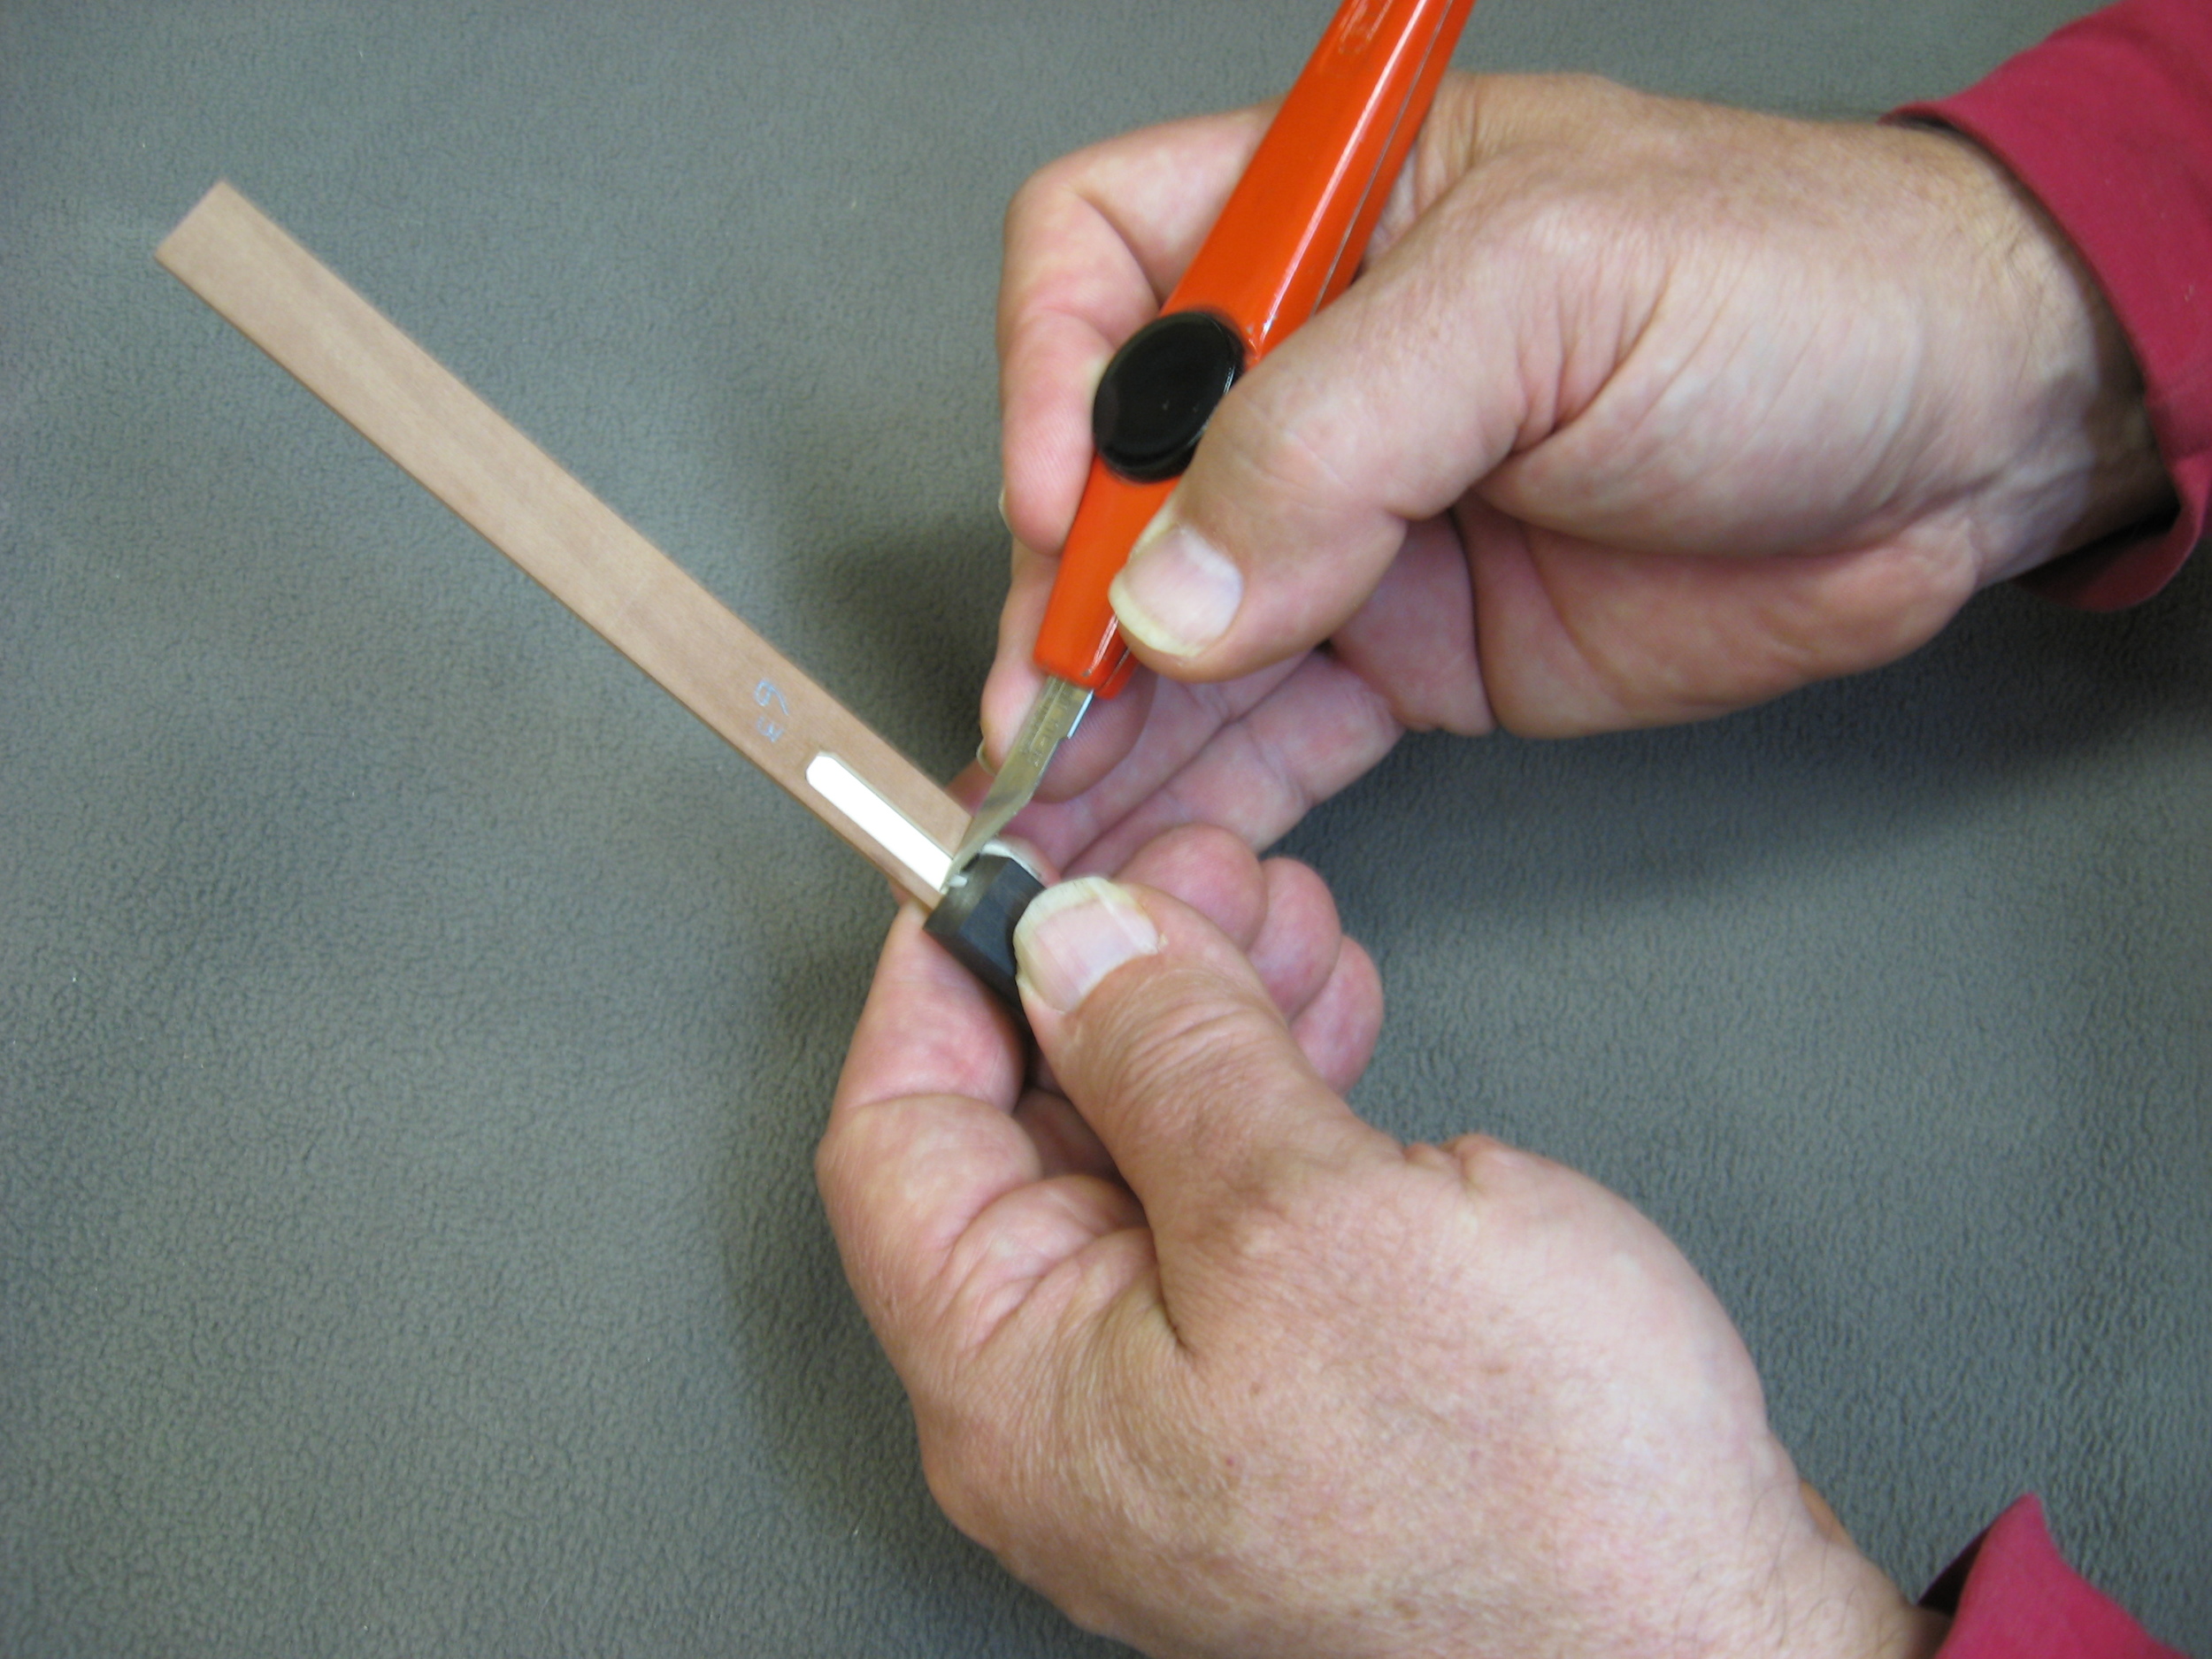
The photos show you exactly how to hold the knife and how to brace the hand which holds the knife so it never slips inadvertently and affords the greatest control over how the material is being removed from the quills. Those to whom I have taught this method of holding the knife and bracing the hand and voicing never cut themselves while voicing. It is fear of cutting oneself just before a concert that terrifies most players. So pay close attention to the exact manner in which the hands are held and learn that method and you will never need fear cutting yourself. I have supplied another photo showing what it should look like if you are left handed.

Notice that the knife is held by three fingers. The middle finger is used to support the knife and keep it from falling to the ground and to draw the knife from the root of the quill to the tip. The index finger is used to press the blade to the knife and to control the relationship between the cutting edge of the knife blade and the surface of the voicing block and how parallel the edge is to the surface of the quill. While the thumb is used to create a counterforce to prevent the knife from being drawn away from the root of the quill. The thumb is also responsible for changing the angle of the edge of the knife as to how much material is to be removed. This is because the thumb acts as a point for the knife to pivot upon.
Finally, the fourth and fifth fingers need to be extended down and are used as a “stop” to prevent the other fingers and the whole hand from lurching forward during a difficult cut…and event that can result in the tip of the blade going into and cutting the fingers of the hand which is holding the jack during the voicing process.

The jack is held against the voicing block as shown in this photo. When you hold your thumb against the voicing block as I have shown in the photo picturing the two hands in the correct position, you can not inadvertently run the tip of the voicing knife into your thumb…it is not possible unless you fail to brace the hand holding the knife using the fourth and fifth fingers extended in the proper position. That is the key to fearless management of the knife during the voicing procedure. I have supplied left handers with the photo (go back two photos) of what the same position looks like for them. The positional principles of how to hold the knife and how to brace that hand using the fourth and fifth fingers extended, and making sure that the thumb of the hand which holds the voicing block and jack is placed correctly may take about 30 minutes to get used to. But thereafter, once you experience how effortless it is to hold the knife, the jack and voicing block, and how controllable it makes the business of moving and manipulating the knife, you will appreciate having taken the trouble to learn the correct position of everything.
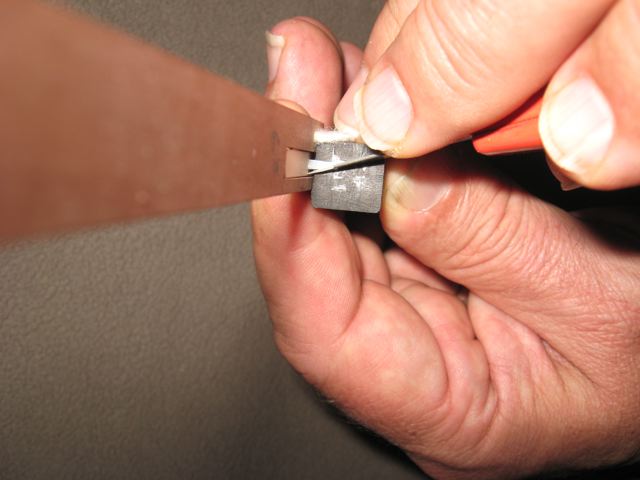
This photo shows how the knife is used to taper the quill lengthwise. Narrower at the tip and wider at the root.
The knife is positioned on the quill parallel to the undersurface of the quill in order to to shave from the underside of the quill. When shaving or scraping or slicing the quill on the underside, remember that the tip of the quill needs to be thinner than the root of the quill. The degree of evenness of the taper, governs to a great extent how pure the sound will be. Aim for a taper both in thickness and in width that is as mathematically as perfect as possible. Once you have that shape firmly in your imagination, then do whatever you like.

This photo shows how the knife is positioned on the quill to cut it to length at the tip.
The correct attitude for learning delicate work is to plan to throw away your first 5 attempts to voice and regulate your harpsichord yourself. If you insist on making your first attempts as perfect as possible, your self consciousness will be the main quality expressed in the sound you are trying to learn to create. Don't insist on perfection first time out. Rather insist on learning to feel comfortable, relaxed, and alert while managing all the variables…like juggling. Your aim should be for getting the feel of how to do the work. In time, as your standards rise with your competence level, the work will eventually be perfect the first time every time and, more importantly, you would have done it easily and fast.
Step four: Voicing
Voicing is the act of making each note sound as wonderful as possible for that note.
I will interject here a note of caution. Voicing is wrongly yet most often viewed as the practice of making every note sound as uniform in timbre and volume, and as similar in touch as possible. This standard is too often the cause of why so many keyboard instruments sound boring. Whatever is uniform is noticed by the human brain as the same and therefore not worth paying attention to. For the brain to notice two similar things is enough for it to guess that a third thing will be the same. As soon as that prediction comes true, the brain recognizes that it has no need to pay attention to those things, and it looks elsewhere for stimulation. Our brains do this without our consent and without our knowledge. You have to pay very close attention to such an event whenever it happens in order to realize how subtle the impulse is. If you choose to establish the pseudo-aesthetic of uniformity to the way you voice your instruments, be prepared to deal with the boredom it engenders.
Nature is always different and unique. Even twins have distinctly different personalities. If you have not noticed how distinct from each other even two similar things are, in nature, it would be worth your while to study this phenomenon. Then learn the lesson which nature teaches and voice your instrument so that you create as interesting and resonant a sound as possible on each and every note. If you do so, your harpsichord will sound more like the antique harpsichords, which is a good thing.
What I consider wonderful in a sound is a balance between purity and interest. Purity is never interesting, but it is superficially satisfying. Interest is never pure, but it is endlessly intriguing. What I believe is the most powerful aesthetically is when you can create a purity that is endlessly intriguing. If you make the mistake of aiming only for purity you will only achieve a saccharine boredom. If you aim only for interest you will only achieve an unsupported visceral curiosity. Purity supports the mind while interest holds it in place. That is why I aim for a balance between purity and interest. However, it is important that you do what pleases you most because you will be the one to live with what you do. The act of making each note sound as wonderful to you as possible is what voicing is all about, in my estimation.
The following instructions are more cautionary warnings about how to avoid doing things which will actually sound and feel bad.
Point one, Avoid cutting the plectra in ways which are irregular, crooked, or clumsy looking, both from a top view and from a side view. An irregular shape from either axis creates a sound that is coarse. A crooked shape, creates a sound that is weak. And something clumsy looking, curiously, feels clumsy to play. This is because these shapes of plectra contact the string in ways that are out of kilter and release the string in ways that set up a pattern of vibration that is impure (which sounds coarse and crude)
Point two, Avoid making the tip of the plectra too thick and the root of the plectra too thin. This results in a sound that is loud and light to touch but has no core and be more prone to breaking at the root.
Point three, Avoid making the tip of the plectra too thin. It is easy to make this mistake in an effort to quickly get a plectrum to sound the right volume, but the touch feels “chunky”. Furthermore, as such a plectrum is played over some weeks, it begins to curl downward at the tip, which can result in “hangers” (I will discuss hangers in greater detail later)
Point four, Avoid making the plectra too wide at the tip. A clean sound can not be achieved when the plectra are too wide at the tip. This is because the plectra actually damp the string even at the moment of plucking it, and the wider the plectra more of the string gets damped. The acoustical result is similar to trying to speak with a swollen tongue, everything sounds thick and garbled.
If the harpsichord you are working on has a particularly thin unresonant sound, then you can thicken the sound substantially by leaving the plectra as wide as possible at the tips. Be aware, though, that this will also create a sensation of thickness in the touch. So if the keys already have a kind of thick turgid sensation when played without the plectra plucking the strings, you may wish to avoid emphasizing that effect or the touch will end up feeling like trudging up to your hips in a mucky swamp.
This particular caution applies only to delrin or celcon, not to real quill, which needs to be as wide always at the tip as at the root. If you make the mistake of pointing plectra made of real quill, the result will be split plectra. That is, the quills will split longitudinally along the edges causing the sound to become very quiet and insubstantial. This phenomena is caused by the fact that real quill has a longitudinal structure of “rods” running through the “cuticle” (the smooth hard surface used to pluck the strings) and this structure accounts for most of the strength of the quill.
Point five, Avoid making the plectra too narrow at the root, unless the plectra are for the 4' register. If you are using delrin, it is useful to know that one of its mechanical properties is that it behaves exponentially. That is, if you have a plectrum that is one millimeter wide from the root to the tip, it will have a volume and resistance that we can call x. If you have a plectrum that is two millimeters wide from the root to the tip, and which has exactly the same thickness, it will have a volume and resistance in touch that is not 2x but 4x, or four times the volume and resistance. Similarly, if you have a plectrum which is 2 millimeters wide from the root to the tip, and which is a uniform one half a millimeter thick, you will realize a volume and resistance we can call x. Double that thickness and you will quadruple the volume and resistance.
Knowing that this is the behavior that you can expect, you can learn to avoid over thinning plectra, and avoid leaving them too thick. And you can learn that removing a really tiny amount of material can radically alter the volume and the touch.
Point six, Delrin, as it ages and is played becomes harder and stiffer. This effect is called work hardening. Also, like metals in which the structure can disintegrate, called fatigue, and break, plastics invariably will also disintegrate and break. This means that if you voice your harpsichord today, by a year from now, you will likely need to reduce the thickness somewhat to account for the increased volume and resistance in the touch caused by work hardening. This is a normal phenomenon with plastics. Also as Delrin is used repeatedly, the crispness of the tip of the plectra get worn down and rounded causing the sound be much more fundamental and “dark”. Oxidation also takes a toll on the durability of plastics, which embrittle because of it.
Point seven, The ideal shape of a plectrum is one which results in the maximum amount of volume, with the minimum amount of plectra noise, having the sweetest, least coarse timbre, and the lightest touch possible. This generally happens when the plectra are narrow at the tip, wide at the root, thinner at the tip getting thicker at the root, and which are perfectly graduated between narrow and wide and thin and thick.
Point eight, The touch resistance depends on the thickness of the plectra at the root and the amount of plectra which extends beyond the string at the tip. The thicker the plectra are at the root, the tougher the touch will feel to be. The further the tip of the plectra extend beyond the string, the longer the plectra will remain in contact with the string and the thicker and more lugubrious the touch will feel. If you aim for a touch that is crisp and light, that is considered by most experienced harpsichordists to be the ideal. However, some players like to have a feeling of resistance in the plectra which requires them to bang on the keys, because they consider sheer volume of sound to be more important for playing concerts than the test of purity and sweetness. Too often, they make recordings with instrument voiced in this manner and the sound is oppressively coarse and caustic.
Oppositely, other players like to have the least resistance possible and eschew every other consideration in order to have that result. In concerts, one can hardly hear such players because their instruments whisper, which causes listeners to fatigue from working too hard to hear the sound and to lose interest in what is happening musically. These are the two extremes. By voicing your instrument for the sound and touch that strike the happy balance between touch and volume, timber and resonance, interest and purity, you can create the best effect for whatever instrument you are playing.
Point nine, Some makers and technicians have a habit of cutting their plectra by beveling the undersides along the edges. The aim, I suppose, is to reduce the stiffness without also reducing the volume. Obviously, you can do anything you like when voicing your own harpsichord. There are no laws to violate and no penalties to pay other than musical ones should you choose to focus on minor issues such as stiffness and volume…the main error in what to consider in voicing.
Qualities to consider in voicing
I try to avoid thinking in uni-dimensional ways and consider voicing to control stiffness and volume as uni-dimensional. Why? Because the relationship between the fingers and the vibrating string is actually extremely complex. Voicing to control stiffness and volume only is like baking a cake and considering height of rise and degree of sponginess exclusively. A high rising cake that is moist and spongy but tastes flat and floury isn't worth eating. Likewise, a harpsichord that has a light touch and a loud sound, though better than one which has a heavy touch and a soft sound, can still have a flat development to the sound and be lacking in transparency, color, focus, vocality, robustness, delicacy, intensity, dynamic and depth (matters that can be influenced by expert voicing).
I aim for transparency of touch, for a solidity of sensation of connection between the finger and the string through the plectrum, for the degree to which the touch encourages a relaxed hand, for the degree to which the plectra reflect the intention of the mind of the player in the manner in which they release the string, for the amount of focused attention the plectra generate, for how interesting the moment of release of the string from the plectrum on each note is, and for the maximum possible feeling of security when playing. I expect each of these to be actually more important than volume or lightness of touch. Here is why.
If a harpsichord has no bloom, it is like listening to someone talking who uses no inflection in their speech. This is what computer generated speech sounds like. It is intensely boring to listen to. If a harpsichord has even the slightest trace of blooming behavior, that needs to be emphasized to the maximum degree. Failure to honor the bloom will have the effect of encouraging player and listener alike to stop listening…music doesn't happen when listening isn't taking place.
If a harpsichord does not have a vocal or human quality to the way the sound occurs, it might just as well be an electronic keyboard. Ditto for a piano, an organ, or a clavichord. It is not obliged to be a beautiful vocal quality to satisfy this requirement…after all, many human beings do not have beautiful sounding voices. But the most beautiful voice speaking in a manner designed to imitate computer generated speech loses all its allure. And some of the finest singers over the past 100 years have had voices that are downright ugly…Willie Nelson and Louis Armstrong. The problem with keyboard instruments is that they sound as mechanical as they are. Getting them to sound organic is the trick to making them sound interesting.
Harpsichords are notoriously thin sounding. Loud and thin is still thin. Therefore, getting them to sound robust and full, broad and deep should be your aim. At the same time, delicacy of sound should not be neglected. Delicacy of sound is like delicacy of mind. No matter the subject being exposed in a piece of music, the instrument wants to sound like someone who has given a great deal of thought to whatever it is that they are saying. If you voice in a manner that is designed to just get the thing working, no matter what, then what you have is what I would call a prevoicing. Prevoicing only tells you what the potential of the instrument is. Voicing is designed to maximize the potential qualities of each instrument.
What carries, over long distances, in the sound of a musical instrument is intensity. Without intensity there is no vividness. You can have intensity of timbre, intensity of fundamental, intensity of brilliance, intensity of bloom, intensity of resonance, intensity of tone, intensity of focus, intensity of volume, etc. Voicing rightly aims at maximizing as much of the intensity available in an instrument as possible. The alternative is vapidity and insipidity, two decidedly uninviting traits. (Such a sound is good only for “throwing on the ground and being trod under foot”.)
What engages an artist player most in a sound is the degree to which that sound is perceived to be capable of being altered while playing. An instrument which does only one thing, no matter how good it is has little to recommend it. It is better to have an instrument that has no perceived good qualities but which takes on whatever quality is in the imagination of a great player, than to have one which has a superficially great sound but which does nothing once you activate it.
These are all the qualities which, if you have them in mind when you are voicing, you can respond to, enhancing them the moment you recognize them in the sound. It is these qualities that make a sound fascinating. The more fascinating a sound is the longer you want to play or listen to it. You can't ask for more if you can learn to voice your harpsichord to be endlessly interesting to play and practice on.
Setting up the stagger.
Point ten: One of the curious problems in harpsichords is that the strings are plucked. This means you have always to consider how hard or tough you want the plucking to be and how much or little pluck resistance you are prepared to live with. This is further complicated when you have more than one set of jacks plucking more than one set of strings. If you have either a 4' jack and an 8' jack plucking simultaneously, the sensation is one of brittle chunkiness no matter how softly the plucks are. However, as soon as you “stagger” the plucking events so that one happens sooner and the other happens later, the result will be a much more smooth, less chunky touch. How close or separated the plucks occur is a matter of choice and preference.
Just because these are a matter of choice or preference doesn't mean that there isn't a right or best solution. The right or best solution is one that is the most natural. Finding that one right best solution is what you should be aiming for in the setup of the stagger. For me, that one right best solution is the perfect balance between volume and stiffness which includes all of the characteristics that I'm looking for. Depending on the harpsichord and its natural volume and string resistance. I stagger the plucks to create the sound: “pa-di-da”, as spoken rapidly but not super fast. This sound indicates the timing between the 4 foot pluck and the two eight-foot plucks. If you say “pa-di-da” too fast, and the staggering will be too close. If you say “pa-di-da” too slowly, then the staggering will be too far apart. The key is to say it in a rapid but natural manner. And then imitate the timing in the spacing of the plucks.
Naturally, there is a right way to play the key in order to create the sound “pa-di-da”. This involves learning to press the notes slowly enough yet smoothly enough and in a very controlled way to produce the sound. The key has to be pressed slowly enough to allow each one of the plucks to sound individually. Usually, when the plucks happened to close together, it is very difficult to isolate the plucks. This means that they're much too close. If it is too easy to isolate the plucks, it means that they're too far apart. What you must learn is how they must sound in sequence to produce that “pa-di-da” sound when the key is played smoothly and naturally yet at a reasonable speed
About “Hangers”
Point 11: Hangers are without doubt the most vexing problem facing a harpsichordist. The reason for this is that often it is extremely difficult to figure out exactly what is causing a jack to hang. So here, I must refer you to rule one, that is, take the time to analyze exactly what is happening before you do anything. Remember too, the real reasons for the cause of hangers is often extremely difficult to observe.
What follows is a list of the causes that I find most often result in hangers.
1. The quills are too long.
2. The tip of the quill has some kind of nit, pit, or obstruction that prevents the jack from returning underneath the string.
3. the springs or bristles are too stiff.
4. The damper is set too low.
5. The underside of the quill is too rough.
6. The jacks set too high, which puts the quills too close to the undersides of the string, so the jack and the quill cannot return under the string reliably enough.
7. The posts on either side of the tongue bend inwards causing the tongue to be pinched.
8. The axle hole in the tongue was drilled in a manner allowing too little tolerance such that when the humidity rises the wood swells binding on the axle pin.
9. Crumbs of some kind have fallen into the action causing the action to freeze.
10. Crumbs of some kind have fallen onto the registers and lodged themselves between the jacks and the holes.
11. Rust on the strings cause the quills to drag on the string preventing them from returning.
12. Jacks swell in the register holes due to excessive humidity.
13. The key under the offending note is not returning properly or completely.
14. The quills or plectra are angled downwards.
These 14 causes each individually can result in hangers. You can sometimes find these causes happening in multiples or “clusters”. What follows is a short explanation of each cause and how it's causing the jack to hang, followed by the appropriate solution to solve the problem.
1. The quills are too long. Quills that are too long invariably have trouble passing around the string as the jack descends. Quills that are too short and sometimes misfire by not plucking the string at all. You need to find the balance point between the quill that is short but not too short and long enough but not too long. When the quill is too long, cut the tip to shorten the quill. This may sometimes necessitate scraping or slicing away a little bit more from the underside of the quill to make it less loud, because anytime you shorten the quill you make it stiffer, and stiffer translates into louder.
2. The tip of the quill has some kind of nit, pit, or obstruction that prevents the jack from returning underneath the string. Any underquill obstructions will result in hangers. The solution is to remove the obstruction by whatever means necessary.
3. The springs or bristles are too stiff. This can be a very tricky problem to solve. Take springs or bristles that are too stiff and reduce some of that stiffness by shortening the length of the bristle or the spring from the top at the rear of the tongues. This changes the point of bearing of the spring or bristle against the back of the jack by lowering it. It also assumes that the rear of the tongue has a channel carved into it for the springs which are curved in a manner such that the springs or bristles lean out towards the rear of the tongue. A spring or bristle which is “flat bearing” against the back of the tongue, as one sometimes sees in antique Italian harpsichord jacks, will not be changed substantially by lowering it. If you attempt to reduce the tension of the spring or bristle by pulling it backwards away from the back of the tongue, you will likely over bend the spring or bristle thus ruining it. If cutting down the spring or bristle does not solve the problem, then it is better to replace the spring or bristle with one that is thinner and has less springiness to it.
4. The damper is set too low. The solution is raise the damper until it allows the jack and quill to slip past the string, but still damps the string after that action has occurred.
5. The underside of the quill is too rough. Scraping the underside of a Delrin plectrum will result in a rough surface. Therefore, make sure to remove any roughness from the underside of the quill, caused by the knife chattering as it scrapes the underside of the quill, by slicing it with a sharp knife to ensure that the underside of the quill is not too rough.
6. The jacks are set too high. Reduce the setting of the jacks, first by seeing if there is a regulation screw under the keyboard on the underside of the instrument, and only then, assuming there are no keyboard regulation screws, cut down the jacks. Remember, soundboards swell in the summer because of humidity and shrink in the winter due to lack of humidity. Anytime you cut down the jacks during the winter you risk having the jacks be too far from the strings in the summer. This is not a problem if you have regulating screws under the keyboards. But it can be a serious problem if you do not have them. Any time you cut the jacks, you must treat it like a final solution because it's very expensive to undo. If you have a harpsichord that was set up in the summer, and there are no keyboard regulating screws, and in the winter the soundboard shrinks and the strings are lowered as a result, you will be obliged to cut down the jacks to make them shorter.The business of cutting the jacks should be done by somebody who feels comfortable handling an extremely sharp chisel. Avoid removing more than 0.5mm at a time, repeatedly checking to see if the work is correct or not. This work can also be done by sanding which takes a long time, or filing which takes less time but still takes much more time than it would if the ends of the jacks were cut with a sharp chisel.
7. The posts on either side of the tongue bend inwards causing the tongue to be pinched. When the tongue is pinched between the posts the best remedy is to insert a narrow knife blade between each post and the tongue. This usually produces enough space between the posts and the tongue to allow the tongue to again move freely.
8. The axle hole in the tongue was drilled in a manner allowing too little tolerance such that when the humidity rises the wood of the tongue swells up, causing it to bind on the axle pin. Sometimes you can ease the axle hole in the tongue by grabbing the tongue firmly between your thumb and index finger on one hand, grabbing the jack in the other, and rotate to a very slight degree the tongue on the axle. Be careful not to be too extreme as you rotate the tongue or you could break it. If you have too many tongues that are binding, you will need to call a technician to come in and remove all of the tongues from the jacks, redrill the axle holes to a larger dimension, and replace the tongues into the jacks.
9. Crumbs of some kind have fallen into the action causing the action to freeze. Correcting this requires that you remove all the jacks and the keyboards and get rid of all the crumbs inside the instrument. This is usually a problem of new harpsichords that have not been properly cleaned prior to being shipped or released from the workshop. It can also happen to older harpsichords that have not been properly cleaned as part of routine maintenance. The solution is to clean the harpsichord completely, check every jack to make sure it has no crumbs between the jack body and the tongue, and make sure that there are no crumbs lodged in the registers.
10. Crumbs of some kind have fallen onto the registers and have lodged themselves between the jacks and the register holes. If you've properly cleaned the harpsichord as suggested above, then you should have nothing to worry about in this regard.
11. Rust on the strings cause the quill to drag on the string preventing it from returning. The solution here is to clean the string. If not the whole string, then at the very least the area around the quill and a damper. This can be effectively done using an ink eraser on the end of an ball point pen.
12. Jacks swell in the register holes due to excessive humidity. If this is a problem, there are two ways to correct this. One way is to sand the jack down until it's thin enough to no longer bind in the register hole. The other way is to file the register hole open ever so slightly. Be careful when doing this last, because you can easily make the hole too large causing the jack to be sloppy in the hole.
13. The key under the offending note is not returning properly or completely. There are only two reasons why a key will not return properly or completely. Reason one, is that there are crumbs between the keys or under the keys or under the cloth under the keys. Reason two, is that the wood somewhere has swollen to the point where the freedom of motion of the keys has been partially or completely restricted. The solution is to carefully file opened those points of bearing that have become swollen shut. The usual point of bearing that swells shut is the balance hole. When filing the balance (mortise) hole to be more open, do not file the hole from the top of the hole but rather from the bottom of the hole upwards. In other words, don't file the top of the hole open any further than you must to get the key to work. Usually, the problem needing filing is further down inside the hole. Therefore, work in that general area before opening the top of the whole anymore than it already is. You can also spread graphite, using a soft pencil, as far into the balance hole as you can reach. Be sure to do this on both sides of the hole. Another point of binding may sometimes be where the keyboard guide pins are binding in the back rack, or if the keys are guided at the fronts those holes need to be “eased” and/or graphited.
14. The quills or plectra are angled downwards. There is only a temporary solution to this problem. That is, bend the Quills upwards if they are plastic. With Delrin or Celcon plectra, the bulk material will often have a grain and manufacturing curve or “ribboning effect” which gives the plectra a distinct curvature. Make sure that that curvature is tending upwards. The best long-term solution is to replace all the tongues. Harpsichord makers who make instruments with this defect need to assume responsibility for replacing the tongues or the jacks whichever is most expedient. Downward angling plectra in a harpsichord is a harpsichord full of hangers waiting to happen. If anything, makers should be making jacks in which the upward angle of the plectra is greater than 5 but not more than 9 degrees. Makers who supply jacks in their instruments in which the plectra have no angle are basically supplying instruments in which the quills will all eventually be pointing downwards. This is because constant plucking causes the plastic of the quills to assume over time and playing a downward angle.Finally, I can't emphasize enough the importance of seeking out and discovering the true cause for why hangers happen. You can make error after error in hunting down the real cause before you actually stumble on it. Use the list of possible causes which I have provided you with and look for each cause on every hanger before applying the right remedy.
Conclusion
I know of no set up for a harpsichord that will ever compensate for a bad touch. In my view, there is only one right way to touch the harpsichord when playing it. That one right way imitates as closely as possible the manner in which a bird flaps its wings. For this reason it is imperative for every person playing harpsichord to study in slow motion if possible the nature of that action.
What does a bird flapping its wings have to do with a fine touch on the harpsichord? Well, harpsichords were originally all quilled in bird feathers. What I have found over the years is that when players play on harpsichords quilled in bird feathers and they don't play in a manner that imitates how a bird flaps its wings the quills don't last very long. I have also found that when players play on harpsichords quilled in bird feathers and they do imitate how a bird flaps its wings when they're performing or playing on the keys the quills tend to last a long time.
It is interesting to note that the descriptions of the manner in which Bach played on the keys accords perfectly with the description that I have provided below of playing the keys in the manner of how a bird flaps its wings. The descriptions provided by both Couperin and Rameau for how to touch the keys of the harpsichord also accord with this manner of playing that I have described.
A bad touch on the harpsichord is any way in which the key is depressed by the finger that does not accord with how a bird flaps its wings. Too often, what one hears in harpsichord playing is not only a bad touch but a miserable touch. This indicates that the player is not really listening to the sound of the harpsichord at all. For if the player were listening, he or she would hear how bad the sound is. Playing a harpsichord in a manner that accords with how a bird flaps its wings will always produce the best sound possible, no matter the quality of the harpsichord.
When playing the harpsichord in a wrong way, there is usually too much airspace between the underside of the fingers and the tops of the keys. And, the motion of the fingers is non-accelerating, being instead instantly in motion, hitting the top of the key with an impacting touch. This kind of motion “throws” the quill against the string causing the string to sound abrupt and coarse. The more coarse the sound produced, the more miserable the touch of the player is.
To play in a manner that accords with how a bird flaps its wings means: 1.) keeping the hand in constant contact with the keyboard, meaning no airspace at all between the bottoms of the fingers and the tops of the keys. 2.) Never raising of the fingers higher than the tops of the keys at rest. 3.) Never lifting the arm and the hand to bring it down forcefully on the tops of the keys when playing. 4.) Holding the hand in the shape of a ball when playing and drawing the tips of the fingers in an arc towards the center of the palm. 5.) Keeping the hand, the arm, the shoulder, and the fingers in as relaxed and poised a condition or state as possible in order to preserve flexibility and agility. 6.) The fingers should be moved in a manner which accelerates from its point of rest to the moment that the quill plucks the string after which the finger gradually decelerates to complete the arc. 7.) All these actions should happen in a smooth continuous flowing manner.
Players who adhere to this method of touching the keys of the harpsichord will always produce the best sound possible.
by Keith Hill ©2015
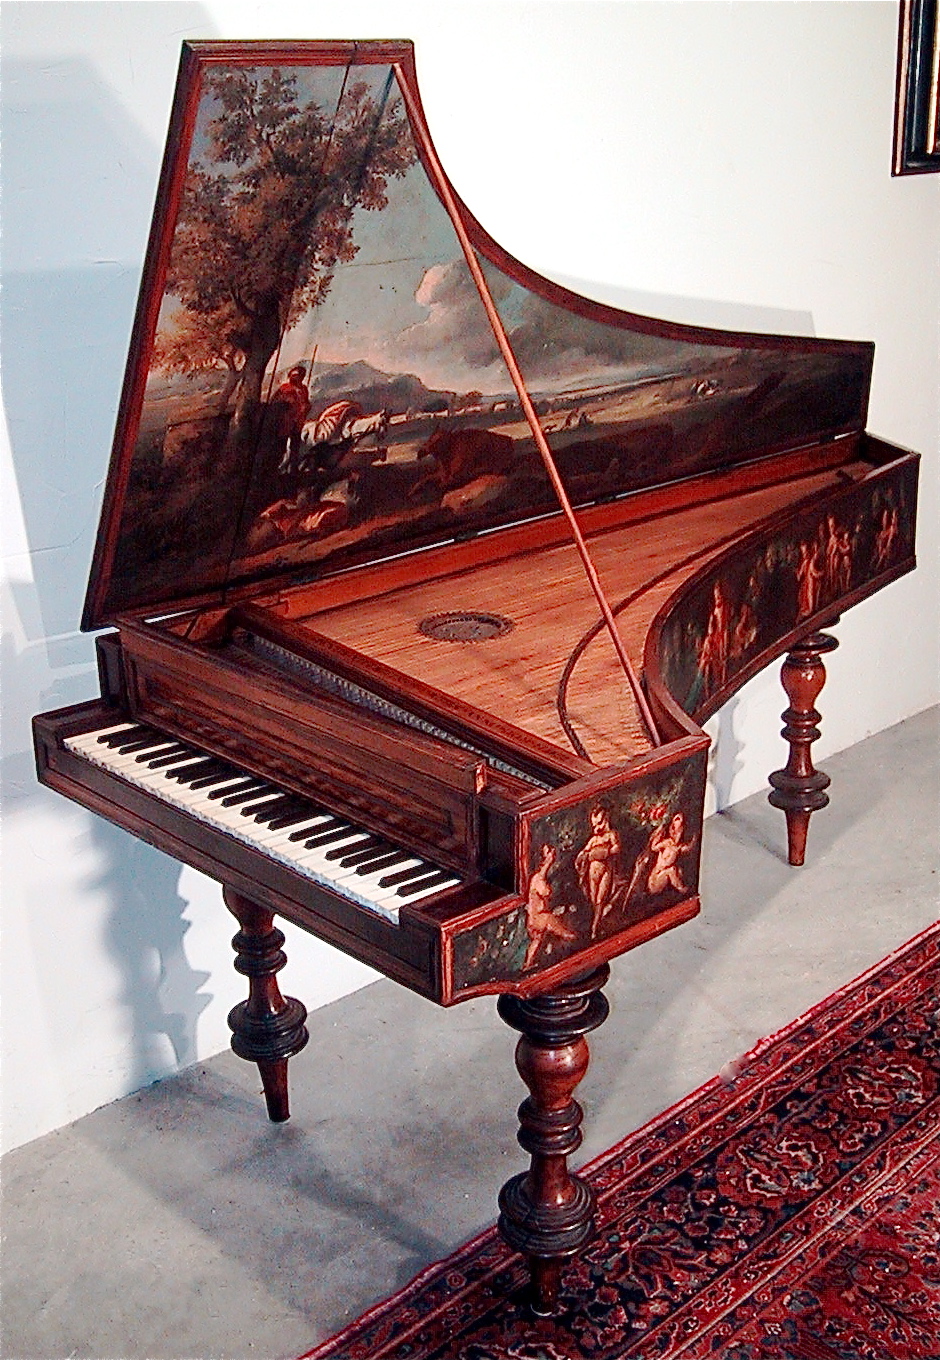
This gem of an instrument used to belong to the New York Metropolitan Museum of Art instrument collection. For some unknown reason, they sold it, probably because some expert there didn't think it "looked" authentic. I was fortunate enough to acquire the instrument from the person who acquired the instrument from the museum before it got "restored". I recognized the instrument as being the work of an acoustical master from the moment I first saw it, even though it was totally unstrung. Everything I have learned over the last 33 years has taught me that one can determine the quality of the acoustics of a musical instrument by knowing exactly what to hear and what to listen for. One need not even play the instrument. Indeed, my subsequent restoration of the sound of this instrument bore my initial judgment out. This harpsichord is extremely charming in sound. I have never heard another harpsichord that I can call more charming. The sound is so "disarming", to use one listener's word, that it lures you into the sound with little capacity to resist. The treble sounds like a voice of an angel. The midrange sounds like a lute. And the bass sounds like a great bass/baritone singer. The sound is so glowing that you can almost "read" by it. I have never heard another antique harpsichord which compares in quality to this particular instrument.

This is the decoration on the spine side of the instrument
Obviously, the instrument had not been truly playable since perhaps the early part of the 18th century. It was passably rejuvinated in Rome by an Englishman who put it into saleable condition for being snapped up by a collector. That person claimed, in a note revealed during the restoration I did, that the decoration on the sides of the instrument were done by one Francesco Albani (d.1662) four of whose paintings hang in the Hermitage in St. Petersburg.

Willard Martin did some interesting research on De Zentis and said he thinks the instrument may have been built by De Zentis for Queen Kristina of Sweden when she abdicated her throne, converted to Catholicism, and moved down to Rome to live near the Pope around 1656. Everything I found during the restoration I did on this instrument suggests that Willard may be right. The instrument was built as a super rush job. De Zentis was probably sent ahead by the Queen to make sure she had an instrument waiting for her. He clearly used a preexisting instrument of extremely high quality construction as the knee braces throughout the instrument are beautifully dovetailed into the bottom and into the bellyrail. The liner had two complete sets of hitchpin holes. The treble half of the soundboard also had two sets of hitchpin holes, but the bass half of the soundboard only had one. That means De Zentis probably used an instrument, made of cypress, one he had built prior to moving to Sweden to work for the Queen as her private instrument maker. He

Queen Christina as painted in 1661 by Abraham Wuchters
stripped away the moldings and, in the manner of the northern makers, glued a spruce core to the outside of the original harpsichord. Then, because the instrument needed to be made as fit for a queen as fast as possible, he took a gorgeously decorated harpsichord case (probably made in Naples) resawed the painting off the sides and glued that outer 3mm of poplar with the case decoration on it to the outside of the spruce core. Not wanting to destroy any of the gorgeous painting, he added (crudely) a bunch of blocks to the underside of the instrument to extend the instrument's width in order to accommodate the poplar veneer and its decoration. To make the whole thing appear elegant, he sculpted the underside at the front and trimmed out the entire instrument in moldings following all the curves. This touch as well as the "strange"looking legs are clearly inspired by ancient Roman wall paintings in which one can see depicted furniture which has the same aesthetic details as the curving moldings and the style of legs used on the instrument.
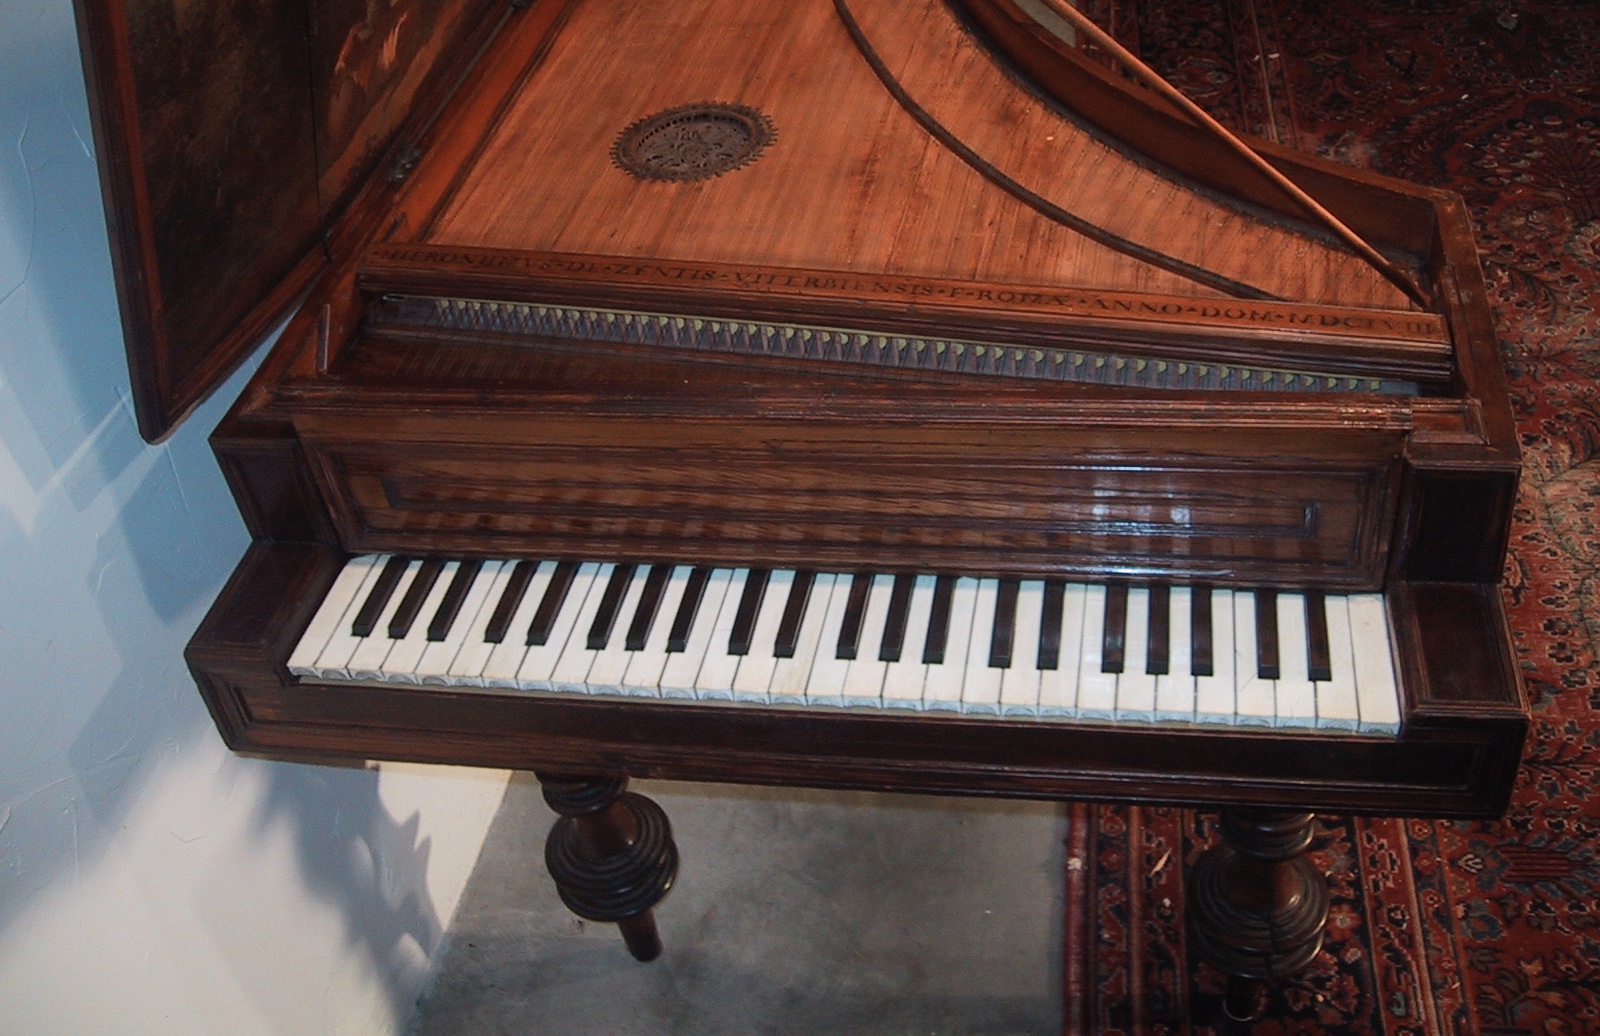
The decoration of the cheek, bentside and tail is different than what is on the spine (an exquisitely painted hunting scene). I suspect that there was another hunting scene on those surfaces as well, originally. But on seeing the hunting scenes, the newly converted and devout Queen probably had De Zentis find a competent artist to cover that decoration with what is now on the sides...Putti and swags of flowers supported by grotesques.
What follows is my offer of a new opportunity, which if you are young and passionate about making musical instruments, would merit your close attention.
When I began building harpsichords, this business was, as it still is, dominated by the idea that if you make an exact physical copy of an antique harpsichord or violin (the model having been selected because its musical and acoustical properties were generally accepted as being musically superior), then the resulting instrument should sound exactly like the original would have sounded.
Everyone seemed to think that this was a good idea. Yet, when the results of such instrument making were compared to the original instruments, the antiques sounded so much better as to make the copies of them appear acoustically inept, musically incompetent and on the whole, aesthetically mediocre. Apparently, this vast discrepancy didn’t seem to bother anyone but me. A few, not instrument makers but players, knew the difference but still had to play on the new instruments. The reason why this chasm failed to dampen almost everyone’s enthusiasm is that they accepted the conventional wisdom.
That conventional wisdom was that antique instruments were thought to sound better because they are old. Modern instruments were and still are generally acknowledged by connoisseurs to be radically inferior to the antiques…like a faded photograph compared to the real thing. Yet, so many of the ancient instruments are clearly better sounding in every possible way than modern made instruments. The easiest answer as to why is that the antique instruments have had 200 years of aging to improve their sound.
Here, the aging metaphor was being misappropriated, even by famous musicians, from the wine making industry. It is an “explanation of convenience” which seems, as far as I can tell, to have absolved musical instrument makers since the 19th century of the obligation to do anything more than making their instruments by first taking careful measurements of a famous antique “master” instrument and then reproducing those measurements using as similar materials as possible to the original instrument. When the sounds of their instruments didn’t turn out as good as the originals, they rested on the hope, no, the expectation that in 200 years their instruments were going to somehow magically sound absolutely fabulous, like the great antiques sound today. I actually heard this being spouted by several harpsichord makers and violin makers. One even said: “I make as exact a copy of the original as I can. If it doesn’t turn out (sounding as good), it is not my fault.”
This arrogant attitude presumes that the best makers of previous centuries were content with making an instrument, just like instrument makers do today, in the hopes that it would show over time to improve with age until it became a great sounding instrument. What astonished me at the time is how many of my colleagues swallowed this way of thinking hook, line, and sinker. At the time, I instinctively rejected this notion but had no evidence to substantiate my radical view.
Fortunately, a visit to the Russell collection in Edinburgh in 1972 provided me with ample evidence that this notion was false. There, where harpsichords from every period and country could be heard and played, is also where that conventional “wisdom” may be observed to be glaringly wrong. If age is what made a musical instrument good, then instruments made in 1585, clearly, should be that much better sounding than instruments made in 1668…after all, they had over 80 years more to improve…but they are not better! The harpsichord made in 1720 should, by that false reasoning, be better than the one made in 1769. But it is not! Logically, any exception to that notion meant to me that the notion was totally false. That has proved to be the case. And if this notion is totally false, then it makes thinking that it is true to be exceedingly arrogant, because it assumes, without any proof, that the best ancient makers were as clueless and ignorant as most instrument makers since the 18th century.
My visit to the Russell collection revealed to me the following fundamental truth; makers who built the best sounding instruments did so because they knew exactly what they were doing and did everything in their power to make their instruments to sound as wonderful as possible right from the moment the instrument was made. It was nothing magical, nothing having to do with the aging process of wood, no "mini iceage", no "holy" varnish, no mystical intuitive talent of some blessed makers that they were able to build instrument after instrument of exceedingly high quality. Those makers who built the best sounding instruments did so because they mastered acoustics. It is as simple as that.
The consequence of this realization for me was that I understood that there was a body of knowledge and techniques (what I now call Acoustical Technology) which was being applied by those great makers, and which, for whatever reason, was lost. Indeed, that lost knowledge had to be something so ordinary that anyone back then could apply it with more or less success, and that it would have been taken for granted and eventually disappeared; as all that we take for granted wanes and eventually disappears in our cultural "march to progress". This Acoustical Technology was the “common denominator” connecting all musical instrument-making for 400 years prior to 1800…including the making of violins, lutes, guitars, brass and woodwind instruments, harpsichords, organs, clavichords, and pianos. Indeed, those makers whose instruments we most revere today, like Ruckers, Stradivari, Guarneri, Blanchet, Taskin, Cristofori, Amati, Schnitger, Stein, and Graf, were merely the most clever in figuring out and applying what they learned to the making of their instruments. Their less clever associates and colleagues built merely good instruments. Important about this realization is that it also meant that that body of knowledge was learnable. And, it meant that anyone who bothered to look for it in a focused, unsentimental, and mindful manner would have some success in recovering that knowledge.
So the question I forced myself to answer was: What exactly were the makers of the great musical instruments of the past doing to make their instruments sound so good? Answering this question as completely as possible, thus far, has taken me 36 years and has required making more than 500 instruments of all kinds, mostly keyboard and bowed stringed instruments. The method I have used for my investigations was not unlike techniques used in Forensic Science.
Forensic Science takes fragments of carefully collected evidence, then analyzes that evidence in order to reconstruct the answers to who did what and when, how they did it, and, in some cases, why. Anyone who studies the antique instruments notices the obvious stuff like layout, materials, dimensions, etc. A forensic science type approach goes several steps further. With this approach one notices, as in hand writing analysis, the human traces of workmanship, aesthetic decisions, and methodologies, and seeks thereby to understand the behavior of the ancient makers. My approach added to these yet one more dimension. It began with one observation about human nature. That is, everything we do is an answer to a question of some kind. Further, every question we pose, either explicitly, implicitly, or covertly, either verbally or nonverbally, arises from an attitude we possess. By starting with that observation, I began with the simplest pieces of evidence to analyze and reconstruct the questions behind that evidence and then to intuit the attitudes that are the cause behind the questions.
From simple observations, working backward, it is possible to deduce the attitudes of those ancient makers. Then, working forwards, from that point, by adopting their attitudes, it is possible to reproduce work that appears and sounds like "brand new antique", as one of my patrons dubbed it. When my results were not exactly like those of the antiques, then I knew that I had not succeeded in rightly deducing the precise attitude behind the phenomenon. Using this method, it took me years of research and experimentation to figure out how the best of the ancient makers thought that resulted in the outstanding quality of sound they were able to produce, instrument after instrument after instrument.
Realizing the value of what I have learned thus far, I feel compelled to make sure that the knowledge that I have gained, at significant personal sacrifice, does not again get lost. For this reason, I am inviting qualified persons to work with me to learn how to apply the Acoustical Technology I have developed and mastered.
Now, finding, identifying and training qualified young makers who want to learn and master musical instrument making from an exclusively acoustical point of view is my goal. This is easier said than done. My experience over the last 36 years has made me realize that few musical instrument makers value sound as much as I do, fewer still are willing to pay the price themselves, as I have, to master acoustics. So naturally, I don’t assume that there are actually all that many musical instrument makers who are willing to subject themselves to learning what is required to be able to build great sounding musical instruments. Nevertheless, I hold that what I do acoustically can be done by anyone willing to learn the techniques and attitudes necessary to apply this Acoustical Technology masterfully. This offer is open to anyone interested in learning this sophisticated yet simple way of realizing a high degree of enhancement in the sound of any musical instrument. However, only those who qualify technically, artistically, musically, and personally will be accepted for instruction. Whomever I undertake to teach the Art and Science of Acoustical Enhancement must be able to successfully apply my acoustical technology to their instruments once they have completed my course of instruction.
Since first making this offer two years ago, I have taught my acoustical technology to 4 young men, 2 of whom are violin makers and 2 of whom are instrument makers who are making harpsichords and fortepianos as well as violins, violas and cellos. The following sound samples are of their first works created following their work learning my acoustical technology. These saples demonstrate definitively that anyone interested to learn my acoustical technology can do so and do so extremely well.
T
Click here for a Sound Sample of my fourth Acoustical Technology Trainee's harpsichord Opus 1*
Click here for another different Sound Sample of my fourth Acoustical Technology Trainee's harpsichord Opus 1 *
Click here for another Sound Sample of my fourth Acoustical Technology Trainee's harpsichord Opus 1 *
Click here for a Sound Sample of my first violin making Acoustical Technology Trainee's violin Opus 1*
Click here for a Sound Sample of my first violin making Acoustical Technology Trainee's violin Opus 2*
Technical qualifications involve a little experience making musical instruments, skill in use of tools, and skill in drawing or sculpting. Artistic qualifications relate to conceptual abilities, natural cognitive abilities, imaginative skills, and ability to think clearly and cogently about ideas. Musical qualifications have to do with how musical, how technically proficient on an instrument, and how much understanding of music one has. And personal qualifications have to do with age, attitudes, philosophy, intellectual aptitude, and habits, etc. The ability to speak English is also really helpful.
Anyone interested is welcome to contact me by email at pictagoras@aol.com. Use “Interested in Acoustics” in the subject line.
Keith Hill – Instrument Maker
A few years ago,I wrote a 250 page book on the subject of the science of enhancing sound, titled "The True Art of Making Musical Instruments, a Guide to the Forgotten Craft of Enhancing Sound". In it I express my views without consideration of how they might be received, because most that I have learned over the last 33 years about acoustics conflicts with almost everything currently understood as being important concerning the subject of Acoustics. To my knowledge, no other book has ever been written on precisely this subject, though many other instrument makers have been more qualified than myself to offer incontrovertable testimony concerning the Craft of Enhancing Sound, I refer to makers such as Antonio Stradivari, Giuseppi Guarneri, Hans Ruckers, Arp Schnitger, Bartolomeo Cristofori, Pascal Taskin, Francois Blanchet, Johann Stein, Nanette Streicher, and Conrad Graf to name a few. Its contents have been largely rediscovered, reintuited, reinvented, or understood anew by me during the course of making more that 406 harpsichords, clavichords, fortepianos, and violins. Where I owe these makers and other clever researchers a debt of gratitude, I have been quick to acknowledge their contributions. However, to one musical scientist, Marianne Ploger of Ann Arbor, Michigan, I owe far more than a mere acknowledgment. Her discoveries in the area of basic acoustics and hearing perceptions made possible a clear understanding of how the ancient instrument makers thought about dimensioning their soundboards and violin plates. You will find a Table of Contents and accompanying descriptions of the various chapters if you click on the "True Art" button. It is now only available to those whom I choose to train to use my acoustical technology.
My contact information is: Keith Hill - Instrument Maker, 5641 Granny White Pike, Brentwood, Tennessee 37027
My land line phone number is 734-395-8708
My email address is: pictagoras@aol.com
Click here for a Sound Sample of my 6 and one half octave Graf piano*